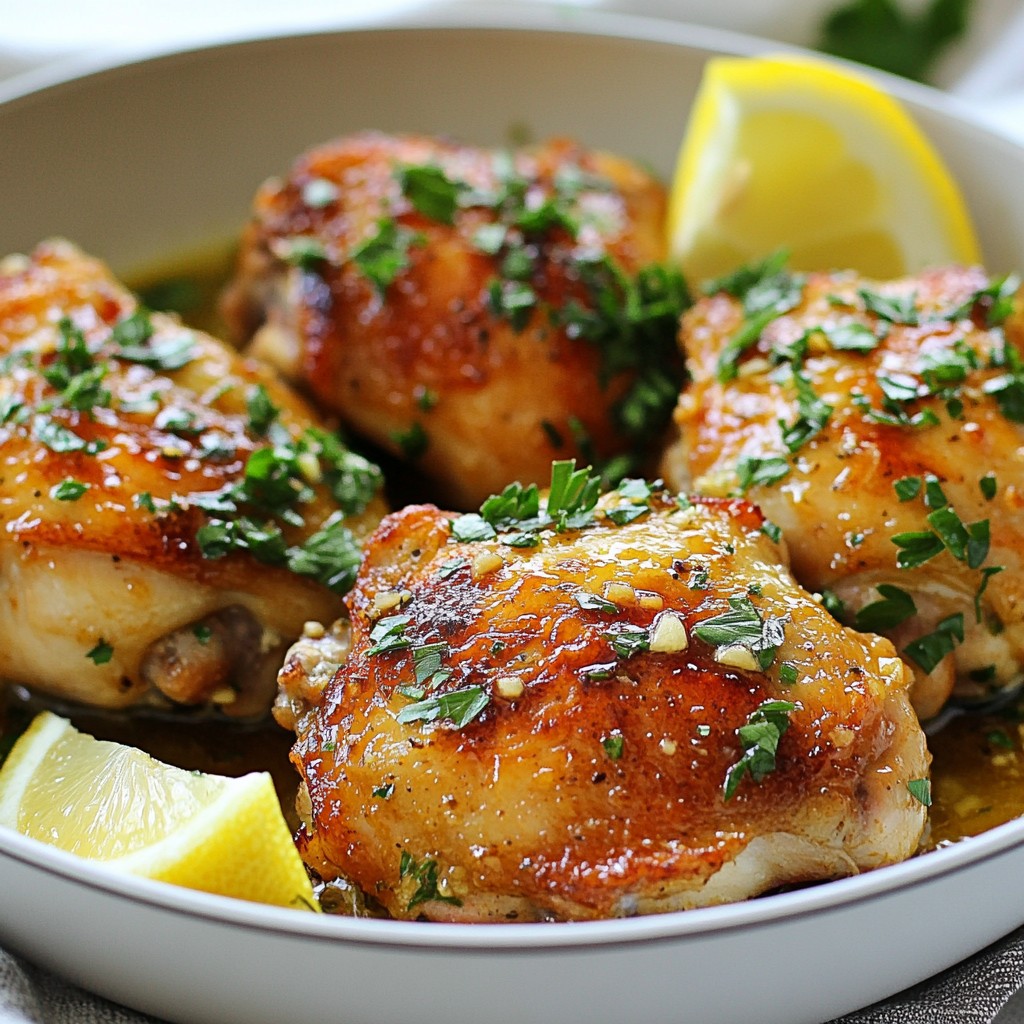
If you’re short on time but still crave a delicious meal, I’ve got you covered with my 15-Minute Garlic Herb Chicken Thighs. This quick recipe delivers tender, juicy chicken with tons of flavor, ready in just a snap. You’ll learn how to sear those thighs perfectly and enhance each bite with garlic and herbs. Let’s dive into this simple yet tasty dish that will impress your family any night of the week!
Why I Love This Recipe
- Quick and Easy: This recipe comes together in just 15 minutes, making it perfect for busy weeknights or last-minute dinners.
- Flavorful Garlic and Herbs: The combination of garlic and Italian herbs infuses the chicken with a deliciously aromatic flavor that everyone will love.
- Perfectly Juicy Chicken: Searing the chicken thighs ensures they stay juicy and tender, while achieving a beautiful golden crust.
- Customizable Serving: Serve it with fresh lemon wedges for an added zing or pair it with your favorite sides for a complete meal.
Ingredients
Main Ingredients Needed
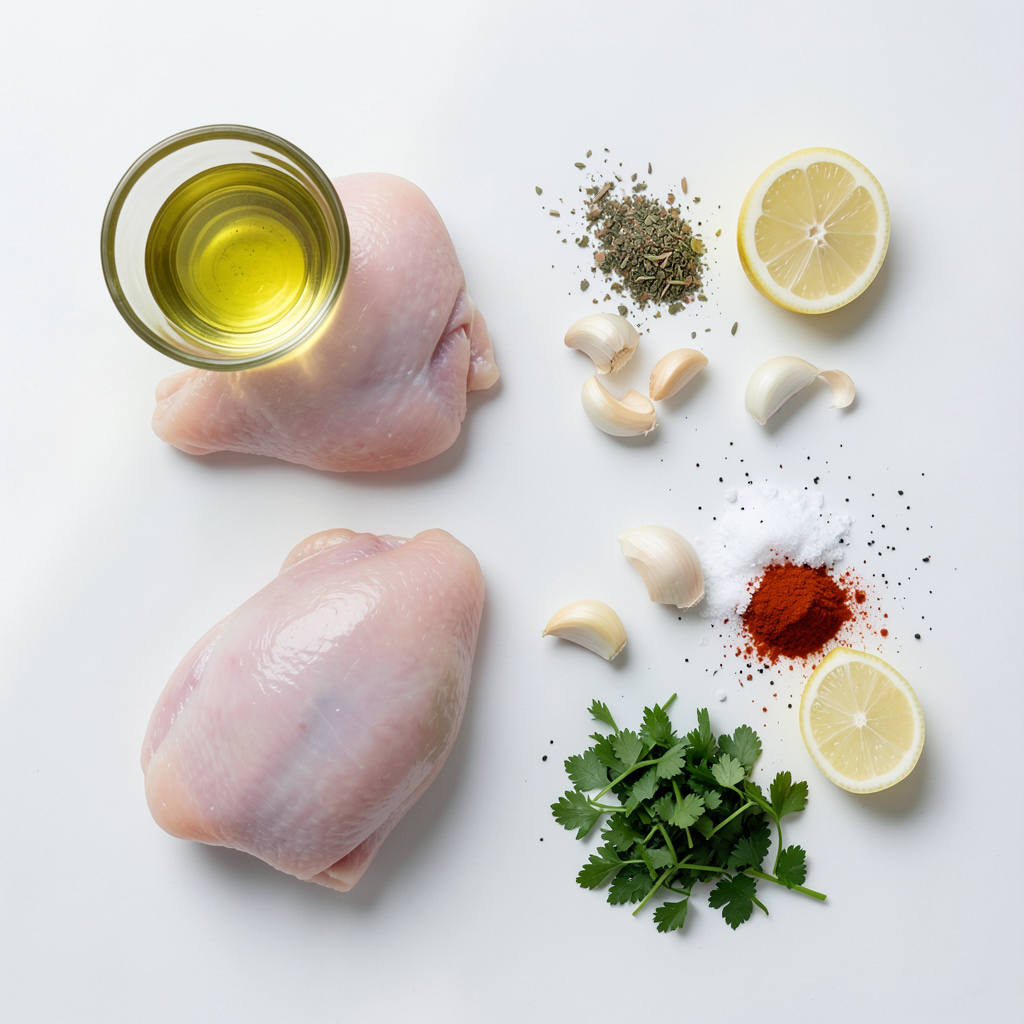
For this quick and tasty dish, gather these main ingredients:
- 4 boneless, skinless chicken thighs
- 3 tablespoons olive oil
- 4 cloves garlic, minced
- 1 teaspoon dried Italian herbs (like basil, oregano, and thyme)
- 1 teaspoon paprika
- Salt and freshly ground black pepper, to taste
- 2 tablespoons fresh parsley, finely chopped (for garnish)
- Lemon wedges, for serving
These ingredients create a simple yet flavorful meal.
Optional Ingredients for Extra Flavor
You can add a few extra ingredients for more taste:
- Fresh herbs like thyme or rosemary
- A splash of white wine for deglazing
- Fresh lemon juice for a zesty kick
- Chili flakes for heat
These options can enhance the dish's flavor profile.
Quick Tips for Ingredient Substitutions
Do you need substitutions? Here are some quick ideas:
- Use chicken breast if you prefer.
- Swap olive oil for avocado oil.
- Try fresh garlic if you have it on hand.
- Use any dried herbs you enjoy.
These swaps keep your dish tasty while using what you have.
Step-by-Step Instructions
Heating the Oil Properly
Heat a large skillet over medium-high heat. Pour in three tablespoons of olive oil. Wait until the oil shimmers. This shows it is ready for cooking.
Seasoning the Chicken Thighs
Take four boneless, skinless chicken thighs. Pat them dry with paper towels. This helps the chicken sear well. Season both sides with salt, black pepper, paprika, and dried Italian herbs. Make sure to coat them evenly.
Searing the Chicken for Optimal Crispiness
Carefully place the chicken in the hot skillet. Avoid overcrowding the pan. Cook for about 5-6 minutes. The bottom will turn golden brown. This process gives the chicken great flavor and texture.
Adding Garlic for Flavor Enhancement
Flip the chicken thighs to sear the other side. Add four cloves of minced garlic around the chicken. The garlic will cook and add a nice depth of flavor. Continue to cook for another 5-6 minutes. Ensure the chicken reaches an internal temperature of 165°F (74°C).
Checking Chicken Doneness
To check if your chicken is done, use a meat thermometer. Insert it into the thickest part of the thigh. If the juices run clear and the temperature is right, your chicken is ready. Enjoy this tasty meal with a squeeze of lemon for extra zest.
Tips & Tricks
Achieving the Perfect Sear
To get a great sear, dry your chicken thighs well. Moisture makes them steam. Use a hot skillet with olive oil that shimmers. Place the chicken in the pan without crowding. This lets the heat circulate and gives you that nice crust.
Best Cooking Techniques for Juicy Chicken
Cook the chicken for about 5-6 minutes on each side. Flip only once to avoid losing juices. Use a meat thermometer to check when it hits 165°F. This ensures your chicken stays juicy and safe to eat. Letting it rest for a few minutes helps keep those juices inside.
How to Use Leftover Garlic Herb Chicken
Leftover chicken is a delight! You can slice it for salads or wraps. Toss it in pasta for extra flavor. Adding it to stir-fries creates a quick meal. Store it in the fridge for up to three days. Always reheat it gently to keep it juicy.
Pro Tips
- Pat the Chicken Dry: Make sure to thoroughly dry the chicken thighs before seasoning. This helps achieve a better sear and prevents steaming the meat.
- Use Fresh Herbs: If possible, substitute the dried Italian herbs with fresh ones for a more vibrant flavor. Just double the quantity for a fresh herb boost!
- Let it Rest: After cooking, allow the chicken to rest for a few minutes before slicing. This helps the juices redistribute, resulting in a juicier piece of chicken.
- Customize Your Seasoning: Feel free to adjust the seasoning according to your taste. Adding a pinch of chili flakes can give a nice kick to the dish!
Variations
Alternative Herbs and Spices
You can change the flavor with other herbs and spices. Try using rosemary for a woodsy taste. Thyme adds a lovely earthiness. If you like heat, add crushed red pepper flakes. You can also use fresh herbs like basil or cilantro for a brighter kick. Mix and match to find your favorite blend!
Transforming to a Low-Carb Version
To make this dish low-carb, skip the starch. Serve the chicken with a side of sautéed greens or zoodles. Use cauliflower rice for a meal that fills you up without carbs. This way, you enjoy the same great taste while staying on track with your diet.
Ideas for Serving with Sides
Pair these chicken thighs with simple sides. A fresh salad with lemon vinaigrette works well. Roasted vegetables add color and flavor. You can also serve them with quinoa or couscous for a heartier meal. Consider adding a light dipping sauce for extra flavor.
Storage Info
Storing Leftovers Properly
To keep your leftover chicken thighs fresh, let them cool first. Place the chicken in an airtight container. Store it in the fridge. This way, it will last for up to three days. Make sure to label the container with the date. This helps you remember when you cooked it.
Reheating Guidelines for Best Results
When you want to reheat your chicken, use the oven for the best taste. Preheat it to 350°F (175°C). Place the chicken on a baking sheet. Cover it with foil to keep it moist. Heat for about 15 minutes or until warm. You can also use a microwave. Just heat in short bursts to avoid drying it out.
Freezing Tips for Meal Prep
If you want to freeze the chicken, do it right after it cools. Wrap each piece tightly in plastic wrap. Then, place them in a freezer bag or container. This keeps air out and prevents freezer burn. You can freeze the chicken for up to three months. When ready to eat, thaw it in the fridge overnight before reheating.
FAQs
How can I adjust the recipe for more servings?
To adjust this recipe, simply multiply the ingredients by the number of servings you need. For example, if you need to serve eight, use eight chicken thighs and double the oil, garlic, and herbs. Remember to use a larger skillet or cook in batches. This way, each piece gets a nice sear.
Can I use bone-in chicken thighs instead?
Yes, you can use bone-in chicken thighs. They will take a bit longer to cook because of the bone. Adjust your cooking time to about 10-12 minutes on each side. Make sure the internal temperature reaches 165°F (74°C) to ensure they are fully cooked.
What should I do if my chicken isn't browning?
If your chicken isn't browning, check if your skillet is hot enough. The oil should shimmer before adding chicken. If it’s not hot, the chicken will steam instead of sear. Ensure you don't overcrowd the pan; give each piece space to brown.
How do I know when the chicken is cooked through?
To know if the chicken is cooked through, use a meat thermometer. Insert it into the thickest part of the thigh. It should read 165°F (74°C). You can also cut into the chicken; the juices should run clear with no pink.
You learned about the key ingredients and how to cook chicken thighs perfectly. You now know how to achieve crispy skin and juicy meat. You can even try variations with different herbs. Don’t forget to store leftovers well, so they taste great later. Follow these tips for success. With practice, you will master this dish and impress everyone. Enjoy your cooking journey!