FREE DINNER EBOOK! Get your copy!
  • Cookie Policy
  • GDPR Policy
  • Disclaimer
  • Terms Of Use
  • Visit my other site: Fun Cookie Recipes
easy meal kitchen
  • Home
  • Dinner
  • Desserts
  • Drinks
  • Appetizers
  • Contact
  • About
  • Privacy Policy
  • Home
  • Dinner
  • Desserts
  • Drinks
  • Appetizers
  • Contact
  • About
  • Privacy Policy
  • Cookie Policy
  • GDPR Policy
  • Disclaimer
  • Terms Of Use
Visit my other site: Fun Cookie Recipes

HOME / CATEGORIES /

Latest

You need 2 cups of fresh strawberries. Make sure to hull and slice them. Ripe strawberries give the best taste. Their sweetness will shine through in this trifle. Use 3 tablespoons of granulated sugar. You will divide this into two parts. Add 2 tablespoons to the strawberries. This helps draw out their juices. The last tablespoon is for the whipped cream, adding just a hint of sweetness. You will need 1 cup of heavy whipping cream. It creates the rich, fluffy layer in the trifle. This cream should be cold for the best results. The cream whips up nicely to soft peaks. Grab 2 cups of pound cake, cut into bite-sized cubes. You can use store-bought or homemade. The cake adds texture and absorbs the strawberry juices well. It forms the base of the trifle. You will want 1/2 cup of strawberry jam. This sweet layer adds more strawberry flavor. It also helps bind the layers together. The jam creates a nice contrast with the whipped cream. Fresh mint leaves are perfect for garnish. They add a pop of color and a nice aroma. Just a few leaves on top make the trifle look fancy. This makes your dessert look more inviting. {{ingredient_image_2}} First, grab your fresh strawberries. Take two cups, hull them, and slice them up. Place the sliced strawberries in a bowl. Add two tablespoons of granulated sugar. Mix them well so the sugar coats every piece. Let them sit for about 15 minutes. This step helps the strawberries release their juices and become sweeter. Next, pour one cup of heavy whipping cream into a clean bowl. Add half a teaspoon of pure vanilla extract. Now, add one tablespoon of sifted powdered sugar. Use an electric mixer to beat the cream. Start on medium speed until soft peaks form. Be careful not to over-whip it. You want the cream fluffy and smooth. Get a large trifle dish or some individual dessert glasses. Start with a layer of pound cake cubes at the bottom. Spread them out evenly. On top of the cake, add a layer of strawberry jam. Let the jam soak into the cake a little. Then, spoon a layer of your macerated strawberries over the jam. Let the juice drip onto the layers. Finally, add a dollop of your whipped cream on top. Repeat this process: cake, jam, strawberries, and whipped cream. Keep layering until you run out of ingredients. Finish with a generous layer of whipped cream at the top. This creates a lovely finish. To make your trifle extra special, add some whole fresh strawberries on top. Also, place a few mint leaves for a pop of green. This not only looks nice but adds a fresh smell. If you use individual glasses, layer the ingredients to show off the bright colors. A whole strawberry and a mint sprig on each serving will impress everyone. When picking strawberries, look for bright red color. The berries should feel firm and plump. Avoid ones that are dull or have green spots. Smell is key, too. Ripe strawberries have a sweet aroma. If you can, buy them from a local farmer’s market. They often taste better and are fresher. You can use store-bought or homemade pound cake. A classic vanilla pound cake works well. If you want to try something new, lemon or almond flavored cakes add a nice twist. Just ensure the cake is moist. Dry cake can ruin the texture of your trifle. For the best whipped cream, start with cold heavy cream. Chill your mixing bowl and beaters in the freezer for a few minutes. This helps the cream whip faster. Beat on medium speed until soft peaks form. Don't over-whip, or it will turn grainy. If you want a sweeter taste, add a bit of powdered sugar. Layering is key to a pretty trifle. Start with cake cubes at the bottom. Press down gently to create a base. Alternate layers of jam, strawberries, and whipped cream. Use clear glasses or a trifle dish for a stunning look. For the top layer, use extra whipped cream. Add whole strawberries and mint leaves for a pop of color. This not only looks great but also makes it more fun to eat! Pro Tips Choose Ripe Strawberries: Select strawberries that are bright red and fragrant. Ripe strawberries not only taste better but will also enhance the overall flavor of your trifle. Homemade Whipped Cream: For the best flavor, consider making your own whipped cream. It’s easy and tastes much fresher than store-bought options. Layering Technique: When layering, ensure each layer is visible. This creates a beautiful presentation and allows guests to appreciate each component of the trifle. Chill Before Serving: Letting the trifle sit in the refrigerator for at least an hour before serving allows the flavors to meld together, resulting in a more delicious dessert. {{image_4}} You can swap strawberries for other fruits. Ripe peaches, blueberries, or raspberries work well. Just slice them up like you do with strawberries. Mix them with sugar to bring out their sweetness. Each fruit gives a unique taste and look to your trifle. You can also layer in a mix of fruits for a fun twist. To make the trifle gluten-free, choose a gluten-free pound cake. Look for brands that use almond flour or coconut flour. You can even make your own! Just follow a gluten-free recipe for pound cake. The rest of the ingredients, like strawberries and whipped cream, are naturally gluten-free. For a vegan trifle, use plant-based whipped cream. Many brands offer coconut or almond cream options. Replace the pound cake with a vegan version or use a sponge cake made without eggs. You can also use maple syrup instead of sugar for a different flavor. These changes keep the dessert tasty and suitable for everyone. To store your leftover strawberry shortcake trifle, first cover it well. Use plastic wrap or a lid. This helps keep the moisture in and the flavors fresh. If you made individual servings, place them in the fridge. Enjoy them within a few days for the best taste. For storage, use an airtight container. Glass or plastic containers work well. If you have individual servings, small jars are perfect. They let you see the layers, making them more fun to eat later. The shelf life of the trifle depends on its parts. Fresh strawberries can last about 3 days in the fridge. The whipped cream stays good for 2 to 3 days. If you used store-bought pound cake, it can last longer, about 5 to 7 days. However, once mixed, it’s best to eat the trifle within 3 days to keep it fresh and tasty. Yes, you can make this trifle ahead of time. I recommend preparing it a few hours before serving. This allows the flavors to mix well. Just keep it in the fridge until you are ready to serve. Your whipped cream may collapse if it is over-whipped. When you beat it too long, it turns grainy and loses its fluff. Use a medium speed and stop when soft peaks form. This keeps it light and airy. Strawberries can sit with sugar for about 15 to 30 minutes. This helps draw out their juices. It also makes them sweeter. After this, they are ready to use in your trifle. Yes, you can use other types of cake. Angel food cake or sponge cake works well. You can even use brownies for a fun twist. Just cut them into bite-sized pieces to layer in your trifle. This blog post covered how to make a tasty trifle. We explored fresh strawberries, whipping cream, and pound cake. I shared step-by-step tips to build layers and make it look great. Remember to choose ripe fruit and use the right type of cake. Consider variations like gluten-free or vegan options to suit all diets. Store leftovers well to keep them fresh. Follow these tips, and you’ll create a delightful dessert that everyone's sure to love. Enjoy making your trifle and share it with friends!

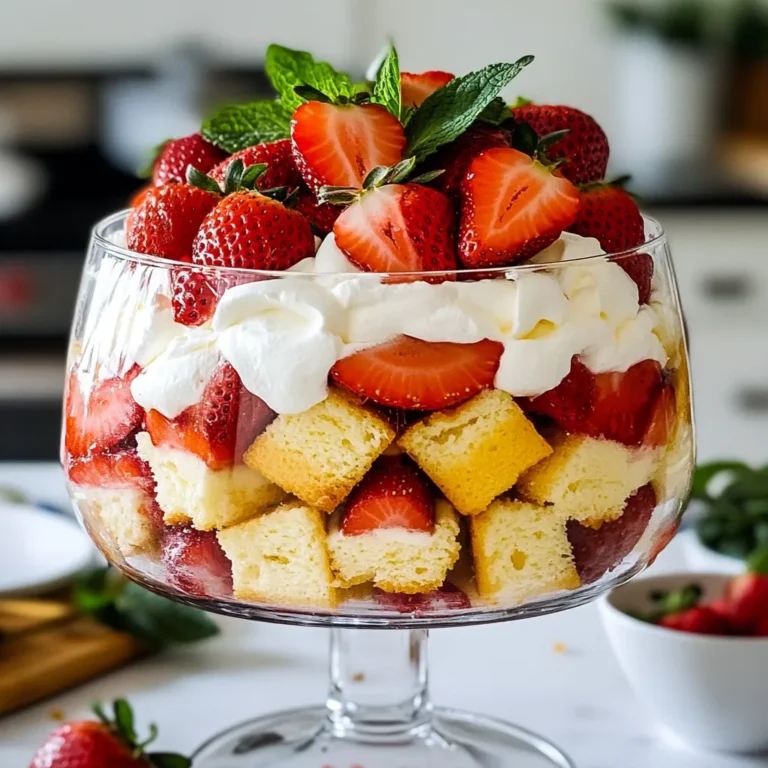
Strawberry Shortcake Trifle Delightful and Simple Treat

- 2 cups cooked chicken, shredded - 1 cup frozen mixed vegetables - 1 cup cream of chicken soup - 1 cup shredded cheddar cheese - 1 cup milk - 1 teaspoon garlic powder - 1 teaspoon onion powder - 1 tablespoon fresh thyme - 1 tablespoon olive oil - 1 package of refrigerated crescent roll dough - Salt and black pepper to taste - 9x13 inch casserole dish - Mixing bowl - Measuring cups and spoons - Oven For this Cheesy Chicken Pot Pie Casserole, you will need a few key ingredients. Start with cooked chicken. You can shred rotisserie chicken or any leftover chicken you have. The shredded chicken adds great flavor and protein. Next, grab some frozen mixed vegetables. These usually have peas, carrots, and corn, which all bring color and sweetness to the dish. The cream of chicken soup is the base for the sauce, making everything creamy and comforting. Don't forget the shredded cheddar cheese! This is what makes it cheesy and delicious. Milk helps make the mixture smooth and rich. For added flavor, use garlic powder, onion powder, and fresh thyme. Olive oil will help your crescent roll dough get nice and crispy. Finally, season with salt and black pepper to taste. Now you have everything you need for a cozy meal! {{ingredient_image_2}} - Preheat the oven to 375°F (190°C). - Gather and prepare all ingredients. In a large bowl, mix together the following: - 2 cups cooked chicken, shredded - 1 cup frozen mixed vegetables - 1 cup cream of chicken soup - 1 cup milk - 1 teaspoon garlic powder - 1 teaspoon onion powder - 1 tablespoon fresh thyme, chopped - Salt and black pepper to taste Stir well until everything is combined. This mixture forms the base of your casserole. Take a greased 9x13 inch casserole dish. Pour the chicken and vegetable mix into it. Spread the mix evenly across the bottom. Next, sprinkle 1 cup of shredded cheddar cheese over the top. This will give your casserole a rich and cheesy flavor. Now, unroll the package of refrigerated crescent roll dough. Lay it over the cheese layer, pressing the seams together to seal in the filling. Drizzle 1 tablespoon of olive oil over the crescent dough. Sprinkle a little more salt and black pepper on top. Place your casserole in the preheated oven. Bake for 25-30 minutes. Look for a golden brown crust on top for the best results. Once done, remove it from the oven and let it cool for about 5 minutes before serving. This cooling time helps the flavors meld. To boost the flavor of your casserole, consider adding a few spices. Paprika adds warmth, while a pinch of cayenne gives a nice kick. Fresh herbs like rosemary or parsley can brighten the dish. For cheese, try mixing sharp cheddar with gouda for a creamy texture. You can also use pepper jack cheese for some heat. For a crispier crescent roll topping, brush the dough with olive oil before baking. This helps it brown nicely. You can also sprinkle a little cornmeal on top for added crunch. To prevent sogginess, ensure your chicken and veggies are well-drained. Avoid too much liquid in the mix, as it can make the crust soft. Pair your casserole with a simple side salad. A fresh green salad balances the creamy dish. You can also serve it with crusty bread to soak up all the flavors. For a beautiful table setup, cut the casserole into squares. Garnish with chopped parsley for a pop of color. It makes the dish look fresh and inviting. Pro Tips Use Rotisserie Chicken: For a quick and flavorful option, use store-bought rotisserie chicken instead of cooking your own. It adds depth to the dish and saves preparation time. Customize Your Vegetables: Feel free to mix and match different frozen vegetables, such as broccoli or green beans, based on your preference or what you have on hand for a unique twist. Cheese Varieties: Experiment with different types of cheese, such as mozzarella or pepper jack, to create varied flavors and textures in your casserole. Let It Rest: Allow the casserole to cool for a few minutes before serving. This helps the layers set and makes it easier to cut and serve without falling apart. {{image_4}} You can easily swap out the chicken for turkey. This makes a great post-holiday meal. If you want a veggie option, use chickpeas or lentils for protein. For the vegetables, frozen mixed veggies work well, but you can also try broccoli or bell peppers. These swaps keep the dish fresh and fun. For a gluten-free option, look for gluten-free crescent dough at the store. Many brands offer this. If you need dairy-free choices, almond milk or coconut milk can replace regular milk. For cheese, try a dairy-free cheese alternative. These swaps let everyone enjoy the casserole. Mixing different cheeses can create a unique taste. Try adding mozzarella for stretch or pepper jack for a kick. You can also include sauces like buffalo sauce or barbecue sauce. These additions add depth to the flavor and make your casserole stand out. To store your cheesy chicken pot pie casserole in the fridge, first let it cool. Cover the dish tightly with plastic wrap or aluminum foil. It will stay fresh for about 3 to 4 days. Make sure to label the container with the date. This way, you know when to enjoy it again! You can freeze the casserole either before or after baking. If you freeze it before baking, wrap it well in plastic wrap and then in foil. It can last up to 3 months in the freezer. When you’re ready to bake, let it thaw overnight in the fridge. If you freeze it after baking, let it cool completely first. Then, store it in an airtight container. Reheat it in the oven for the best taste. To reheat your casserole, the oven is best. Preheat the oven to 350°F (175°C). Cover the casserole with foil to keep it moist. Heat for about 20-25 minutes or until it’s hot. If you use a microwave, put a slice on a plate. Heat in short bursts of 1-2 minutes, checking often. Microwaving can make the crust softer, so the oven is a better choice for crispiness. Yes, you can use rotisserie chicken. This saves time and effort. - Benefits of using pre-cooked chicken: It cuts down your prep time. Plus, it adds nice flavor. The chicken is already tender and juicy. - Flavor considerations: Rotisserie chicken has good seasoning. This adds depth to your casserole. Just be sure to remove the skin and bones before adding it. You can easily make this casserole meat-free. - Substitutions to make it meat-free: Swap the chicken with hearty veggies. Use mushrooms, chickpeas, or lentils for protein. - Suggested vegetarian proteins: Tofu or tempeh work great too. They soak up flavors well, making your dish tasty. Yes, you can prepare this casserole ahead of time. - Steps for pre-preparing and storing: Mix all your ingredients as usual. Cover the dish well with foil. Store it in the fridge until you’re ready to bake. - Recommended time before baking for best results: Try to bake within 24 hours. This keeps it fresh and delicious. If you wait longer, the dough may get soggy. This recipe combines simple ingredients to create a tasty chicken casserole. You learned how to mix, assemble, and bake with ease. Exploring variations helps keep meals exciting, while storage tips ensure you don’t waste any food. Remember, this dish offers flexibility for your taste and dietary needs. Whether you stick to the classic or try new flavors, the outcome will delight. Enjoy making this meal and sharing it with loved ones. It’s sure to be a hit at any table.

Cheesy Chicken Pot Pie Casserole Comfort Food Recipe

- 1 cup heavy cream - 4 cloves garlic, minced - 2 tablespoons unsalted butter - 1 tablespoon all-purpose flour - 1 teaspoon Dijon mustard - 1 teaspoon fresh lemon juice - 1/2 teaspoon fine sea salt - 1/4 teaspoon freshly ground black pepper - 1/4 teaspoon red pepper flakes (optional for a spicy kick) - Fresh parsley, finely chopped, for garnish When making creamy garlic sauce, choose fresh ingredients for the best taste. Heavy cream forms the base. It gives the sauce its rich, creamy texture. Use four cloves of garlic, minced finely. This adds a strong, savory flavor. Unsalted butter helps create a smooth sauce. It also adds depth to the taste. All-purpose flour is key for thickening the sauce. One tablespoon is enough. Dijon mustard adds a nice kick. It balances the cream and garlic flavors. Fresh lemon juice brings brightness. Sea salt and black pepper enhance all the flavors. You can add red pepper flakes for a spicy twist. Finally, chop fresh parsley for a pretty garnish. These ingredients come together to create a delicious sauce. You can use it over pasta, chicken, or vegetables. It’s versatile and easy to make. {{ingredient_image_2}} 1. Melting butter and sautéing garlic Start by melting 2 tablespoons of unsalted butter in a medium saucepan over medium heat. Wait until the butter bubbles gently. Then, add 4 minced garlic cloves. Sauté the garlic for 1-2 minutes. Stir it often until it gives off a nice smell without turning brown. 2. Making the roux Next, sprinkle 1 tablespoon of all-purpose flour over the garlic and butter mix. Whisk it for about 1 minute. This forms a roux, which helps thicken the sauce. Cooking the flour slightly makes the flavor better. 3. Adding heavy cream and thickening the sauce Gradually pour in 1 cup of heavy cream while whisking. This keeps the mixture smooth and lump-free. Cook the sauce for 3-4 minutes. Stir often until it thickens enough to coat the back of a spoon. 1. Finalizing flavors with seasonings Stir in 1 teaspoon of Dijon mustard, 1 teaspoon of fresh lemon juice, 1/2 teaspoon of fine sea salt, 1/4 teaspoon of black pepper, and 1/4 teaspoon of red pepper flakes if you want some heat. 2. Adjusting thickness and seasoning Taste the sauce. If it needs more salt or spice, add it now. If the sauce is too thick, whisk in a bit more cream to reach your desired consistency. 3. Garnishing for presentation Remove the sauce from heat. For a lovely finish, garnish with finely chopped fresh parsley. This adds color and freshness to the dish. Now, you have a rich, creamy garlic sauce ready to elevate your favorite meals. Enjoy the burst of flavor! How to avoid bitter garlic To keep garlic sweet, cook it gently. When you sauté garlic, do not let it brown. Brown garlic can taste bitter. Sauté for only 1-2 minutes until it smells good. Achieving the perfect sauce consistency To get a smooth sauce, whisk well as you add the heavy cream. Stir often while it cooks. The sauce should coat the back of a spoon lightly. If it is too thick, add a bit more cream. If it's too thin, let it cook longer. Best dishes to pair with creamy garlic sauce This sauce goes great with many dishes. Try it over pasta, grilled chicken, or steamed veggies. It also tastes amazing with seafood. Presentation techniques for an elegant serving For a pretty look, drizzle the sauce over your dish. Add a sprinkle of fresh parsley on top. This adds color and makes the dish pop. Serve it warm for the best taste. Pro Tips Fresh Garlic is Key: Using fresh garlic instead of pre-minced or jarred garlic will enhance the flavor of your sauce significantly. Adjusting Thickness: If your sauce is too thick, add a splash of chicken or vegetable broth to reach your desired consistency. Experiment with Herbs: Feel free to add other fresh herbs like thyme or basil for an extra layer of flavor that complements the garlic. Serving Suggestion: This sauce pairs beautifully with seafood; consider drizzling it over grilled shrimp or scallops for an elegant dish. {{image_4}} You can swap heavy cream for various options. Use half-and-half or whole milk for a lighter sauce. For a vegan twist, try coconut cream or cashew cream. These substitutes change the flavor a bit but still taste great. Adding herbs can really boost flavor. Fresh thyme, basil, or rosemary work well. Just chop them finely and mix them in at the end. This adds freshness and a unique taste to your sauce. To make the sauce dairy-free, use plant-based cream. Almond or oat cream can replace heavy cream. They give a rich taste without dairy. Add a bit more seasoning to enhance the flavor profile. For a gluten-free option, substitute all-purpose flour with cornstarch. Mix cornstarch with a little cold water to create a slurry. This will help thicken your sauce without gluten. It’s an easy switch that keeps the sauce smooth and creamy. To keep your creamy garlic sauce fresh, use the right containers. I recommend using an airtight container. This helps prevent any unwanted odors from other foods. - Best containers for storage: Glass jars or plastic containers with tight seals work well. - Refrigeration guidelines: Store the sauce in the fridge for up to 3 days. Make sure it cools down before sealing. When it’s time to enjoy your sauce again, reheating is key. Follow these steps for the best results. - Best practices for reheating the sauce: Use a saucepan over low heat. Stir often to keep the sauce smooth. - Tips for maintaining sauce consistency upon reheating: If the sauce thickens too much, add a splash of cream or water. This will bring it back to the right texture. You can store creamy garlic sauce for up to one week in the fridge. Keep it in a sealed container to maintain freshness. Yes, you can freeze creamy garlic sauce. Place it in an airtight container and use it within three months. Thaw it in the fridge overnight before using. This sauce pairs nicely with many dishes, including: - Pasta - Grilled chicken - Steamed vegetables - Fish - Baked potatoes If your sauce is lumpy, try whisking it vigorously. If that doesn't work, blend it in a blender until smooth. This will help restore its creamy texture. This blog post covered how to make a rich and creamy garlic sauce. We listed all the ingredients needed and outlined clear steps for cooking. You learned helpful tips to get the best flavor and texture. We even explored variations to fit dietary needs. Lastly, we included storage and reheating details. This creamy garlic sauce enhances your meals and adds great taste. Enjoy trying it out and making it your own!

Creamy Garlic Sauce Rich Flavor for Your Dishes

- 500g chicken breast, sliced into thin strips - 2 tablespoons olive oil - 2 teaspoons dried oregano - 1 teaspoon garlic powder - 1 teaspoon onion powder - 1 teaspoon paprika - Salt and pepper, to taste - 1 cup Greek yogurt - 1 cucumber, peeled and grated - 2 cloves garlic, minced - 1 tablespoon fresh dill, finely chopped - 1 tablespoon fresh lemon juice - Salt, to taste - 4 pita breads - 1 firm tomato, sliced - 1 red onion, thinly sliced - A handful of fresh lettuce or arugula When you make chicken gyros, freshness is key. I love using chicken breast because it’s lean and cooks well. The marinade adds flavor and moisture. For the tzatziki, Greek yogurt is a must. It gives a creamy texture. Grating the cucumber and squeezing out the water keeps the sauce from getting too runny. Don’t forget the toppings! Fresh veggies make your gyros bright and crunchy. Use warm pita bread for the best taste. These ingredients come together to create a delicious meal. {{ingredient_image_2}} Start by mixing the chicken with olive oil and spices. In a bowl, add sliced chicken breast, 2 tablespoons of olive oil, 2 teaspoons of dried oregano, 1 teaspoon each of garlic powder and onion powder, and 1 teaspoon of paprika. Sprinkle salt and pepper to taste. Stir well until the chicken is fully coated. For the best flavor, let the chicken marinate for 30 minutes at room temperature. If you have more time, refrigerate it overnight. While the chicken marinates, let’s make the tzatziki sauce. First, drain the moisture from the cucumber. Peel and grate the cucumber, then place it in a clean cloth or a paper towel. Squeeze out as much moisture as you can. In a medium bowl, mix 1 cup of Greek yogurt with the drained cucumber, 2 minced garlic cloves, 1 tablespoon of chopped fresh dill, and 1 tablespoon of fresh lemon juice. Add salt to taste. Mix everything well and taste. Adjust seasoning if needed. Chill the tzatziki sauce in the fridge until you're ready to serve. Next, heat a skillet over medium-high heat. Add the marinated chicken strips to the skillet. Cook for about 6 to 8 minutes, stirring occasionally. Make sure the chicken is cooked through and lightly browned. This will give it a great texture and taste. While the chicken cooks, warm the pita bread. You can do this in another skillet over low heat. Alternatively, place the pita in the oven for about 5 minutes. This will make the pita soft and warm, perfect for wrapping. Now, it’s time to assemble your gyros! Take a warm pita and lay a handful of fresh lettuce or arugula on it. Add a portion of the cooked chicken strips. Top it off with slices of fresh tomato and red onion. Finally, drizzle a generous amount of tzatziki sauce over the filling. Wrap or fold the pita around the ingredients for easy handling. Enjoy your delicious homemade chicken gyros! To make your chicken gyros pop, try different seasonings. You can add cumin for warmth or coriander for a fresh taste. Mix and match spices to find your favorite blend. For best results, marinate your chicken for at least 30 minutes. If you have time, let it sit overnight in the fridge. This allows the flavors to soak in deeply. Always coat the chicken evenly to ensure every piece shines with flavor. When making tzatziki, adjust the flavors to your liking. Add more salt for a savory kick or extra lemon juice for tang. Always taste as you go to find that perfect balance. For a great texture, make sure to drain the cucumber well. After grating, use a clean cloth or paper towel to squeeze out excess water. This keeps your tzatziki thick and creamy, not watery. To get a nice sear on your chicken, heat your skillet well before adding the meat. This helps lock in the juices and adds flavor. Cook the chicken for about 6-8 minutes, stirring occasionally. A meat thermometer can help you check for doneness. The chicken should reach an internal temperature of 165°F (75°C). This ensures it is both safe and juicy. Pro Tips Marinate Longer: For deeper flavor, marinate the chicken for several hours or overnight in the refrigerator. This allows the spices to penetrate the meat thoroughly. Use Fresh Herbs: Fresh herbs like dill and mint in the tzatziki can elevate the flavor. Try adding a little fresh mint for a refreshing twist. Warm Pita Perfectly: To achieve the best texture, consider grilling the pita for a minute or two on each side instead of just warming them in a skillet. Customize Fillings: Feel free to add extra toppings like feta cheese, olives, or pickles for added flavor and texture. Get creative with your gyros! {{image_4}} You can swap the chicken for other proteins. Beef or lamb works well. Slice them thinly like the chicken. For a lighter option, try tofu. Press the tofu to remove water, then marinate it just like the chicken. Cook it in the same way. Each protein brings its own flavor and texture. Want a veggie twist? Use grilled vegetables instead of meat. Peppers, zucchini, and mushrooms are great choices. For a dressing, mix tahini, lemon juice, and garlic. This gives your gyros a creamy texture. You can also use hummus as a spread. It adds flavor and protein. To jazz up your gyros, add spices. Try cumin or coriander for warmth. A dash of chili powder brings a kick. You can also drizzle hot sauce for heat. For a tangier taste, use a splash of vinegar in the tzatziki. These small changes create unique flavors that surprise your taste buds. To keep your chicken gyros and tzatziki fresh, store them separately. Place any leftover cooked chicken in an airtight container. It will stay good for up to 3 days in the fridge. For the tzatziki, use a clean jar. This will help it last up to 4 days. Always check for freshness before using. When reheating chicken gyros, avoid dry meat. Use a skillet over low heat. Add a splash of water to keep it moist. Heat for about 5 minutes, stirring occasionally. For the tzatziki, simply give it a good stir. You can microwave it for 10-15 seconds if you want it warm. Freezing is a great way to save time. You can freeze the cooked chicken and the tzatziki sauce. Wrap the chicken tightly in foil or plastic wrap and place it in a freezer bag. It will last for up to 3 months. For the tzatziki, freeze it in small containers. Thaw it in the fridge overnight when ready to use. Just remember, fresh veggies like tomatoes and lettuce should not be frozen. Add them fresh when serving. Yes, you can use frozen chicken for this recipe. First, thaw the chicken in the fridge overnight. If you're short on time, place the chicken in a sealed bag and submerge it in cold water for about an hour. Once thawed, marinate it as the recipe suggests. Make sure the chicken is fully thawed. This helps the spices stick better and ensures even cooking. If you don’t have Greek yogurt, you can use regular yogurt. Strain it through a cheesecloth to get a thicker texture. Another option is sour cream. It won’t taste the same, but it adds creaminess. Coconut yogurt works for a dairy-free version, too. Each option gives tzatziki a slightly different taste, but they all work well. To make gluten-free gyros, you need gluten-free pita bread. Many stores sell this option now. You can also use lettuce wraps for a low-carb version. Simply fill the lettuce leaves with chicken and toppings. This gives you the same great flavors without the gluten. Make sure to check labels to ensure they are gluten-free. Tzatziki sauce typically lasts 3 to 5 days in the fridge. Store it in an airtight container to keep it fresh longer. If you notice any change in color or smell, it’s best to throw it away. Always give it a stir before using, as separation can occur. Enjoy this sauce with various dishes for the best taste! Making gyros at home is simple and fun. Start with tender, marinated chicken and a fresh tzatziki sauce. You can customize the toppings and even switch proteins if you want. Remember to store leftovers properly for later enjoyment. With these tips and steps, you can create a delicious meal that satisfies. Enjoy your gyros, and feel free to experiment for your best version yet!

Satisfying Chicken Gyros with Tzatziki Recipe Guide

- 1.5 lbs boneless, skinless chicken thighs, cut into 1-inch chunks - 1 cup coconut milk - 1 large onion, finely chopped - 4 cloves garlic, minced - 1-inch piece fresh ginger, grated - 2 ripe tomatoes, pureed - Ground cumin, ground coriander, turmeric powder, garam masala, red chili powder, and salt to taste - Fresh cilantro for garnish When you look at this list, you will see some key parts. First, the chicken thighs offer rich flavor. They cook well and stay juicy. The coconut milk adds a creamy texture and a hint of sweetness. Next, the vegetables and aromatics are crucial. Onions give depth. Garlic and ginger add warmth. Pureed tomatoes bring acidity, balancing the dish. The spices are where the magic happens. Ground cumin and coriander bring earthiness. Turmeric adds color and health benefits. Garam masala gives warmth and complexity. Red chili powder adds heat, so adjust it to your taste. Salt is essential to enhance all these flavors. Finally, fresh cilantro brightens the dish. It adds a pop of color and freshness on top. This blend of ingredients creates a delightful and authentic Indian chicken curry. {{ingredient_image_2}} 1. In a large pot, heat 2 tablespoons of vegetable oil over medium heat. 2. Once the oil shimmers, add 1 large chopped onion. 3. Cook the onion for 7-8 minutes until it turns golden brown and soft. 4. Next, add 4 minced garlic cloves and 1 inch of grated ginger. 5. Stir and cook for 2 minutes until fragrant. 1. Now, stir in 2 ripe tomatoes that you have pureed. 2. Let the mixture cook for about 5 minutes. Stir it occasionally. 3. You want the sauce to thicken and the oil to separate. 4. Then, add 2 teaspoons of ground cumin, 2 teaspoons of ground coriander, 1 teaspoon of turmeric powder, 1 teaspoon of garam masala, and 1 teaspoon of red chili powder. 5. Stir the spices in for 2-3 minutes. This toasting step boosts the flavor. 1. Increase the heat to medium-high and add 1.5 lbs of chicken thighs. 2. Cook the chicken pieces for 5-7 minutes, stirring often until browned. 3. Next, reduce the heat to medium and pour in 1 cup of coconut milk. 4. Stir well to mix everything together. 5. Bring the mixture to a gentle simmer and reduce the heat to low. 6. Cover the pot and cook undisturbed for 25-30 minutes. 7. Stir occasionally to prevent sticking and ensure even cooking. 8. Once the chicken is tender, taste your curry. Adjust with more salt if needed. 9. Finally, sprinkle fresh chopped cilantro over the curry just before serving. This method will guide you to a tasty and fragrant chicken curry that warms the soul! Caramelizing onions is key for great flavor. When you cook onions slowly, they turn sweet and golden. This step adds depth to your curry. Aim for about 7-8 minutes of cooking time. Stir often to avoid burning. Toasting your spices is another must. Just sprinkle them in the pot after the onions. Let them cook for 2-3 minutes. This brings out their rich aromas, making your curry even better. Avoid burning the sauce by keeping a close watch. Stir the mixture often, especially as it thickens. If it looks like it's sticking, reduce the heat. You want a gentle simmer, not a boil. To ensure tender chicken, simmer it low and slow. After adding the coconut milk, cover the pot. Let it cook undisturbed for 25-30 minutes. This helps the chicken soak up all the great flavors. Serve your curry in a deep bowl. Pair it with fluffy basmati rice or warm naan. This makes for a hearty meal. For a pop of color, garnish with fresh cilantro. A slice of lime adds a nice touch. Guests can squeeze the lime for a fresh twist. This makes the dish not just tasty, but beautiful, too. Pro Tips Marinate for Extra Flavor: For an even richer taste, marinate the chicken in yogurt and spices for at least an hour before cooking. This helps tenderize the meat and infuse it with flavors. Use Fresh Spices: Whenever possible, use freshly ground spices instead of pre-ground ones. This enhances the aroma and flavor profile of the curry significantly. Adjusting Spice Levels: If you prefer a milder curry, reduce the amount of red chili powder and add a touch of sugar to balance the heat. Conversely, increase the chili powder for a spicier kick. Perfect Consistency: If your curry is too thick, add a splash of chicken broth or water to reach your desired consistency. If it’s too thin, let it simmer uncovered for a few more minutes to thicken. {{image_4}} Indian chicken curry varies across regions. Each area has its own unique twist. - North India often uses more dairy, like yogurt or cream, making it rich. - South India adds coconut and curry leaves for a fresh taste. - East India focuses on mustard oil and spices like nigella seeds. - West India brings in sweet flavors with coconut and jaggery. You can adjust spice levels based on your taste. If you like it hot, add more chili powder. For a milder dish, use less chili or leave it out. You can easily swap out proteins in this recipe. If you prefer lamb, use it instead of chicken. Lamb adds a deep, rich flavor. Chickpeas are a great option for a vegetarian dish. They soak up flavors well and provide good protein. If you want a dairy-free option, consider using almond milk instead of coconut milk. Almond milk gives a different taste but still creates a nice sauce. After you enjoy your Indian chicken curry, you may want to save some for later. To store leftovers, let the curry cool down first. Then, place it in an airtight container. This keeps the food fresh and safe. - Refrigerating: Store in the fridge for up to 3 days. Make sure it’s sealed well to avoid spoilage. - Freezing: You can freeze chicken curry for up to 3 months. Use freezer bags or containers. Label them with the date. When you’re ready to eat, reheat the curry. - Thawing: If frozen, thaw in the fridge overnight or use the microwave. - Reheating: Heat on the stove over low heat. Stir often to prevent sticking. You can also use the microwave, but stir it halfway. Batch cooking Indian chicken curry is a great idea. You can make a large pot and portion it out for the week. This saves time and effort on busy days. - Portioning: Divide the curry into single servings. Store in containers. This way, you can grab one when you need a quick meal. - Enhancing Flavor: When reheating, add a splash of coconut milk. It makes the curry creamy again. You can also sprinkle fresh cilantro for extra flavor. This method gives you tasty meals ready to enjoy anytime! How do I thicken my chicken curry? You can thicken chicken curry by cooking it longer. This helps reduce the sauce. Another way is to add a bit of cornstarch mixed with water. Stir this mixture into the curry and cook for a few more minutes. What can I serve with authentic Indian chicken curry? You can serve chicken curry with fluffy basmati rice. Warm naan bread is also a great choice. For a fresh touch, add a side of cucumber salad or raita. Can I make this recipe ahead of time? Yes, you can make chicken curry ahead of time. Just let it cool and store it in the fridge. The flavors will blend well overnight, making it even tastier. How do I know when the chicken is fully cooked? Check the chicken pieces for doneness. They should be white and no longer pink inside. The juices should run clear when you cut into a piece. A meat thermometer can show if it reached 165°F. Can I use frozen chicken for this recipe? Yes, you can use frozen chicken. Just make sure to thaw it first. This helps ensure even cooking and better flavor. What to do if I can’t find some ingredients? If you can't find fresh ginger, use ginger powder instead. For coconut milk, try using cream or yogurt. You can also adjust spices based on what you have. This chicken curry recipe is packed with flavor and easy to make. You learned about the key ingredients, cooking techniques, and tips to get the best taste. Remember to caramelize your onions and toast your spices for an authentic flavor. You can also explore different variations or adjust spice levels to suit your taste. With proper storage, you can enjoy this dish for days. Dive into this recipe and savor the deliciousness. Cooking can be fun and rewarding!

Authentic Indian Chicken Curry Flavorful and Simple Recipe

- 1 cup pastina (such as star-shaped pasta or acini di pepe) - 4 cups low-sodium vegetable or chicken broth - 1 medium onion, finely chopped - 2 cloves garlic, minced - 2 medium carrots, diced into small pieces - 1 celery stalk, diced - 1 cup fresh spinach, roughly chopped - 1 teaspoon dried Italian herbs (a mix of oregano, basil, and thyme) - 2 tablespoons extra-virgin olive oil - Salt and freshly ground black pepper to taste - 1/4 cup grated Parmesan cheese (optional for a richer flavor) - Fresh basil leaves for garnish - Pastina: A small pasta that cooks quickly. One cup is enough for four servings. - Broth: Use four cups of low-sodium broth for a clean taste. - Onion: A medium onion brings flavor. Chop it finely for quick cooking. - Garlic: Use two cloves. Mince them to release their strong flavor. - Carrots and Celery: Dice into small pieces. This helps them soften fast. - Spinach: One cup, roughly chopped, adds color and nutrients. - Dried Italian Herbs: One teaspoon gives a nice blend of flavor. - Olive Oil: Two tablespoons help sauté the veggies. - Salt and Pepper: Use to taste for a balanced flavor. - Parmesan Cheese: Optional, but adds creaminess and depth if used. - Basil Leaves: Fresh basil enhances the soup's look and taste. - Lemon Juice: A splash brightens the soup. - Red Pepper Flakes: Add for a touch of heat. - Peas: Toss in a half-cup for added sweetness and color. - Zucchini: Dice and add for extra veggies. - Chicken: Diced cooked chicken can make this soup heartier. This list keeps it simple. You can mix and match to suit your taste. Enjoy the process of making this comforting soup! {{ingredient_image_2}} To start, gather all your ingredients. This makes cooking smooth and easy. You will need: - 1 cup pastina (like star-shaped pasta or acini di pepe) - 4 cups low-sodium vegetable or chicken broth - 1 medium onion, finely chopped - 2 cloves garlic, minced - 2 medium carrots, diced - 1 celery stalk, diced - 1 cup fresh spinach, roughly chopped - 1 teaspoon dried Italian herbs (oregano, basil, and thyme) - 2 tablespoons extra-virgin olive oil - Salt and freshly ground black pepper to taste - 1/4 cup grated Parmesan cheese (optional) - Fresh basil leaves for garnish Chop your vegetables before cooking. This helps you stay organized and ready. 1. Heat the olive oil in a large pot over medium heat. 2. Add the chopped onion, diced carrots, and diced celery. Sauté for 5-7 minutes. Stir often until the vegetables soften. 3. Add the minced garlic and dried herbs. Sauté for another minute. Allow the lovely smells to fill your kitchen. 4. Pour in the broth and raise the heat to a boil. 5. Once boiling, add the pastina. Reduce the heat and let it simmer for 6-8 minutes. Stir occasionally to keep it from sticking. 6. After the pastina cooks, stir in the spinach. Cook for another 2-3 minutes until the spinach wilts. 7. Taste your soup. Add salt and pepper as you like. 8. If you want creaminess, stir in Parmesan cheese. Let it melt into the soup. Ladle the hot soup into bowls. Garnish with fresh basil leaves for a nice look. For extra flavor, drizzle a bit of olive oil on top. This soup pairs well with crusty bread. Enjoy every comforting spoonful! Cooking Italian Pastina Comfort Soup is simple. Start by sautéing the onion, carrots, and celery in olive oil. This step adds depth to the soup. Cook them until the onion is soft and clear. Then, add garlic and Italian herbs. This brings out rich flavors. When you add the broth, let it boil. This helps the pastina cook well. Remember to stir often. It keeps the pasta from sticking. Once done, add spinach last. This keeps it bright and fresh. To enhance the flavor, always use fresh herbs. Fresh basil at the end gives a nice touch. If you like cheese, add grated Parmesan. It melts beautifully into the soup. You can also squeeze a bit of lemon juice. This adds a nice zing. If you want more flavor, add a dash of red pepper flakes. They give a warm kick without overpowering the dish. One common mistake is overcooking the pastina. Keep an eye on it. It should be tender but firm. Avoid adding too much salt early on. Taste as you go. Lastly, don’t skip the fresh basil. It balances the flavors and makes the soup pop. Pro Tips Use Fresh Ingredients: Fresh vegetables and herbs will enhance the flavor of your soup significantly, making it more vibrant and delicious. Customize the Broth: Feel free to use homemade broth for a richer flavor or to add different spices to adjust the taste to your liking. Perfecting the Pastina: Keep an eye on the pastina while it cooks, as it can become mushy if overcooked. Aim for al dente for the best texture. Add a Protein: To make this soup heartier, consider adding shredded chicken, beans, or tofu for added protein and nutrition. {{image_4}} You can easily swap ingredients in Italian pastina comfort soup. For a vegan dish, use vegetable broth and skip the cheese. Instead of pastina, try quinoa or rice for a gluten-free option. If you want more protein, add lentils or chickpeas. These swaps keep the soup tasty while meeting diverse dietary needs. One great way to change this soup is by adding seasonal veggies. In spring, toss in fresh asparagus or peas. In summer, add zucchini or tomatoes for brightness. In fall, use butternut squash or pumpkin. In winter, root veggies like parsnips or turnips work well. These additions not only change the flavor but also bring color and nutrition. If you love meat, consider adding chicken or sausage. For chicken, use cooked, shredded meat. Stir it in when you add the spinach, letting it heat through. For sausage, slice it and brown it in the pot before adding other veggies. This adds a rich flavor to the soup. Whether you choose chicken or sausage, your soup becomes heartier and more filling. To keep your Italian Pastina Comfort Soup fresh, store it in an airtight container. Let the soup cool down first. This helps avoid steam buildup. Place it in the fridge if you plan to eat it within three days. For longer storage, freezing is a better option. When you're ready to enjoy your leftovers, take the soup out of the fridge. Pour it into a pot and heat it over medium heat. Stir it often to prevent sticking. If the soup seems thick, add a little broth or water to reach your desired consistency. You can also use a microwave if you're in a hurry. Heat it in a microwave-safe bowl for one to two minutes. Stir halfway for even heating. Freezing your soup is a great way to save it for later. Use freezer-safe containers or bags. Leave some space at the top, as liquids expand when frozen. Label the container with the date. Your soup can last up to three months in the freezer. When you're ready to eat it, thaw it overnight in the fridge. Reheat as mentioned above. Enjoy the comfort of this warm soup anytime! Pastina is tiny pasta, often shaped like stars or little pearls. It cooks fast and adds a soft texture to soups. This makes it perfect for a comforting bowl of Italian Pastina Comfort Soup. I love using star-shaped pastina or acini di pepe in my soup. They are fun to eat and look great in a bowl. You can make this soup your own! Try adding different veggies like peas or zucchini. You can also swap the spinach for kale for a heartier taste. If you want more protein, add cooked chicken or beans. For a spicy kick, stir in red pepper flakes. This recipe is flexible, so feel free to experiment! This soup goes well with crusty bread. A slice of garlic bread or a warm baguette is perfect. You can also serve a light salad on the side. A simple green salad with lemon dressing adds freshness. If you want more cheese, sprinkle some Parmesan on top before serving. Enjoy your meal! This blog post covered important parts of making Italian Pastina Comfort Soup. We discussed the key ingredients, step-by-step cooking guide, and tips for better flavor. You learned how to avoid common mistakes and explored variations for different diets. Proper storage and reheating rules will keep your soup tasty. Enjoy making this soup for any meal. With these details, you can create a warm bowl of comfort.

Italian Pastina Comfort Soup Hearty and Nourishing Dish

To make Slow Cooker Marry Me Chicken, gather the following ingredients: - 4 boneless, skinless chicken breasts - 1 teaspoon salt - 1/2 teaspoon black pepper - 1 teaspoon garlic powder - 1 teaspoon onion powder - 1 cup sun-dried tomatoes, finely chopped - 1 cup heavy cream - 1 cup chicken broth - 1 cup freshly grated Parmesan cheese - 1 teaspoon mixed Italian herbs - Fresh basil leaves, for garnish Each ingredient plays a key role in this dish. The chicken provides a solid base, while the sun-dried tomatoes add a burst of flavor. The heavy cream and chicken broth create a rich sauce that coats the chicken perfectly. Seasoning the chicken with salt, pepper, garlic powder, and onion powder enhances its taste. The Parmesan cheese enriches the sauce, making it creamy and delicious. Mixed Italian herbs bring a lovely aroma and depth to the dish. Finally, fresh basil leaves add a touch of color and freshness when serving. When you have all the ingredients ready, you're set to create a warming and flavorful meal that will impress anyone who tries it. {{ingredient_image_2}} To start, season the chicken breasts well. Use one teaspoon of salt, half a teaspoon of black pepper, one teaspoon of garlic powder, and one teaspoon of onion powder. Rub the seasonings over the chicken evenly. This step helps the chicken absorb all the flavors. Next, place the seasoned chicken breasts in the slow cooker. Lay them flat at the bottom. This way, the juices can flow around the chicken as it cooks. Now, it's time to add the sun-dried tomatoes. Chop one cup of sun-dried tomatoes finely and sprinkle them over the chicken. Make sure to spread them out to ensure even flavor. In a separate bowl, prepare the creamy mixture. Combine one cup of heavy cream, one cup of chicken broth, one cup of grated Parmesan cheese, and one teaspoon of mixed Italian herbs. Whisk until smooth. This creamy sauce will make the dish rich and comforting. Carefully pour this mixture over the chicken and tomatoes. Ensure that everything is covered well by the sauce. Cover the slow cooker and set it to cook. If you choose low heat, cook for six to seven hours. If you prefer high heat, three to four hours will do. The chicken should become tender and fully cooked. Once the cooking time is up, use two forks to shred the chicken in the slow cooker. Mix it well with the creamy sauce. This step allows all the flavors to blend together, making each bite delicious. To ensure even flavor distribution, layer the sun-dried tomatoes well. Spread them evenly over the seasoned chicken. This way, every bite will burst with flavor. Mix the creamy sauce well before pouring it over the chicken. A smooth blend helps coat everything evenly. For tender chicken texture, cook on low heat for six to seven hours. This slow cooking breaks down tough fibers, making the chicken soft. If you’re short on time, high heat for three to four hours works too, but low is best for tenderness. To plate the dish, scoop the chicken onto warm plates. Drizzle the creamy sauce generously over the chicken. Add fresh basil leaves on top for color. This simple garnish makes your dish look inviting. For sides, I recommend crusty garlic bread or al dente pasta. These pair nicely with the creamy sauce. A fresh salad can also add a nice crunch. Choose sides that balance the rich flavors. For leftovers, let the dish cool down first. Store it in airtight containers to keep it fresh. It can last in the fridge for up to three days. If you want to enjoy it later, freezing is an option too. To reheat without losing flavor, use low heat in the microwave or on the stove. Add a splash of chicken broth or cream to keep it moist. Heat gently, stirring to blend the flavors back together. Enjoy that creamy goodness again! Pro Tips Use Fresh Ingredients: Opt for high-quality, fresh sun-dried tomatoes and herbs to enhance the flavor profile of your dish. Adjust Creaminess: If you prefer a lighter sauce, consider substituting half of the heavy cream with Greek yogurt for a tangy twist. Perfect Shredding: Allow the chicken to rest for a few minutes after cooking before shredding to keep it juicy and tender. Storage Tips: This dish stores well in the fridge for up to 3 days. Reheat gently to keep the chicken moist. {{image_4}} If you want to try a dairy-free version, swap heavy cream for coconut cream. This keeps the dish rich and creamy without dairy. For cheese lovers, use a dairy-free Parmesan. Want to change the protein? You can use boneless thighs or even turkey. Each option brings its own unique taste, but the cooking times may vary slightly. Adding vegetables is a fun way to boost flavor. Try spinach, bell peppers, or zucchini. They blend well and add color. Another option is to mix in mushrooms for an earthy taste. To spice it up, consider adding crushed red pepper or Italian seasoning. A dash of smoked paprika can also add depth to the dish. Adjust the spices based on your taste. Transform your Marry Me Chicken into a pasta dish. Serve it over cooked pasta like fettuccine or penne. The creamy sauce clings to the pasta perfectly. You can also pair it with rice or quinoa. These grains soak up the sauce well. For a heartier option, serve it with farro or barley. Each pairing makes the meal feel complete and satisfying. To keep your Marry Me Chicken fresh, use the right containers. Glass containers with tight lids work best. They seal well and keep air out. You can also use BPA-free plastic containers. Make sure they are food-safe. When storing, let the dish cool first. This helps avoid moisture build-up. Once cool, spoon the chicken and sauce into your containers. Fill them only three-quarters full. This leaves room for the food to expand if it freezes. To maintain freshness, store your leftovers in the fridge. They will last for 3 to 4 days. For longer storage, consider freezing. If you want to freeze Marry Me Chicken, start by prepping it right. First, let the dish cool completely. Next, portion the chicken and sauce into freezer-safe bags. Squeeze out as much air as you can. This prevents freezer burn. Label the bags with the date. This helps you track how long they stay frozen. Marry Me Chicken can be frozen for up to 3 months. When you’re ready to enjoy it again, thaw the chicken in the fridge overnight. If you're short on time, you can use the microwave on the defrost setting. After thawing, reheat the chicken in a pot over medium heat. Stir it often to keep it from sticking. You can also use the slow cooker on low for 1 to 2 hours. This method keeps the sauce creamy and delicious. Can I use frozen chicken breasts? Yes, you can use frozen chicken breasts. Just make sure to cook them longer. Add an extra hour if you cook on low. If you use high heat, add 30 minutes. Always check that the chicken reaches 165°F for safety. How can I make this dish more spicy? To spice it up, add red pepper flakes or diced jalapeños. You can also use spicy Italian sausage instead of chicken. Just adjust the amount based on your heat preference. A touch of cayenne pepper can also enhance the flavor. Can I prepare this dish ahead of time? Yes, you can prep this dish ahead. Season the chicken and layer it in the slow cooker. Cover and store it in the fridge overnight. When you are ready, add the creamy mixture and start cooking. This saves time and adds flavor! Slow Cooker Marry Me Chicken is simple yet full of flavor. We covered the key ingredients, easy steps, and helpful tips to make it perfect. Remember to season well and cook it low for the best results. Feel free to try new flavors or serve it with your favorite sides. With these tips, you will impress anyone you serve this dish to. Enjoy every bite of your Marry Me Chicken and happy cooking!

Slow Cooker Marry Me Chicken Flavorful Comfort Dish

- 1 lb boneless, skinless chicken thighs - 1 can coconut milk (14 oz) - 4 cups chicken broth - 1 red bell pepper, sliced into strips - 1 cup carrots, peeled and sliced - 1 cup mushrooms, sliced - 1 onion, chopped finely - 3 cloves garlic, minced - 1 tablespoon fresh ginger, grated In this soup, we use boneless, skinless chicken thighs. They cook well and stay tender. The coconut milk adds a creamy base, while chicken broth boosts flavor. Fresh vegetables make the soup colorful and nutritious. I love using red bell pepper, carrots, and mushrooms. They add great texture and taste. - 2 tablespoons red curry paste - 1 tablespoon soy sauce - 1 tablespoon fish sauce - 1 tablespoon lime juice (freshly squeezed) - 1 teaspoon sugar (optional, for sweetness) Seasonings bring this dish to life. Red curry paste adds warmth and spice. I use soy sauce for umami and fish sauce for depth. Fresh lime juice gives a tangy kick. If you like a touch of sweetness, add sugar. Adjust to fit your taste. {{ingredient_image_2}} Seasoning the Chicken Start by placing the boneless, skinless chicken thighs at the bottom of the crockpot. I sprinkle salt and pepper on the chicken. This simple step boosts the flavor. Layering the Vegetables Next, I layer the sliced red bell pepper, carrots, mushrooms, and chopped onion over the chicken. This colorful mix adds texture and taste. I love seeing the vibrant layers in the pot! Combining the Liquid Ingredients In a bowl, I combine the coconut milk and chicken broth. Then I add minced garlic, grated ginger, red curry paste, soy sauce, lime juice, fish sauce, and optional sugar. I whisk everything until smooth. This creamy broth is the heart of the soup. Incorporating Seasonings Now, I carefully pour the creamy mixture over the chicken and veggies. Using a spoon, I stir gently to coat everything. This ensures each bite is full of flavor. Cooking Time and Temperature Options I cover the crockpot and set it to cook. You can choose low for 6-8 hours or high for 3-4 hours. The chicken should be tender and easy to shred. Shredding the Chicken Once cooked, I take the chicken out and shred it using two forks. This makes it easy to mix back into the soup. I return the shredded chicken to the crockpot and stir everything together. The soup is now ready to enjoy! - Adjusting Seasoning to Taste: After cooking, taste your soup. You may want more salt, pepper, or lime juice. Each ingredient adds depth. Adjust as needed until it feels just right. - Enhancing Creaminess: For extra creaminess, add more coconut milk. You can also blend a small portion of the soup and stir it back in. This will give a nice, thick texture without losing the great flavors. - Recommended Slow Cooker Settings: I suggest using the low setting for 6-8 hours. This allows the flavors to meld perfectly. If you’re short on time, the high setting for 3-4 hours works too. - How to Prevent Overcooking: To avoid overcooking, check the chicken at the 3-hour mark on high or the 5-hour mark on low. Chicken should shred easily but not dry out. If you notice it’s getting too tender, turn off the heat. Pro Tips Use Fresh Ingredients: Fresh vegetables and herbs can elevate the flavor profile of your soup significantly, making it more vibrant and aromatic. Adjust Spice Level: If you prefer a milder soup, reduce the amount of red curry paste or opt for a mild variety. You can always add more heat later if desired. Make It Ahead: This soup tastes even better the next day as the flavors meld together. Store leftovers in the fridge for up to 3 days. Garnish for Flavor: Adding fresh cilantro and lime juice just before serving enhances the flavor and adds a refreshing touch to each bowl. {{image_4}} You can get creative with different proteins in this soup. If you want a lighter option, try using tofu. Tofu absorbs flavors well and adds a nice texture. You can also use shrimp for a seafood twist. Shrimp cooks quickly, so add it in the last hour of cooking. Adding more vegetables can elevate the taste and nutrition of your soup. Try adding baby spinach, snap peas, or zucchini for extra color and crunch. Each vegetable brings its own flavor. You can mix and match based on what you have in your kitchen! For those who need gluten-free options, swap soy sauce with tamari. It gives the same salty flavor without gluten. Make sure any broth you use is also gluten-free. If you want a vegan adaptation, replace the chicken with chickpeas or extra tofu. Use vegetable broth instead of chicken broth. You can also skip the fish sauce and use a bit of extra soy sauce. This keeps the soup tasty while meeting vegan needs! - Proper Storage Techniques: After enjoying your soup, let it cool. Transfer the leftovers into an airtight container. Store it in the fridge for up to three days. Make sure to label the container with the date. This helps you keep track of freshness. - Best Practices for Reheating: When you're ready to enjoy your soup again, pour it into a pot. Heat it gently over medium heat. Stir occasionally to ensure even heating. You can also use a microwave-safe bowl if you're in a hurry. Heat in short bursts, stirring in between. This keeps the soup creamy and delicious. - How to Freeze the Soup: If you want to save some soup for later, freezing is a great option. Allow the soup to cool completely. Pour it into freezer-safe containers, leaving some space at the top for expansion. Seal tightly and label with the date. - Thawing and Serving Frozen Soup: When you're ready to enjoy frozen soup, transfer it to the fridge to thaw overnight. For quicker thawing, you can use the microwave. Heat it in short intervals, stirring often. Once thawed, gently reheat on the stove. Add a splash of chicken broth or coconut milk if it seems too thick. Yes, you can make this soup a day ahead. Just cook it and let it cool. Store it in the fridge in a sealed container. When you're ready, reheat it on the stove or microwave. This soup tastes even better the next day. The flavors blend more and get richer. This soup pairs well with many sides. Here are some ideas: - Steamed jasmine rice - Rice noodles - Fresh spring rolls - Crispy bread for dipping - A simple green salad These sides add more texture and flavor to your meal. To add heat, you have a few options: - Add more red curry paste. - Stir in sliced fresh chili peppers. - Use chili oil as a topping. - Serve with a side of hot sauce. Start with a small amount and taste. You can always add more! Yes, you can make a low-carb version. Simply swap out starchy veggies. Use: - Zucchini noodles instead of rice or noodles. - Cauliflower rice for a grain-free option. - Skip the sugar to keep it low-carb. These swaps keep the soup tasty without the carbs. This soup combines chicken thighs, coconut milk, and fresh veggies for rich flavors. I shared tips for seasoning and cooking to enhance your dish. You can adjust the recipe with alternative proteins or make it vegan. Proper storage and reheating tips keep leftovers tasty. Explore variations to keep meals interesting. Enjoy experimenting with this comforting soup anytime. It’s easy, fun, and satisfying!

Crockpot Thai Coconut Chicken Soup Tasty Comfort Meal

For these tasty enchiladas, you will need: - 2 cups cooked chicken, shredded - 1 cup cream cheese, softened - 1 cup shredded Monterey Jack cheese, divided - 1 cup cauliflower rice (fresh or frozen) - 1/2 cup sour cream - 1/2 cup chicken broth, divided - 1 teaspoon garlic powder - 1 teaspoon onion powder - 1 teaspoon ground cumin - 1/2 teaspoon salt - 1/2 teaspoon black pepper - 8 large lettuce leaves (like romaine or butter lettuce) These main ingredients create a rich and creamy filling. The chicken and cream cheese blend well, while the spices add great flavor. For a bright finish, you might like to add: - 1/4 cup chopped fresh cilantro This garnish gives a fresh taste and a pop of color to your dish. You can skip it if you prefer, but it’s worth a try! Each serving of these enchiladas offers: - Calories: 380 - Protein: 35g - Total Fat: 26g - Carbohydrates: 7g - Fiber: 2g These numbers make this dish a great option for low-carb diets. The high protein keeps you full, while the low carbs fit well into a healthy meal plan. {{ingredient_image_2}} To make the filling, start with a large bowl. Add 2 cups of shredded chicken. Then, mix in 1 cup of softened cream cheese. This will make the filling rich and creamy. Next, add 1 cup of shredded Monterey Jack cheese, but save half for later. Include 1 cup of cauliflower rice for texture. Then, add 1/2 cup of sour cream for extra creaminess. Pour in 1/4 cup of chicken broth to keep it moist. Season with 1 teaspoon of garlic powder, 1 teaspoon of onion powder, and 1 teaspoon of ground cumin. Sprinkle in 1/2 teaspoon of salt and 1/2 teaspoon of black pepper. Mix everything until smooth and blended. Lay out 8 large lettuce leaves on a clean surface. These leaves will be our wraps. Take about 1/4 cup of the chicken mixture and place it in the center of each leaf. Carefully roll the leaf around the filling. Make sure to tuck in the sides as you roll. This helps keep the filling inside. Place the rolled enchiladas seam-side down in a greased 9x13 inch baking dish. Make sure they fit snugly. In a small bowl, mix the remaining 1/4 cup of chicken broth with the leftover 1/2 cup of shredded Monterey Jack cheese. Pour this over the enchiladas. Cover the dish tightly with aluminum foil. Bake in a preheated oven at 350°F (175°C) for 20 minutes. After that, remove the foil and bake for another 10 minutes. This lets the cheese get bubbly and golden. Once done, take the dish out and let it cool for a few minutes. You can add chopped fresh cilantro on top for a pop of color. To wrap your enchiladas, use large lettuce leaves. Romaine or butter lettuce works well. Place about 1/4 cup of the filling in the center of each leaf. Roll the leaf tightly around the filling. Fold in the sides as you roll to keep everything inside. Make sure the seam is down in the baking dish. This helps them hold shape during baking. Having the right tools makes cooking easier. Here are some tools I recommend: - Large mixing bowl: For combining your filling. - Baking dish (9x13 inch): To hold your enchiladas. - Aluminum foil: To cover the dish while baking. - Measuring cups: For precise ingredient amounts. - Spatula: For mixing and serving. Many people make a few common mistakes when making enchiladas. Here’s how to avoid them: - Don't overfill the lettuce leaves. This makes them hard to wrap. - Ensure your filling is well mixed. This helps with flavor and texture. - Bake covered first. This keeps the enchiladas moist. Remove the foil later for a nice golden top. - Allow the dish to cool for a few minutes before serving. This helps with handling and eating. Pro Tips Use Fresh Ingredients: Fresh vegetables and herbs will elevate the flavor of your enchiladas, making them more vibrant and delicious. Customize the Heat: If you enjoy spice, add diced jalapeños or a dash of hot sauce to the chicken mixture for an extra kick. Make Ahead: Prepare the enchiladas ahead of time and refrigerate them before baking. Just add a few extra minutes to the baking time when you're ready to cook. Experiment with Cheese: Try different types of cheese like pepper jack or cheddar for a unique flavor twist in your enchiladas. {{image_4}} You can swap out the chicken in this recipe for other proteins. Turkey works well and keeps it light. Ground beef offers a heartier flavor. You can also use shredded pork for a tasty twist. Each option brings its own taste, making this dish fun to customize. Try different sauces to elevate your enchiladas. A green salsa verde adds a zesty kick. For a creamier texture, use a cheese sauce made with cream cheese. You can also mix sour cream with a bit of lime juice for a refreshing touch. Each sauce variation enhances the dish in a unique way. For a vegetarian version, replace the chicken with more cauliflower rice or black beans. You can add sautéed bell peppers, zucchini, or spinach for added flavor and nutrition. Keep the cream cheese and cheese for creaminess. This gives you a hearty, satisfying option without meat. Store leftover enchiladas in an airtight container. Keep them in the fridge. They will stay fresh for about 3 to 5 days. Make sure to let them cool down before sealing. This helps prevent moisture buildup. To reheat, preheat your oven to 350°F (175°C). Place the enchiladas in a baking dish. Cover them with foil to keep moisture in. Heat for about 15 to 20 minutes. You can also use a microwave. Heat for 1 to 2 minutes at a time until warm. You can freeze these enchiladas for later. Wrap each one tightly in plastic wrap. Place them in a freezer-safe bag or container. They can last up to 3 months in the freezer. When ready to eat, thaw in the fridge overnight before reheating. Yes, you can make this recipe dairy-free. Use dairy-free cream cheese and sour cream. For cheese, try a dairy-free shredded cheese. This keeps the flavors rich while being dairy-free. To lower the sodium, select low-sodium chicken broth. You can also reduce the added salt. This small change can help make the dish healthier without losing taste. If you want to skip lettuce, use large cabbage leaves. They have a nice crunch and hold the filling well. You could also use low-carb tortillas for a different texture. This post covered low-carb white chicken enchiladas from start to finish. We explored the main and optional ingredients, provided step-by-step instructions, and shared useful tips. You learned about variations, storage methods, and had answers to your questions. Enjoying these enchiladas can fit your diet while being tasty. Try different proteins or sauces to mix things up. Always remember to store and reheat properly. Dive in and make this meal your own!

Low Carb White Chicken Enchiladas Savory and Easy Dish

To make this delicious Potato Sausage Chowder, you need the following items: - 4 large russet potatoes, peeled and diced into 1-inch cubes - 1 pound smoked chicken sausage, sliced into rounds - 1 medium onion, finely diced - 2 cloves garlic, minced - 3 cups high-quality chicken broth - 1 cup heavy cream - 1 cup corn kernels - 2 tablespoons olive oil - 1 teaspoon dried thyme - 1 teaspoon paprika - Salt and pepper to taste - 1/4 cup fresh chives or parsley, chopped for garnish This chowder is flexible! You can swap or add ingredients to suit your taste: - Use turkey or veggie sausage for a lighter dish. - Swap russet potatoes for Yukon Gold for a creamier texture. - Add diced carrots or celery for extra veggies. - Replace heavy cream with coconut milk for a dairy-free version. Choosing quality ingredients makes a big difference. Here are my top picks: - Potatoes: Look for organic russets from local farmers’ markets. - Sausage: Aidells and Applegate offer great options for smoked chicken sausage. - Broth: Swanson and Pacific Foods have rich, flavorful chicken broth. - Cream: Organic Valley has a great heavy cream that is rich and thick. Using the best ingredients enhances the flavors and makes your chowder even more comforting! {{ingredient_image_2}} Start by heating 2 tablespoons of olive oil in a large pot over medium heat. Once the oil shimmers, add 1 medium onion, finely diced. Cook the onion for about 5 minutes. Stir occasionally until the onion turns translucent and fragrant. This step creates a tasty foundation for your chowder. Next, stir in 2 cloves of minced garlic and 1 pound of sliced smoked chicken sausage. Cook for another 3 to 4 minutes. This allows the sausage to warm and get a nice brown edge. The garlic will also release its wonderful aroma, making your kitchen smell amazing. Now, add 4 large russet potatoes, diced into 1-inch cubes. Sprinkle in 1 teaspoon of dried thyme, 1 teaspoon of paprika, and a generous pinch of salt and pepper. Stir well to coat everything with spices. Pour in 3 cups of chicken broth and bring the mixture to a gentle boil. When it boils, reduce the heat to low and cover the pot. Let it simmer for 15 to 20 minutes, or until the potatoes are fork-tender. After the potatoes soften, stir in 1 cup of corn kernels and 1 cup of heavy cream. Heat through on low for another 5 minutes. Be sure to stir occasionally to avoid sticking. Taste the chowder and adjust the seasoning with more salt and pepper if needed. Finally, remove the pot from heat. Ladle the chowder into bowls and garnish with fresh chives or parsley. Enjoy your rich and comforting potato sausage chowder! When making Potato Sausage Chowder, avoid these common pitfalls: - Overcooking the potatoes. They should be tender but not mushy. - Skipping the sautéing step. This builds flavor. Cooking the onion and sausage first is key. - Using low-quality broth. Good broth makes a big difference in taste. - Not tasting before serving. Always adjust salt and pepper to your liking. To boost the flavor of your chowder, try these tips: - Add fresh herbs. Fresh thyme or parsley adds brightness. - Use smoked paprika. This gives the chowder a deeper, richer taste. - Finish with a squeeze of lemon. A little acidity brightens the dish. - Incorporate a splash of hot sauce. This gives a nice kick without overpowering. For the best texture in your chowder, follow these steps: - Use a heavy-bottomed pot. This helps heat evenly and prevents sticking. - Simmer gently. A slow simmer allows flavors to meld together. - Stir occasionally. This helps prevent sticking and ensures even cooking. - Add cream at the end. This keeps it rich and prevents separation. Pro Tips Use Fresh Ingredients: Whenever possible, opt for fresh potatoes and herbs to enhance the flavor profile of your chowder. Adjust the Thickness: For a thicker chowder, mash a few of the cooked potatoes against the side of the pot before adding the cream. Flavor Depth: Consider adding a splash of white wine after sautéing the sausage for an extra layer of flavor. Storage Tips: If you have leftovers, store them in an airtight container in the fridge for up to 3 days. Reheat gently on the stove. {{image_4}} You can make this chowder vegetarian by skipping the meat. Use vegetable broth instead of chicken broth. Replace the sausage with plant-based sausage. You can also add more veggies like carrots and bell peppers for extra flavor. For a creamy texture, use coconut milk or cashew cream. These swaps keep the chowder rich and tasty. Feel free to play with sausage types. Smoked chicken sausage gives a nice flavor, but other options work well too. Try Italian sausage for a spicy kick or bratwurst for a milder taste. You can also use turkey sausage for a leaner choice. Each type of sausage adds a unique twist to the chowder. To take your chowder to the next level, add some fun extras. Fresh herbs like rosemary or basil can brighten the taste. A splash of hot sauce adds heat if you like spice. Consider mixing in diced bell peppers or mushrooms for added texture. For a smoky flavor, try using smoked paprika instead of regular paprika. These small changes can make a big impact on your chowder. To store leftover chowder, let it cool first. Once cool, pour it into an airtight container. Make sure to seal it well. Store the container in the fridge. It will last about 3 to 4 days. If you want to enjoy it later, freezing it is a great option. If you want to freeze chowder, use freezer-safe containers. Leave some space at the top for expansion. This chowder can stay good for up to 3 months. When you are ready to eat it, just thaw it in the fridge overnight. This helps keep the flavors intact. To reheat the chowder, pour it into a pot over medium heat. Stir it often to heat evenly. You can also microwave it in a bowl. Cover it loosely to prevent splatters. Heat in short bursts, stirring in between, until hot. If it seems thick, add a splash of broth or cream for a smoother texture. Yes, you can make this chowder in advance. It tastes even better the next day. After cooking, let it cool. Then store it in an airtight container in the fridge. It will keep for about 3-4 days. When you're ready to eat, just reheat it on the stove. Add a splash of cream if it seems too thick. You can use vegetable broth as a great substitute for chicken broth. This will keep the chowder lush and full of flavor. If you want a richer taste, try using beef broth. You can also use water, but add more spices to boost flavor. Homemade broth is always a nice touch, too. To thicken the chowder, you have a few options. One way is to mash some of the potatoes with a fork or potato masher. This will give the chowder a creamier texture. Another method is to add a slurry of cornstarch mixed with cold water. Stir in this mixture while the chowder simmers. It will thicken nicely. You can also add more cream for richness. This blog post provided a clear guide to making chowder. We covered the main ingredients, alternatives, and top brands for quality. You learned step-by-step instructions from preparing the base to finalizing the dish. We shared tips on avoiding common mistakes and enhancing flavor. You also found variations, storage tips, and answers to common questions. Chowder can fit anyone's taste or diet. By following this guide, you can create a perfect bowl every time. Enjoy your cooking!

Potato Sausage Chowder Rich and Comforting Recipe

PREV 1 … 16 17 18 NEXT
easy meal kitchen

explore

DessertsDinnerAppetizersDrinks

Our Policies

  • Cookie Policy
  • Copyright Policy
  • Disclaimer
  • GDPR Policy
  • Terms Of Use
Back to Top
  • About
  • Contact Us
  • Privacy Policy
© 2025 easy meal kitchen