FREE DINNER EBOOK! Get your copy!
  • Cookie Policy
  • GDPR Policy
  • Disclaimer
  • Terms Of Use
  • Visit my other site: Fun Cookie Recipes
easy meal kitchen
  • Home
  • Dinner
  • Desserts
  • Drinks
  • Appetizers
  • Contact
  • About
  • Privacy Policy
  • Home
  • Dinner
  • Desserts
  • Drinks
  • Appetizers
  • Contact
  • About
  • Privacy Policy
  • Cookie Policy
  • GDPR Policy
  • Disclaimer
  • Terms Of Use
Visit my other site: Fun Cookie Recipes

HOME / CATEGORIES /

Latest

Gather these simple ingredients to make your Brown Butter Garlic Thyme Mushrooms: - 1 pound cremini or button mushrooms, cleaned and sliced - 4 tablespoons unsalted butter - 4 cloves garlic, minced - 1 tablespoon fresh thyme leaves (or 1 teaspoon dried thyme) - Salt and freshly cracked pepper, to taste - Zest of 1 lemon - Fresh parsley, chopped (for garnish) Each ingredient plays a key role in creating rich flavors. The cremini or button mushrooms offer a firm texture and earthy taste. Unsalted butter brings depth, while garlic and thyme add a delightful aroma. The lemon zest brightens the dish, and parsley gives a fresh finish. You can easily find these ingredients at your local store, making this recipe approachable for any cook. {{ingredient_image_2}} Start by cleaning the mushrooms. Use a damp paper towel to wipe off any dirt. This keeps them fresh and clean. Next, slice the mushrooms into thick pieces. This helps them cook evenly. Once done, set them aside. You want all your ingredients ready before you start cooking. Heat a large skillet over medium heat. Add the unsalted butter to the skillet. Watch the butter as it melts completely. Stir it occasionally. After about 5-7 minutes, the butter should foam and turn a golden brown color. Keep an eye on it. Brown butter can burn quickly if left unattended. When the butter reaches a beautiful brown hue, it’s time to add flavor. Add the minced garlic and fresh thyme leaves to the skillet. Sauté them for about 1 minute. Stir them often until the garlic smells good but doesn’t turn brown. This step adds a wonderful aroma to your dish. Now it’s time to cook the mushrooms. Toss the sliced mushrooms into the brown butter mixture. Make sure they get coated well. Season them with salt and freshly cracked pepper. Continue to sauté for 6-8 minutes. Stir occasionally until the mushrooms are tender and golden brown. This gives them a nice texture and rich flavor. Once the mushrooms are done, remove the skillet from heat. Add the freshly grated lemon zest to the mushrooms. Stir well to mix all the flavors together. Carefully transfer the sautéed mushrooms to a serving dish. Finish by garnishing with chopped fresh parsley. This adds a pop of color and fresh taste to your dish. To make perfect brown butter, watch for key signs. Look for a nutty smell and a golden brown color. Avoid burning by stirring often. Keep the heat medium and don’t rush. If the butter starts to smoke, reduce the heat. This simple step stops it from turning dark too soon. Adding herbs can boost flavor. You can mix in rosemary or parsley for a twist. A sprinkle of red pepper flakes adds a nice heat. Fresh lemon juice brightens the dish. For garnishes, try toasted nuts or grated cheese. They add texture and flavor. Serve the mushrooms on warm plates for a nice touch. Plating on toasted baguette slices makes it look fancy. Pair them with grilled chicken or steak for a full meal. A sprinkle of thyme on top makes it pop. Use colorful dishes to enhance the visual appeal. Pro Tips Fresh Ingredients: Always use the freshest mushrooms and herbs available to enhance the flavor of the dish. Perfect Brown Butter: Watch the butter closely as it browns; it can go from perfect to burnt quickly. Stir it frequently for even browning. Enhance Flavor: Add a splash of white wine after sautéing the garlic and before adding the mushrooms for an extra layer of flavor. Serving Suggestions: Serve the mushrooms over polenta or pasta for a hearty meal, or use them as a topping for steak or chicken. {{image_4}} You can use many types of mushrooms for this dish. Cremini and button mushrooms are great, but try shiitake or oyster mushrooms too. Each type brings its own taste and texture. Mixing mushrooms can enhance flavor and make the dish unique. You can also add other vegetables if you like. Try spinach, zucchini, or bell peppers. They can add color and a fresh taste. For a richer taste, consider adding wine or cream. A splash of white wine will add depth. Cream can make the dish creamy and smooth. Just stir it in after cooking the mushrooms. You can also experiment with other herbs. Try rosemary or sage for a different twist. Fresh herbs can brighten the dish and bring new flavors. If you want to make this dish vegan, swap the butter for olive oil or vegan butter. This keeps the rich flavor without dairy. For a gluten-free version, ensure that your ingredients are gluten-free. Most mushrooms and fresh ingredients work well. This way, everyone can enjoy the dish. To store your brown butter garlic thyme mushrooms, let them cool first. Place them in an airtight container. This helps keep them fresh. They last in the fridge for about 3 to 5 days. If you want to keep them longer, consider freezing. They can last in the freezer for up to 3 months. When it’s time to enjoy leftovers, reheat them gently. The best way is to use a skillet on low heat. This keeps them tender and flavorful. Stir often to ensure even heating. You can add a splash of water or broth to help with moisture. Avoid using high heat, as it can change the texture. For a quick option, you can use the microwave. Just heat in short bursts, stirring in between. I love using cremini mushrooms in this dish. They have a rich flavor and firm texture. Button mushrooms are a great option too. They are milder and more common. Both types work well in brown butter. If you want a deeper taste, go for cremini. If you prefer something lighter, choose button mushrooms. Yes, you can make this dish ahead of time. Cook the mushrooms completely and let them cool. Store them in an airtight container in the fridge for up to three days. When you’re ready to eat, reheat them in a skillet over low heat. Add a splash of water to keep them moist. Stir gently until warmed through. To make this dish vegan, swap the butter for plant-based butter or olive oil. Use the same amount. For a creamy touch, you can add a bit of coconut cream at the end. The garlic and thyme will still shine through. You won't miss the butter at all! In this article, we explored a simple and tasty mushroom dish. You learned about the key ingredients, step-by-step cooking instructions, and helpful tips. I shared ways to adapt the recipe for different diets and flavors. Remember, using fresh mushrooms and herbs makes a big difference. Enjoy experimenting with flavors and presentations. This dish can impress your guests or make a cozy dinner special. Keep cooking, and have fun in the kitchen!

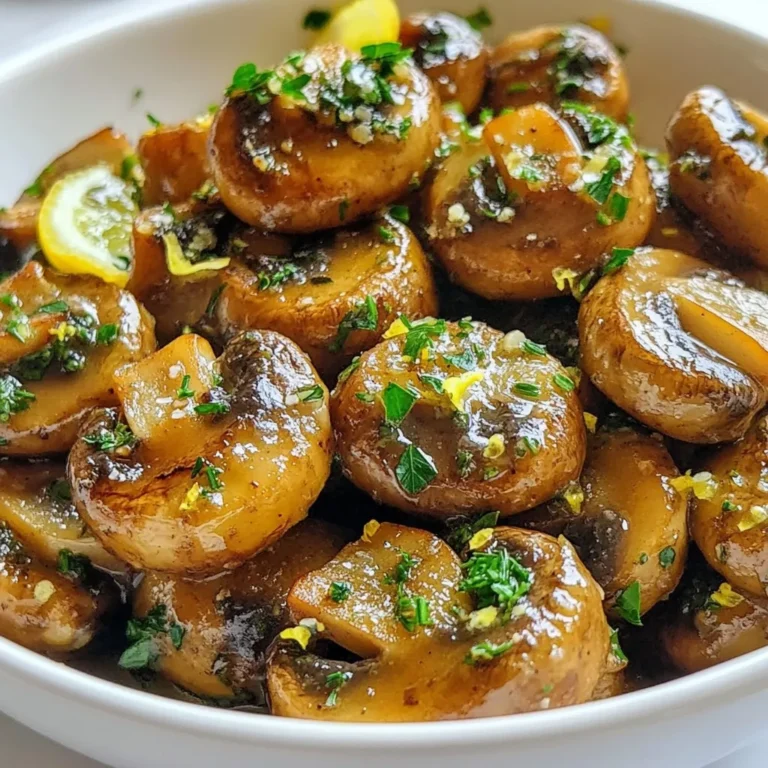
Brown Butter Garlic Thyme Mushrooms Savory Delight

To make homemade rock candy, you need just a few simple ingredients. These ingredients will help you create the sweet crystal delights everyone loves. - 2 cups granulated sugar - 1 cup water - ½ teaspoon food coloring (your choice) - 1 teaspoon flavor extract (e.g., vanilla, peppermint) - Wooden skewers or string - Clean glass jars or containers Each ingredient plays a key role in forming those beautiful sugar crystals. The sugar provides the base, while the water helps dissolve it. The food coloring adds a fun twist to your candy. The flavor extract gives your candy its unique taste. You can use wooden skewers or string to help the crystals form. Finally, the clean jars hold your candy as it grows. {{ingredient_image_2}} To start, gather your ingredients. You need 2 cups of granulated sugar and 1 cup of water. 1. In a medium saucepan, mix the sugar and water. 2. Place the pan over medium heat. Stir gently until the sugar fully dissolves. 3. Once smooth, stop stirring and let it boil. Simmer for about 8-10 minutes. This thickens the syrup. 4. Remove the pan from heat. Add food coloring and your chosen flavor extract. Stir gently to combine everything well. Next, let the syrup cool for around 15 minutes. During this time, prepare your jars. - Clean them thoroughly. - Make sure they are completely dry. Once the syrup is cool, slowly pour it into each jar. Fill them about halfway. This leaves space for sugar crystals to form. Now, it's time to prepare your skewers. - Dip one end of each wooden skewer into the syrup. - Let a thick coating form. - Roll the coated end in granulated sugar. This helps kickstart the crystallization. Carefully insert the skewers into the jars. Ensure the sugared end is in the syrup but does not touch the bottom. If you use string, tie one end to a pencil. Balance the pencil across the jar top, letting the string hang down. Cover each jar with a cloth to keep dust away. Place them in a cool, undisturbed spot. Check back after 7-10 days. You will see beautiful sugar crystals forming! Once they look good to you, gently take out the skewer or string. Allow it to dry fully before serving. Enjoy your homemade rock candy! To make rock candy, you want to dissolve the sugar well. Here are some tips: - Use a medium saucepan for even heat. - Stir the sugar into the water slowly. - Keep stirring until the sugar fully dissolves. - Do not rush; let it come to a boil gently. - Avoid stirring once it starts to boil. This helps create a smooth syrup. If sugar remains, crystals may not form well. Flavor extracts make your rock candy unique. Here’s how to choose: - Start with one teaspoon of your favorite extract. - Common choices are vanilla, peppermint, or almond. - Use clear extracts for vibrant colors. - Experiment with combinations for fun flavors. - Try seasonal flavors like pumpkin spice or cherry for variety. Choosing the right extract enhances the taste and makes it special. Sometimes, things may not go as planned. Here are some tips to fix problems: - If crystals do not form, the syrup may be too hot. - Ensure your jars are clean and dry before pouring the syrup. - If the syrup becomes cloudy, it may have too much moisture. - Check the location where the jars sit; keep them still and cool. - If using string, make sure it’s not touching the jar's bottom. These tips can help you create perfect rock candy every time! Pro Tips Choose the Right Flavor: Opt for strong flavor extracts, as the sugar can mute the taste. Vanilla and peppermint are classic choices! Temperature Matters: Ensure your syrup reaches the correct temperature to create the perfect crystal structure. A candy thermometer can help achieve this. Cleanliness is Key: Make sure all your utensils and jars are thoroughly cleaned to prevent any unwanted bacteria that could disrupt crystallization. Patience Pays Off: Allow the crystals to form undisturbed for the best results. Avoid moving the jars during the crystallization process. {{image_4}} You can make rock candy in many fun flavors. Here are some ideas: - Vanilla: A classic choice. - Peppermint: Refreshing and cool. - Almond: Sweet and nutty. - Lemon: Bright and zesty. - Cinnamon: Warm and spicy. Mix and match flavors to create your own unique blend. Use one or two flavors for every batch. You can also add a few drops of extract for a stronger taste. Color makes rock candy even more fun! You can choose any color you like. Here are some popular options: - Red: Perfect for strawberry or cherry. - Blue: Great for blueberry or cotton candy. - Green: Ideal for lime or mint. - Yellow: Nice for lemon or banana. - Purple: Works well for grape or lavender. Feel free to blend colors for a rainbow effect. Just add a little more food coloring for brighter shades. How you show off your rock candy can make it special. Here are some ways to present it: - Use clear jars to show off the crystals. - Tie colorful ribbons around jars for a festive look. - Place pieces on a nice plate and add sprinkles for extra flair. - Wrap them in small bags for gifts. - Make a candy bouquet by sticking skewers in floral foam. Get creative and let your personality shine through in your presentation! To store your finished rock candy, place it in a clean glass jar. Make sure the jar is dry before putting the candy inside. Seal the jar tightly to keep out moisture and dust. If you want to share, you can also wrap the candy in plastic wrap or put it in small bags. Homemade rock candy lasts a long time. When stored properly, it can last for several months. However, for the best taste and texture, try to eat it within three months. Over time, it may lose its crunch and become chewy. Store your rock candy in a cool, dry place. Avoid direct sunlight and humidity, as they can affect the candy's texture. A pantry or cupboard works well. Keep the jars away from heat sources to ensure the candy stays fresh and crisp. Making rock candy takes about 10 days. You need this time for the sugar crystals to form. Start by preparing the syrup, which takes only 15 minutes. After pouring it into jars, wait patiently as the magic happens! Yes, you can use alternative sweeteners. However, the texture may change. Some sweeteners do not crystallize like sugar. Experiment with options like honey or agave syrup. Keep in mind that results may vary. If you don't have skewers, use string instead. Tie one end of the string to a pencil. Balance the pencil across the top of the jar. Let the other end hang into the syrup. This works well for growing crystals too! To prevent stickiness, let your candy dry fully after you remove it from the jar. Store it in a cool, dry place. If you see moisture, place it in a bowl of rice for a few hours. This helps absorb extra moisture. Rock candy is safe for young children to eat. However, be cautious of choking hazards. Always supervise them while enjoying this treat. Cut the candy into smaller pieces if needed. This way, everyone can enjoy it safely! Homemade rock candy is fun and easy to make. You need simple ingredients like sugar and water. Following the steps ensures perfect results. Tips help you avoid common mistakes, and variations let you get creative. Store your candy right for long-lasting enjoyment. With this guide, you can make tasty treats and impress loved ones. Enjoy the sweet rewards of your labor!

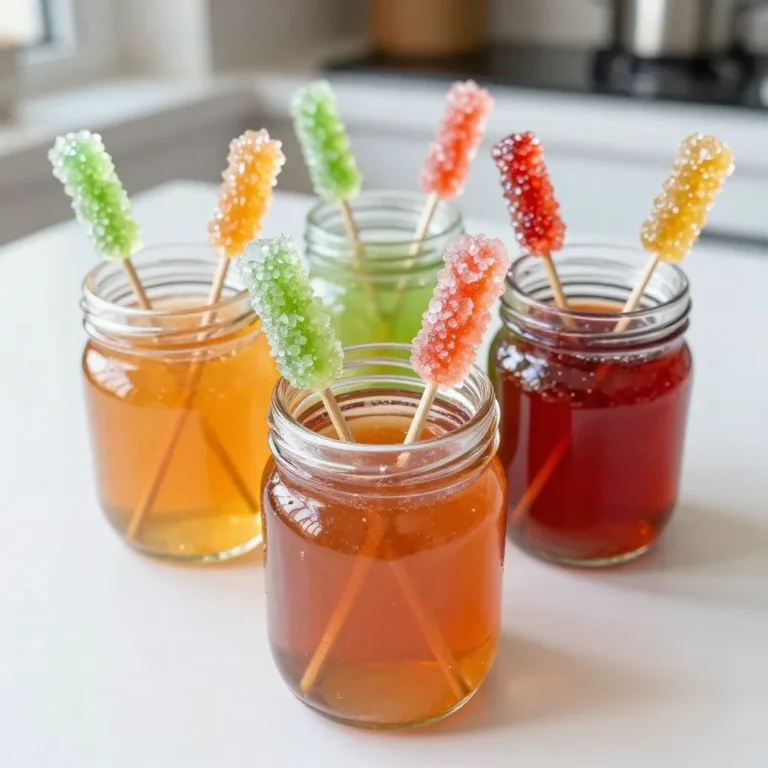
Homemade Rock Candy Sweet Treat You Can Make

When making Butterfinger Caramel Crunch Truffles, you need simple yet tasty ingredients. Here’s what to gather: - 1 cup Butterfinger bars, crushed (about 4 bars) - 1 cup cream cheese, softened to room temperature - 1 cup powdered sugar - 1 cup graham cracker crumbs - 1/2 cup caramel sauce (plus more for drizzling) - 1 cup semi-sweet chocolate chips - 1 tablespoon coconut oil (to thin the chocolate) - Pinch of sea salt - Additional crushed Butterfinger for garnish These ingredients blend together to create a rich, sweet treat. The Butterfinger bars give a crunchy texture, while the cream cheese adds creaminess. The graham cracker crumbs keep it light, and caramel sauce brings in that gooey goodness. The chocolate coating seals the flavors, making each bite a delight. Enjoy the process of mixing and rolling these truffles! {{ingredient_image_2}} Start with a large bowl. Add 1 cup of softened cream cheese and 1 cup of powdered sugar. Use an electric mixer to beat them together. Mix until the cream cheese is smooth and creamy. You want no lumps here! Next, add in 1 cup of crushed Butterfinger bars, 1 cup of graham cracker crumbs, and 1/2 cup of caramel sauce. Stir it well until everything combines perfectly. This mixture will be thick and sweet. Now, wash your hands. Take small portions of the mixture and roll them into balls. Aim for about 1 inch in size. Place these balls onto a baking sheet lined with parchment paper. When you have rolled all the truffles, pop the baking sheet into the freezer. Let them chill for about 30 minutes. This will help them firm up so they hold their shape. While the truffles chill, it's time to melt the chocolate. Take a microwave-safe bowl and add 1 cup of semi-sweet chocolate chips and 1 tablespoon of coconut oil. Microwave this mix in 30-second intervals. Stir in between each interval until the chocolate is fully melted and smooth. The coconut oil helps thin out the chocolate for easy dipping. Once the truffles are firm, take them out of the freezer. Use a fork to dip each truffle into the melted chocolate. Make sure they are fully coated. Let any extra chocolate drip back into the bowl. Place the coated truffles back onto the parchment-lined baking sheet. Before the chocolate sets, drizzle some extra caramel sauce over each truffle. Sprinkle a pinch of sea salt and more crushed Butterfinger on top. This adds great flavor and crunch! Finally, return them to the fridge for about 30 minutes to set the chocolate. Enjoy these rich and decadent treats! To get a smooth chocolate coating, use good quality chocolate. I like semi-sweet chips. Adding coconut oil helps thin the chocolate for easier dipping. Melt the chocolate in short bursts in the microwave. Stir it well after each burst to avoid burning. If you dip quickly, the coating stays smooth. Make sure each truffle is fully covered, but let excess chocolate drip off. Store your truffles in an airtight container. Keep them in the fridge to stay fresh. They can last up to a week this way. If you want to keep them longer, freeze them. Just let them thaw in the fridge before serving. This keeps the texture nice and creamy. For a fun touch, use mini cupcake liners to hold each truffle. Arrange them on a pretty plate for a nice look. Drizzle extra caramel around the plate for a gourmet flair. Sprinkle some crushed Butterfinger on top for added crunch and color. These ideas make your truffles look as good as they taste! Pro Tips Chill the Mixture: For easier handling, ensure the truffle mixture is well-chilled before rolling into balls. This helps maintain their shape. Use Quality Chocolate: Select high-quality chocolate for coating to enhance the flavor and texture of your truffles. Coconut Oil Benefits: Adding coconut oil not only thins the chocolate for easier dipping but also gives a lovely sheen to the finished truffles. Experiment with Flavors: Don't hesitate to mix in other candies or flavor extracts to personalize your truffles and make them your own! {{image_4}} You can switch up the flavors in your Butterfinger Caramel Crunch Truffles. Try using different candy bars like Snickers or Reese's for a unique twist. You can also swap the caramel sauce for a chocolate fudge sauce. This will give your truffles a rich, new taste. If you want a fruity flavor, add a splash of orange or raspberry extract to the cream cheese mix. This will brighten up the truffles and make them even more fun. Making these truffles vegan or gluten-free is easy. For a vegan version, use dairy-free cream cheese and powdered sugar. You can replace the graham cracker crumbs with gluten-free alternatives like almond flour or coconut flour. For the chocolate coating, choose vegan chocolate chips. These swaps keep the truffles just as tasty while meeting different dietary needs. Mixing flavors can lead to exciting new truffles. Consider adding a pinch of cinnamon or nutmeg for warmth. You could also mix in crushed nuts, like pecans or walnuts, for extra crunch. If you enjoy spices, a dash of chili powder can add a surprising kick. Experiment with these combinations to find your favorite blend. The options are endless, and each variation can bring something special to your truffles. To keep your Butterfinger Caramel Crunch Truffles fresh, store them in an airtight container. Place parchment paper between layers to avoid sticking. Keep them in the fridge if you plan to eat them within a week. This helps maintain their texture and flavor. You can freeze these truffles for longer storage. First, place them in a single layer on a baking sheet. Freeze them for about an hour, until firm. Once frozen, transfer them to a freezer-safe bag or container. They can last for up to three months in the freezer. These truffles stay fresh for about one week in the fridge. If frozen, they can last for up to three months. Just remember to let them thaw in the fridge before eating. This ensures the best taste and texture when you're ready to enjoy them. Yes, you can! Milk chocolate adds a sweeter taste. Dark chocolate gives a rich flavor. White chocolate is also an option for a creamy touch. Just make sure it melts well. To keep these truffles nut-free, skip any nut-based ingredients. Use graham cracker crumbs without nuts. Always check labels on your chocolate and other ingredients. This way, you avoid hidden nut products. If your mixture is sticky, simply chill it longer in the fridge. This helps it firm up. You can also add a little more graham cracker crumbs. It will help with the texture. You can find Butterfinger Bars at most grocery stores. Check the candy aisle or the checkout area. If you still can't find them, try online retailers. Many stores offer them for delivery. These Butterfinger Caramel Crunch Truffles are a sweet treat you can easily make. You learned about the key ingredients and how to prepare them. We covered important tips for a smooth finish and storage for freshness. You can also try many fun variations to fit your taste. In the end, these truffles are worth the effort. Enjoy your delicious creations and share them with friends. You’ll impress everyone with your skills!

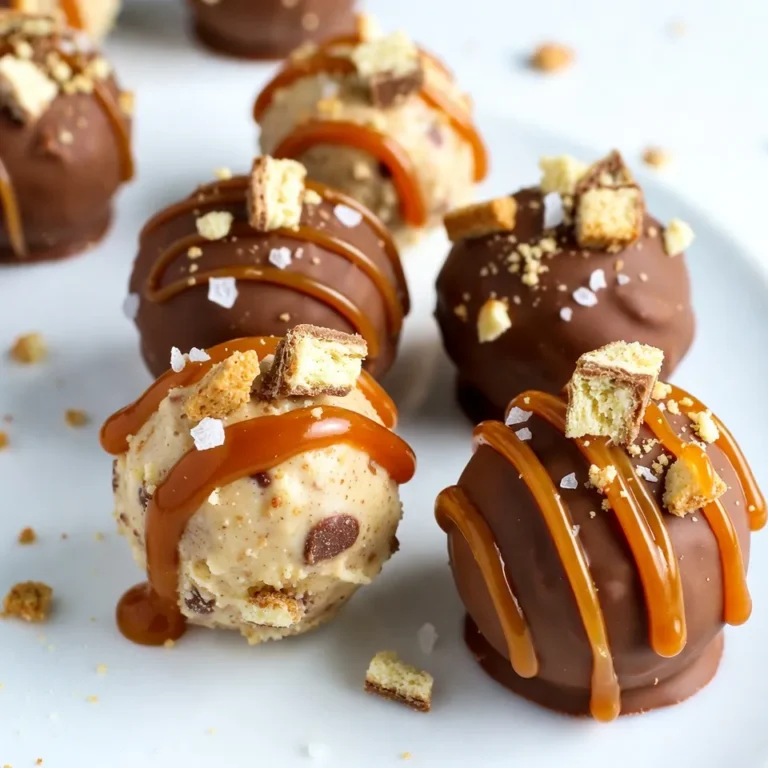
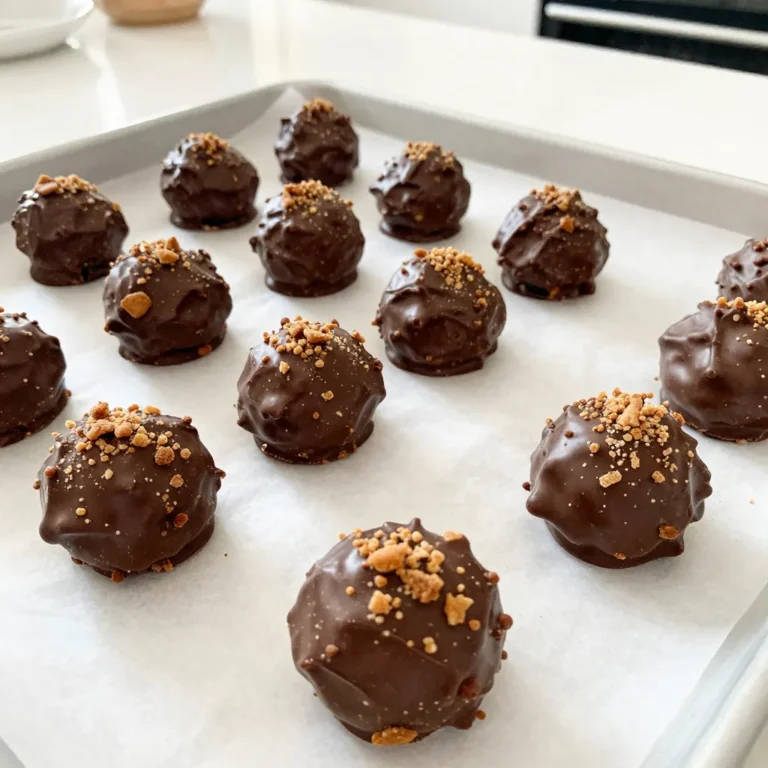
Butterfinger Caramel Crunch Truffles Rich and Decadent

- 1 loaf of buttery brioche bread, cut into 1-inch cubes - 2 cups plump fresh blueberries, rinsed and drained - 6 large eggs, at room temperature - 2 cups whole milk, preferably warmed - 1/2 cup granulated sugar - 1 teaspoon pure vanilla extract - 1 teaspoon ground cinnamon - 1/4 teaspoon salt - 2 tablespoons unsalted butter, melted - Powdered sugar for dusting (optional) Using fresh blueberries is key. They add sweetness and a burst of flavor. Frozen blueberries can work, but they release more juice and may make the dish soggy. Choosing the right bread also matters. Brioche is rich and soft, making it perfect for this casserole. It soaks up the egg mixture well, giving you a creamy texture. If you can’t find brioche, challah is a good option too. These ingredients come together for a delicious breakfast. They create a warm, sweet dish that feels like a hug on a plate. Don't skip on the details, as they make a big difference in taste and texture! {{ingredient_image_2}} Start by making the egg mixture. In a large bowl, whisk together six eggs. Add two cups of warmed whole milk, 1/2 cup of sugar, one teaspoon of vanilla extract, one teaspoon of ground cinnamon, and 1/4 teaspoon of salt. Mix until it is smooth and frothy. Next, let's cube the brioche bread. Take a loaf of buttery brioche and cut it into 1-inch cubes. This size helps it soak up the egg mixture well. Make sure to cut evenly so every piece cooks the same. Now, it's time to add blueberries. You will need two cups of fresh blueberries. Rinse and drain them first. Gently fold the blueberries into the bread cubes, making sure they are spread out evenly. This helps each bite be full of berry goodness. Now, layer your ingredients in the greased baking dish. First, place the bread cubes in an even layer at the bottom. Then, sprinkle the blueberries over the bread. Pour the egg mixture over the bread and blueberries. Press down lightly on the bread to help it soak up the egg mixture. This step is key to getting a tasty, custardy texture. After that, drizzle two tablespoons of melted butter over the top. This adds richness and flavor. Cover the dish tightly with aluminum foil. Let it rest for about 30 minutes at room temperature. If you can, refrigerate it overnight to let the flavors mix even better. Preheat your oven to 350°F (175°C). Place the covered dish in the oven and bake it for 30 minutes. After that, remove the foil. Bake for another 15 to 20 minutes. To check for doneness, insert a toothpick into the center. If it comes out clean, the casserole is ready. You want the top to be golden brown. This gives it a nice look and a slight crunch. Once baked, let the casserole cool for a few minutes before slicing. Enjoy the deliciousness! To make sure your bread absorbs the custard, use stale brioche. Fresh bread can be too soft. Cut it into 1-inch cubes and let it sit out for a few hours. Warming your milk and eggs helps them mix better. This step makes the custard smooth and rich. Greasing your baking dish well is key. Use unsalted butter or non-stick spray. This prevents sticking and helps with easy serving. Coat the dish evenly to ensure every piece comes out nicely. For garnishing, dust your casserole with powdered sugar. It adds a sweet touch and looks great. Serve it warm with a bowl of maple syrup. The syrup complements the blueberries perfectly. Pair your casserole with a hot cup of coffee or tea. The warmth of the drink enhances the flavors. You can also add extra fresh blueberries on the side for a pop of color. Enjoy creating a beautiful breakfast spread that everyone will love! Pro Tips Use Day-Old Bread: For the best texture, use slightly stale brioche bread. This will help the bread absorb the custard mixture without becoming too soggy. Mix-in Variations: Feel free to add other fruits like raspberries or sliced bananas for a fun twist on flavors, or incorporate nuts for added crunch. Make Ahead: Preparing the casserole the night before allows the flavors to meld beautifully, making for a quick and easy breakfast option in the morning. Watch the Baking Time: Keep an eye on the casserole in the last few minutes of baking to ensure it doesn’t over-brown. You can cover it loosely with foil if needed. {{image_4}} You can change the flavor of your casserole easily. Try using strawberries or raspberries instead of blueberries. They will add a nice sweetness and color. You can also mix in nuts like pecans or walnuts for a crunch. Chocolate chips are a fun option if you want a sweeter touch. If you need a gluten-free version, use gluten-free bread. This will still give you the soft texture you want. Just make sure to check for gluten-free oats in other ingredients, if you choose to add them. To make this dish dairy-free, try using almond or oat milk instead of whole milk. You can also use a dairy-free butter. This will keep the rich taste without the dairy. If you're looking to cut back on sugar, try using a sugar substitute. Honey or maple syrup can work well. They add a nice flavor too. For a vegan version, swap the eggs with a flaxseed mixture. Mix one tablespoon of ground flaxseed with three tablespoons of water for each egg. This will help bind your casserole just like eggs do. Use plant-based milk and a vegan butter to keep it vegan-friendly. To keep your casserole fresh, store it in the fridge. Place it in an airtight container. This helps keep moisture in and prevents it from drying out. If you have a lot left, you can cover the dish tightly with plastic wrap. Just be careful not to let it touch the food. When you're ready to eat, simply reheat it in the oven or microwave. For reheating, I suggest using the oven. Preheat it to 350°F (175°C). Place the casserole in an oven-safe dish and cover it with foil. Heat for about 20 minutes. This way, the texture stays nice. You want it warm all the way through without making it soggy. You can freeze the casserole before or after baking. If you choose to freeze it before baking, assemble it as directed. Then cover it tightly with foil or plastic wrap. You can freeze it for up to three months. If you decide to freeze it after baking, let it cool completely first. Then cut it into pieces, wrap each piece, and place them in a freezer bag. This makes it easy to grab a slice later. When you're ready to enjoy your frozen casserole, thaw it in the fridge overnight. You can reheat it in the oven the same way as before. This method keeps the flavor and texture intact. Enjoy your delicious Blueberry French Toast Casserole anytime! Yes, you can prepare this casserole the night before. After you mix the bread and blueberries, pour the egg mixture over them. Then, cover the dish tightly with foil. Place it in the fridge overnight. This helps the bread soak up the custard. Before baking, let it sit at room temperature for about 30 minutes. This simple step makes sure it cooks evenly. If you don't have brioche, don't worry! You can use challah, French bread, or even whole wheat bread. Each type offers a unique taste and texture. Just cut the bread into 1-inch cubes. This will help the custard soak in well. Choose a bread that is soft and slightly sweet for the best result. Look for a golden brown top and a firm texture. After 30 minutes, remove the foil. Bake for another 15-20 minutes. Insert a toothpick into the center. If it comes out clean, your casserole is done. The edges should be puffed, and the center should not jiggle. Yes, you can use frozen blueberries for this dish. Just rinse them under cold water and drain well. Frozen blueberries may release more juice than fresh ones. This can make the casserole a bit wetter. If you like, add a touch more bread to help absorb the extra moisture. This blog post covered everything you need for a great Blueberry French Toast Casserole. We talked about essential ingredients, like fresh blueberries and the right bread. I shared step-by-step instructions for prepping, assembling, and baking. You can try fun variations or make dietary adjustments to fit your needs. In the end, with some tips for storage and serving, you’re ready to impress. Enjoy making this delicious dish for yourself and others!

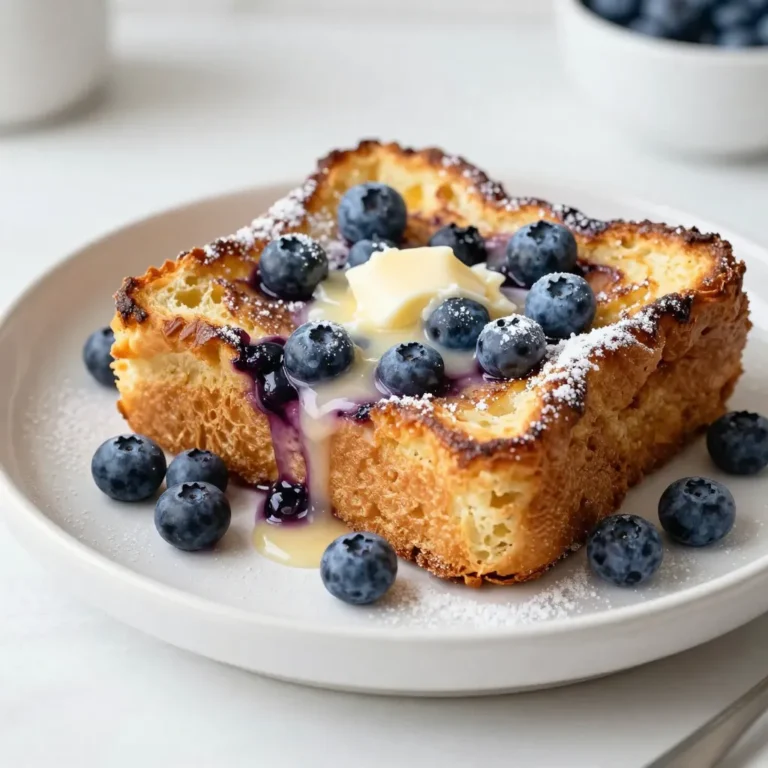
Blueberry French Toast Casserole Easy Weekend Delight

- 1 pound ground beef or turkey - 1/2 cup breadcrumbs (preferably Italian-style for extra flavor) - 1/4 cup grated Parmesan cheese - 2 cloves garlic, finely minced - 1 cup honey - 1/2 cup low-sodium soy sauce - 1 tablespoon rice vinegar - 1 tablespoon sesame oil - Optional: 1/2 teaspoon crushed red pepper flakes - Chopped green onions - Additional serving suggestions Gathering the right ingredients is key for great flavor. I love using ground beef or turkey as the base for my meatballs. Breadcrumbs add texture, and Parmesan gives a nice cheesy kick. Don't forget the garlic; it brings a wonderful aroma and taste to the mix. For the honey garlic sauce, honey is the star. It adds sweetness that balances the savory soy sauce. Rice vinegar and sesame oil add depth and a hint of tanginess. If you like some heat, you can toss in crushed red pepper flakes for an extra kick. Finally, garnishing with chopped green onions brightens up the dish. You can also serve these meatballs over rice or noodles for a complete meal. Enjoy! {{ingredient_image_2}} First, gather your meatball ingredients. You will need: - 1 pound ground beef or turkey - 1/2 cup breadcrumbs (preferably Italian-style) - 1/4 cup grated Parmesan cheese - 1 large egg, lightly beaten - 2 cloves garlic, finely minced - 1 teaspoon onion powder - 1/2 teaspoon salt - 1/4 teaspoon freshly ground black pepper In a large mixing bowl, combine all these ingredients. Mix them well. You can use your hands or a spoon. Just be careful not to overmix. Overmixing can make your meatballs tough. Now, shape the mixture into small meatballs. Aim for about 1 inch in diameter. Place the meatballs on a baking sheet. This helps keep them organized for the next steps. Next, let’s make the sauce. You will need: - 1 cup honey - 1/2 cup low-sodium soy sauce - 1 tablespoon rice vinegar - 1 tablespoon sesame oil - 1/2 teaspoon crushed red pepper flakes (optional) In a separate bowl, whisk together the honey, soy sauce, rice vinegar, sesame oil, and crushed red pepper flakes. Whisk it until smooth. This honey garlic sauce adds a sweet and savory kick. Now it’s time to set up the slow cooker. Lightly spray the interior with non-stick cooking spray. Carefully place the meatballs into the slow cooker. Spread them out in an even layer. This helps them cook evenly. Pour the honey garlic sauce over the meatballs. Make sure they are fully coated. This way, every bite bursts with flavor. Secure the lid on the slow cooker. Set it to cook on low for 4 hours or high for 2 hours. The meatballs should reach an internal temperature of 160°F (70°C) to ensure they are safe to eat. Once cooked, gently use a slotted spoon to transfer the meatballs to a serving dish. Drizzle some sauce over the top. Finish with chopped green onions for a fresh touch. Enjoy your flavorful treat! To prevent tough meatballs, mix the meat gently. Overmixing can make them dense. Aim for a soft blend of ground beef or turkey, breadcrumbs, cheese, and spices. Shape your meatballs to about one inch. This size cooks evenly and stays juicy. For even cooking, spread the meatballs in a single layer in the slow cooker. This way, every meatball gets the same heat. Pour the honey garlic sauce over them and ensure they are well-coated. This helps keep them moist. Adjusting sweetness is easy. Add more or less honey based on your taste. If you want a spicy kick, use the crushed red pepper flakes. Start with a small amount. You can always add more later. Consider adding minced ginger or bell peppers for a fresh twist. Chopped herbs like cilantro or basil also add flavor. Experiment with what you like best. Serve your meatballs over rice or noodles. This adds a filling base and makes the dish complete. For a pop of color, sprinkle extra green onions and sesame seeds on top. This makes your plate look inviting. Garnishing with fresh herbs not only looks good but adds flavor too. A well-presented dish makes everyone excited to eat. Enjoy the tasty treat! Pro Tips Use Fresh Ingredients: Fresh garlic and herbs can significantly enhance the flavor of your meatballs, making them more aromatic and delicious. Chill the Mixture: After mixing the meatball ingredients, refrigerate the mixture for about 30 minutes. This helps the meatballs hold their shape when cooked. Customize the Sauce: Feel free to adjust the sweetness or spice level of your sauce by adding more honey or red pepper flakes, according to your taste preference. Serving Suggestions: These meatballs pair wonderfully with steamed rice, noodles, or even in a sub sandwich for a tasty twist! {{image_4}} You can change the meat in your meatballs. Ground chicken and pork work great. Chicken gives a lighter taste, while pork adds richness. If you want a meatless option, use plant-based ground meat. This makes the dish friendly for vegetarians. You can also make meatballs with lentils or chickpeas. These options still taste amazing with the honey garlic sauce. You can switch up the sauce for new tastes. Try using maple syrup instead of honey for a different sweetness. Add ginger for a fresh kick. If you love heat, mix in more crushed red pepper flakes. You can also add fresh herbs like cilantro or basil. These herbs bring a bright flavor that pairs well with the sauce. If you want to try a faster method, use an Instant Pot. Cook the meatballs on high pressure for about 10 minutes. This saves time but keeps them juicy. Another option is oven baking. Place the meatballs on a baking sheet and bake at 400°F for 20 minutes. This gives you a nice crisp outside. Each method brings a unique touch to the dish. To store cooked meatballs, let them cool first. Place them in an airtight container. Make sure to cover them well to keep moisture in. You can refrigerate them for up to four days. For reheating, use the microwave or the stovetop. Heat them gently to avoid drying them out. You can freeze both uncooked and cooked meatballs. For uncooked meatballs, place them on a baking sheet. Freeze them for about an hour, then transfer to a freezer bag. Cooked meatballs can go straight into a container. They will stay fresh for three months in the freezer. To thaw, move them to the fridge overnight. You can also use the microwave for quick thawing. Refrigerated meatballs last about four days. In the freezer, cooked meatballs last three months. It's best to label your containers with dates. This way, you know when to use them. Always check for any signs of spoilage before eating. Honey garlic meatballs pair well with many sides. Here are my top picks: - Steamed rice - Noodles - Mashed potatoes - Roasted vegetables - A fresh green salad These sides balance the sweet and savory flavors of the meatballs. Choose what you love! Yes, you can make meatballs ahead of time. Here are some tips: - Make and freeze: Shape the meatballs and freeze them. - Store in the fridge: Keep them covered for up to two days. - Cook later: If you freeze, you can slow cook directly from frozen. Just add extra cooking time. Meal prep saves time and makes dinner easy. To check if meatballs are done, use these methods: - Internal temperature: Use a meat thermometer; it should read 160°F (70°C). - Visual cues: The meatballs should be firm and no longer pink inside. Both methods ensure your meatballs are safe and tasty. Yes, you can switch sweeteners! Here are some alternatives: - Maple syrup: Adds a nice flavor. - Agave nectar: A good vegan choice. - Brown sugar: Mix with water for a syrupy texture. Each sweetener changes the taste slightly, so choose what you like best. Honey garlic meatballs are simple and tasty. You learned about key ingredients like garlic, honey, and ground meat. I shared steps to make them perfectly, from mixing to slow cooking. Remember, you can change meat types and sauces for new flavors. Use our tips for perfect texture and great presentation. Finally, storing and reheating is easy, so enjoy your meal anytime. Create your version, and make these meatballs a hit at your table!

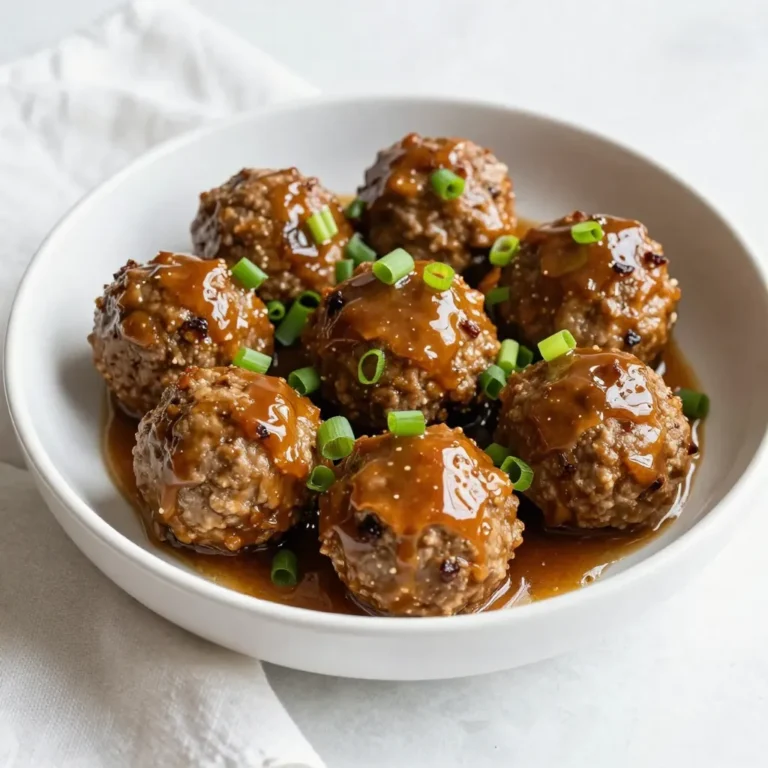
Slow Cooker Honey Garlic Meatballs Flavorful Treat

To make delicious gingerbread truffles, you need these key ingredients: - 1 cup gingerbread cookies, finely crushed - 1/2 cup cream cheese, softened - 1 teaspoon ground ginger - 1 teaspoon ground cinnamon - 1/4 teaspoon freshly grated nutmeg - 1/4 teaspoon ground allspice - 1/2 cup powdered sugar - 1 teaspoon pure vanilla extract - 1 cup chocolate chips (milk or dark) - 1 tablespoon coconut oil These ingredients create the perfect blend of flavors and textures. The crushed gingerbread cookies give a warm spice flavor. Cream cheese adds creaminess, while spices like ginger and cinnamon make it festive. For a fun touch, consider these garnishes: - Extra crushed gingerbread cookies - Finely chopped nuts These garnishes add texture and a visual appeal to your truffles. They also enhance the gingerbread flavor, making each bite even more delightful. When making truffles, quality matters. Here are some tips: - Gingerbread Cookies: Choose a brand you love or bake your own for the best taste. - Cream Cheese: Use full-fat cream cheese for a rich, creamy texture. - Spices: Freshly ground spices offer more flavor than pre-ground ones. - Chocolate Chips: Pick chocolate chips that you enjoy eating. Dark chocolate adds depth, while milk chocolate is sweeter. Using high-quality ingredients makes a big difference in flavor. Trust me; your taste buds will thank you! {{ingredient_image_2}} First, grab a large mixing bowl. Add 1 cup of finely crushed gingerbread cookies. Then, mix in 1/2 cup of softened cream cheese. Use a spatula or mixer to blend until smooth. Make sure there are no lumps. Next, sprinkle in the ground ginger, ground cinnamon, freshly grated nutmeg, and ground allspice. Add 1/2 cup of powdered sugar and 1 teaspoon of pure vanilla extract. Stir everything well until all the ingredients are combined. Cover the bowl with plastic wrap. Place it in the refrigerator for about 30 minutes. This step helps firm up the mixture. Chilling makes it easier to shape into truffles later. Once the mixture is chilled, take it out of the fridge. Scoop and roll the mixture into small balls. Aim for about 1 inch in diameter. Place the shaped truffles on a parchment-lined baking sheet. Make sure to space them apart to prevent sticking. In a microwave-safe bowl, combine 1 cup of chocolate chips with 1 tablespoon of coconut oil. Microwave in 30-second intervals, stirring well each time. Keep doing this until the chocolate is fully melted and smooth. Dip each truffle into the melted chocolate. Use a fork to lift it out, letting any excess chocolate drip back into the bowl. While the chocolate is still wet, sprinkle extra crushed gingerbread cookies or finely chopped nuts on top. This adds a festive touch. Return the coated truffles to the parchment-lined baking sheet. Put them back in the refrigerator for at least 15 minutes. This allows the chocolate to harden completely. Once set, your gingerbread truffles are ready to enjoy! When making gingerbread truffles, some common mistakes can happen. First, don’t skip the chilling step. Chilling the mixture makes it easier to shape. If your truffles are too soft, they will not hold their shape well. Second, make sure to blend the cream cheese and cookies until smooth. Lumps will ruin the truffle texture. Lastly, don’t rush the chocolate coating. Take your time to dip each truffle fully. To get the right texture for your truffles, balance is key. The cream cheese must be soft but not too loose. Use room temperature cream cheese for easy mixing. Also, ensure you finely crush the gingerbread cookies. Larger pieces can make the mixture grainy. After mixing, let the truffle mixture chill for at least 30 minutes. This helps it firm up nicely for rolling. Gingerbread truffles shine during the holiday season. Serve them on a festive platter for parties. You can also place them in small treat boxes for gifts. Consider adding a sprinkle of cinnamon or nutmeg on top for extra flair. They pair well with warm drinks like hot cocoa or spiced tea. Enjoy them with loved ones for a cozy holiday treat! Pro Tips Chill the Mixture: Allowing the truffle mixture to chill for at least 30 minutes is crucial for easy rolling. It helps firm up the ingredients, making them less sticky and easier to shape. Melt Chocolate Properly: When melting your chocolate, do it in 30-second intervals, stirring in between. This ensures even melting and prevents the chocolate from burning. Decorative Toppings: For a festive touch, use a combination of crushed gingerbread cookies and finely chopped nuts for garnishing. It adds texture and enhances the visual appeal of your truffles. Storage Tips: Store any leftover truffles in an airtight container in the refrigerator. This keeps them fresh and maintains their texture for a longer period. {{image_4}} You can play with flavors in your gingerbread truffles. Try adding different spices like cardamom or cloves. These spices add warmth and depth. You can also swap in shortbread cookies for a unique twist. For a chocolate lover’s delight, use chocolate cookies instead of gingerbread. This gives your truffles a rich, sweet taste. Making gingerbread truffles fit your diet is easy. For a vegan version, use vegan cream cheese and dark chocolate without dairy. You can also use gluten-free gingerbread cookies to make them gluten-free. Always check the labels to ensure all ingredients are suitable for your needs. This way, everyone can enjoy these festive treats! Making your truffles look great is simple. Use a decorative box or a clear jar to display them. You can also place them in mini cupcake liners for an elegant touch. Drizzle extra melted chocolate over the truffles for a fancy finish. Sprinkle some edible glitter to make them sparkle. A beautiful presentation makes them even more special! To keep your gingerbread truffles fresh, store them in an airtight container. Place parchment paper between layers to avoid sticking. Keep them in the fridge for the best taste. They stay cool and firm this way. If you want to save some for later, freezing is easy. First, let the truffles cool completely. Then, place them on a baking sheet and freeze them for about an hour. Once firm, transfer them to a freezer-safe bag. They can last up to three months in the freezer. When ready to eat, let them thaw in the fridge overnight. These truffles last about one week in the fridge. If stored properly, they stay tasty and fresh. Just remember to check for any changes in smell or texture before eating. Enjoy them as a delightful treat throughout the holidays! Homemade gingerbread truffles last about one week in the fridge. Store them in an airtight container. This keeps them fresh and tasty. If you want to enjoy them longer, freezing can help. Just wrap them well and freeze for up to three months. Yes, you can make gingerbread truffles in advance. They taste even better after a day in the fridge. Give them time to chill and set, which helps the flavors blend well. Just make sure to store them properly so they stay fresh. For coating, both milk and dark chocolate work well. Milk chocolate adds a sweet touch, while dark chocolate gives a rich flavor. Choose what you love most. You can also mix different chocolates for a unique taste. Absolutely! Gingerbread truffles make great gifts. They look lovely and taste amazing. You can place them in a cute box or jar. Add a festive ribbon for a nice touch. Friends and family will love this sweet treat! In this article, we explored how to make gingerbread truffles. We covered essential ingredients and tips for choosing the best ones. I shared step-by-step instructions for preparing, shaping, and coating your truffles with chocolate. We discussed common mistakes and variations to fit different diets. Lastly, I provided storage tips to keep your treats fresh. Gingerbread truffles are fun to make and share. Enjoy your sweet treats and impress your friends!

Gingerbread Truffles Delightful Holiday Treats Recipe

- 1 cup unsalted butter, softened: This helps create a rich and creamy texture. - 1 cup powdered sugar: This adds sweetness and helps the cookies stay soft. - 1 teaspoon vanilla extract: Use pure vanilla for the best flavor. - 2 ½ cups all-purpose flour: The base of our cookie dough gives structure. - ¾ teaspoon baking powder: This helps the cookies rise and become fluffy. - ¼ teaspoon salt: A small amount enhances the overall taste. - 1 cup crushed candy canes (plus extra for garnish): These add a refreshing minty flavor and a festive touch. - 24 Hershey's Candy Cane Kisses, unwrapped: These melted kisses top the cookies for a sweet surprise. - I recommend using unsalted butter to control the saltiness in your cookies. - Choose fresh candy canes for the best crunch and flavor. - Feel free to crush the candy canes in a zip-top bag for less mess. - Always use room temperature butter for easy mixing. This ensures a smooth dough. With these ingredients, you're ready to create your festive treats! Enjoy the process and the delicious results. {{ingredient_image_2}} First, preheat your oven to 350°F (175°C). This step ensures even baking. Next, prepare your baking sheet by lining it with parchment paper. This will help prevent sticking. In a large mixing bowl, combine 1 cup of softened unsalted butter and 1 cup of powdered sugar. Beat this mixture on medium speed for about 2-3 minutes. You want it to be light and fluffy. This texture makes your cookies soft and nice. In a separate medium bowl, whisk together 2 ½ cups of all-purpose flour, ¾ teaspoon of baking powder, and ¼ teaspoon of salt. Mix these dry ingredients until they are evenly combined. Gradually add this dry mixture to your butter-sugar blend. Mix until just combined. Be careful not to overwork the dough. Now, gently fold in 1 cup of crushed candy canes. This will add a fun, festive flavor to your cookies. Make sure the candy canes are evenly distributed throughout the dough. Using a tablespoon or cookie scoop, portion out the dough. Roll it into balls and place them on the prepared baking sheet. Space the balls about 2 inches apart. This spacing allows for even baking. Bake your cookies in the preheated oven for 10-12 minutes. Look for the edges to turn a light golden color. This is a sign they are ready. After baking, let the cookies cool on the sheet for about 5 minutes. During this time, gently press a Hershey's Candy Cane Kiss into the center of each cookie. The heat will make the kiss melt slightly into the soft cookie. Transfer the cookies to a wire rack to cool completely. While they are still warm, sprinkle some additional crushed candy canes on top. This adds a nice festive touch. Enjoy these cookies with milk or your favorite holiday drink! To make sure your Candy Cane Kiss Cookies turn out great, follow these tips: - Prevent Spreading: Chill the dough for 30 minutes before baking. This helps keep the cookies thick and fluffy. - Ensure Fluffiness: Beat the butter and sugar well. This adds air to the mix, making your cookies soft and light. - Even Baking: Space the cookie balls about 2 inches apart. This allows hot air to circulate and bake them evenly. Decorating your cookies can be just as fun as baking them! - Garnishing with Crushed Candy Canes: While the cookies are warm, sprinkle some crushed candy canes on top. This adds a nice crunch and extra flavor. - Using Different Types of Kisses: Try using other flavors of Kisses, like milk chocolate or caramel. This gives a fun twist to your festive treats. Pro Tips Use Room Temperature Butter: Make sure your butter is softened to room temperature for better incorporation into the dough, which results in a lighter and fluffier cookie. Chill the Dough: If you have time, chilling the dough for at least 30 minutes can help the cookies maintain their shape, especially when adding the Candy Cane Kisses. Perfectly Press the Kisses: For a beautiful finish, press the Candy Cane Kisses into the cookies while they are still warm but not too hot, ensuring they melt just enough to adhere without becoming overly soft. Experiment with Flavors: Feel free to replace crushed candy canes with other festive ingredients like crushed peppermint or different flavored kisses for a unique twist on this classic recipe. {{image_4}} You can easily change the flavor of your Candy Cane Kiss Cookies. One fun way is to swap the vanilla extract with other flavor extracts. Try peppermint for a stronger minty flavor or almond for a nutty twist. Each option gives your cookies a unique taste that can surprise your friends and family. Another tasty variation is using white chocolate instead of Candy Cane Kisses. Melt white chocolate chips and drizzle them over the cookies. This adds a creamy sweetness that pairs well with the crunch of candy canes. You can also use other flavors of Kisses, like dark chocolate or caramel. Each type adds a distinct flavor and makes your cookies special. If you need gluten-free options, you can replace the all-purpose flour with a gluten-free blend. Look for a blend that includes xanthan gum for better texture. This way, everyone can enjoy your festive treats without worry. For vegan adaptations, substitute the unsalted butter with vegan butter or coconut oil. Use a flax egg instead of a regular egg by mixing one tablespoon of flaxseed meal with three tablespoons of water. This simple swap helps make your cookies vegan without losing their deliciousness. With these variations, you can create a Candy Cane Kiss Cookie that fits everyone's tastes and needs! To keep your Candy Cane Kiss Cookies fresh, store them in an airtight container. This helps prevent them from drying out. If you leave them at room temperature, they stay good for about a week. If you want to keep them for longer, place them in the fridge. They can last up to two weeks in the fridge. Just make sure to let them come back to room temperature before enjoying. For long-term storage, you can freeze these cookies. Place them in a freezer-safe bag or container. They can stay fresh for up to three months in the freezer. When you're ready to eat them, simply take out what you need and let them thaw at room temperature. When you're ready to serve these cookies, you may want them warm. To reheat, you can place them in the microwave for about 10-15 seconds. This will warm them up nicely without making them tough. If you've frozen the cookies, let them thaw first. After thawing, reheat them using the microwave or an oven set to 350°F (175°C) for about 5 minutes. This keeps them soft and tasty, just like when they were fresh. Enjoy these festive treats with a glass of milk for the best experience! Can I use different types of kisses? Yes, you can use different types of kisses. Try using milk chocolate or dark chocolate kisses. Each type will change the taste. You can also explore seasonal flavors, like pumpkin spice. This adds a fun twist to your cookies. How do I know when the cookies are done baking? You can tell the cookies are done when the edges turn light golden. Bake them for 10-12 minutes. If they look soft in the middle, that's okay. They will firm up as they cool. Can I add other mix-ins to the dough? Absolutely! You can add nuts, chocolate chips, or dried fruit. Just mix them in gently. This adds texture and flavor to your cookies. How can I make these cookies less sweet? To make the cookies less sweet, cut back on the powdered sugar. You can use half a cup instead of a full cup. Also, choose dark chocolate kisses for less sweetness. This guide shows you how to bake amazing Candy Cane Kiss cookies. You learned about every ingredient and crucial steps. I shared tips for perfecting your cookies and exciting variations. Remember, you can customize these cookies to fit your taste or diet. Store them properly for freshness and enjoy them warm. Baking is about joy, so have fun experimenting. Enjoy your sweet treats!

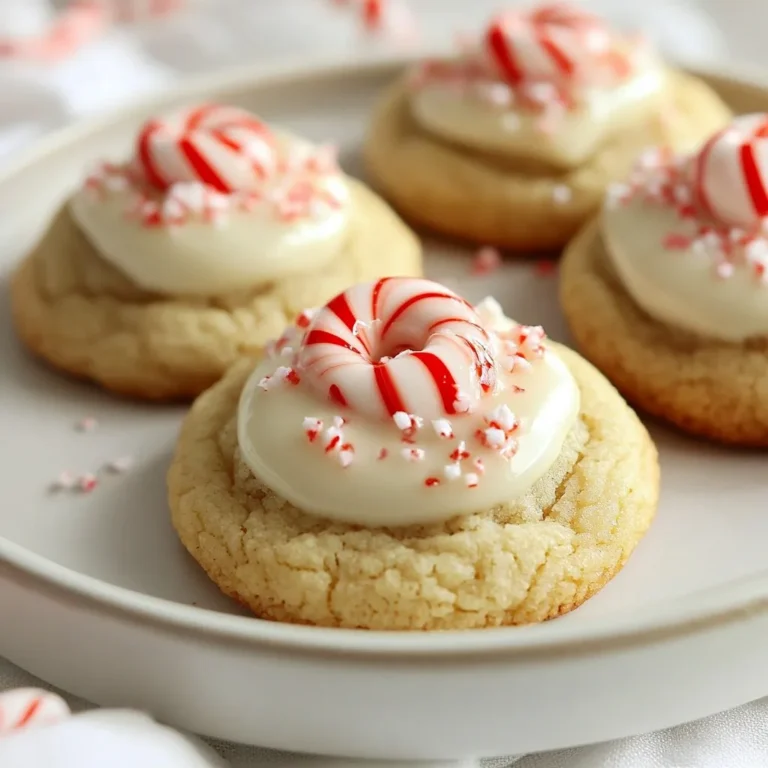
Candy Cane Kiss Cookies Festive and Fun Treats

For Marry Me Chicken Pasta, you need: - 2 boneless, skinless chicken breasts - 2 cups penne pasta - 1 tablespoon olive oil - 3 cloves garlic, minced - 1 cup heavy cream - 1 cup sun-dried tomatoes, finely chopped - 1 cup fresh baby spinach - 1/2 cup freshly grated Parmesan cheese - 1 teaspoon Italian seasoning - Salt and freshly ground black pepper to taste - Fresh basil leaves, for garnish These ingredients create a rich and flavorful dish. The chicken adds protein, while the pasta serves as a hearty base. The sun-dried tomatoes and spinach add color and nutrients. You also need some common pantry items: - Olive oil - Salt - Black pepper - Italian seasoning Having these staples on hand makes cooking easier. You can find them in most kitchens. They enhance the dish without extra fuss. To make the dish even better, consider these garnishes: - Fresh basil leaves - Extra grated Parmesan cheese - Crushed red pepper flakes (for heat) These add-ons can boost flavor and make your plate look stunning. Feel free to mix and match based on your taste. Enjoy getting creative with your Marry Me Chicken Pasta! {{ingredient_image_2}} First, grab a large pot. Fill it with water and add salt. Bring the water to a boil. Once it boils, add 2 cups of penne pasta. Cook the pasta as the package says, usually about 9 to 11 minutes. You want it al dente, which means it’s firm but cooked. When done, drain the pasta in a colander and set it aside. While the pasta cooks, take 2 boneless, skinless chicken breasts and season them. Use salt, black pepper, and 1 teaspoon of Italian seasoning. Rub this mixture on both sides of the chicken. Next, heat 1 tablespoon of olive oil in a large skillet over medium heat. Once the oil is hot, carefully add the chicken. Cook each side for about 6 to 7 minutes. You want the chicken to turn golden brown and fully cooked. Use a meat thermometer to check it reaches 165°F (75°C). After cooking, place the chicken on a cutting board. Let it rest for a few minutes before slicing it into strips. In the same skillet, add 3 cloves of minced garlic. Sauté it for about 30 seconds. Stir it often, but don’t let it brown. Carefully pour in 1 cup of heavy cream. Stir well to mix it with the garlic. Then add 1 cup of chopped sun-dried tomatoes and 1 cup of fresh baby spinach. Cook this mixture for about 3 to 4 minutes. Stir occasionally until the spinach wilts and the sauce thickens slightly. Once thickened, stir in 1/2 cup of grated Parmesan cheese. Mix until the cheese melts smoothly. Taste the sauce and add more salt or pepper if needed. Finally, add the sliced chicken and the drained penne pasta to the skillet. Toss everything gently until the pasta is well-coated in the creamy sauce. To cook chicken just right, start with good seasoning. Use salt, black pepper, and Italian seasoning. This makes the chicken tasty. Heat olive oil in a skillet over medium heat. Once hot, add the chicken breasts. Cook each side for about 6-7 minutes. They should turn golden brown. Use a meat thermometer to check if they are done. The chicken must reach 165°F (75°C). Once cooked, let it rest. This helps keep it juicy. To make a creamy sauce, use heavy cream. After cooking garlic in the same skillet, pour in the cream. Stir it well with the garlic. Add sun-dried tomatoes and spinach next. Cook this mix for about 3-4 minutes. Keep stirring until the spinach wilts. Then, add grated Parmesan cheese. This cheese will melt smoothly, making the sauce rich. If the sauce is too thick, add a little pasta water. This keeps it creamy and easy to coat the pasta. Serve your Marry Me Chicken Pasta hot. Garnish it with fresh basil leaves. This adds a nice touch and flavor. You can pair it with a simple salad for a fresh side. Garlic bread also goes well to soak up the sauce. Enjoy the dish with family or friends for a special meal. Each bite is sure to impress! Pro Tips Use Fresh Ingredients: For the best flavor, opt for fresh garlic and high-quality sun-dried tomatoes. Fresh ingredients make a noticeable difference in the final dish. Don’t Overcook the Chicken: To keep your chicken juicy, remove it from the skillet as soon as it reaches 165°F (75°C). Letting it rest before slicing will help retain its moisture. Customize the Sauce: Feel free to add other vegetables like bell peppers or mushrooms to the sauce for additional flavor and texture. Perfect Pasta Texture: Make sure to cook the penne al dente. It will continue to cook slightly when mixed with the sauce, so a firmer texture is ideal. {{image_4}} You can swap the chicken for many options. Try using turkey breast for a leaner choice. Pork chops also work well for a different flavor. If you want to go lighter, choose tofu. Slice it thin and season it like the chicken. Cook it the same way, and it will soak up all the great flavors. For a veggie delight, skip the meat. Use a mix of mushrooms for a hearty texture. Baby bellas or shiitakes add depth. You can also use chickpeas for protein. Cook them in the same way you would the chicken. The creamy sauce pairs perfectly with these options, making it rich and filling. You can add more colors and flavors using various vegetables. Try bell peppers for sweetness or zucchini for a fresh crunch. Broccoli or asparagus can add a nice bite. Just cook them in the sauce until tender. Toss them in the pasta at the end. This keeps your dish vibrant and tasty. To store leftovers, let the dish cool first. Place it in an airtight container. Keep it in the fridge for up to three days. This keeps the flavors fresh and safe. Reheat leftovers on the stove for best taste. Add a splash of cream if it looks dry. Stir gently over medium heat until warm. You can also use a microwave. Heat in short bursts, stirring in between. You can freeze Marry Me Chicken Pasta for longer storage. First, let it cool completely. Then, place it in a freezer-safe container. It will last for up to three months in the freezer. When ready to eat, thaw it in the fridge overnight before reheating. "Marry Me" Chicken Pasta is a fun name. It suggests that this dish is so good, it might win over someone’s heart. Many people find this dish full of rich flavors. The creamy sauce, chicken, and sun-dried tomatoes create a great mix. It’s perfect for a special dinner or a cozy night in. Yes, you can use different pasta shapes. While penne is great, you can try rotini, fusilli, or even spaghetti. Each pasta will change the texture but keep the taste. Just be sure to cook it according to the package directions. This keeps the pasta tender and ready to soak up the sauce. To make this dish healthier, you can use whole grain pasta. This adds fiber and makes the meal more filling. You can also use less heavy cream and replace it with low-fat milk or Greek yogurt. Adding more vegetables, like bell peppers or zucchini, boosts the nutrients. Finally, consider using less cheese or a lighter version. Marry Me Chicken Pasta is a blend of tasty flavors and easy steps. We explored key ingredients, handy cooking tips, and helpful storage methods. You can also adapt this dish to fit your needs with substitutions or vegetarian options. Remember, cooking is about having fun and experimenting. Enjoy every bite of this dish as you share it with loved ones. Your kitchen adventure with Marry Me Chicken Pasta will surely impress!

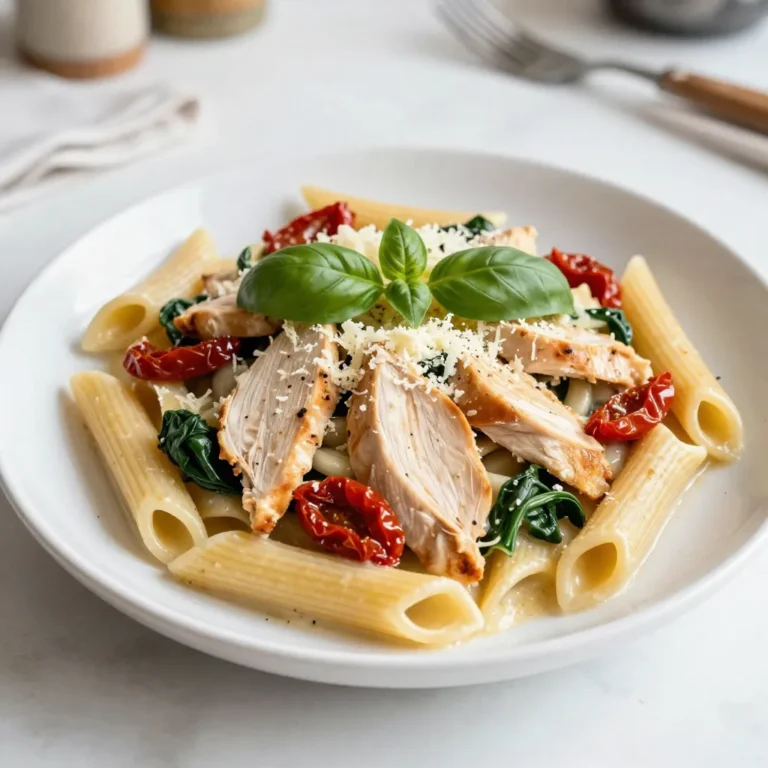
Marry Me Chicken Pasta Flavorful and Easy Recipe

- 1 pre-made pie crust (or homemade, if you prefer the personal touch) - 2 cups fresh spinach, chopped into small pieces - 1 cup ricotta cheese, room temperature - 1 cup shredded Gruyère cheese, plus extra for topping if desired - 3 large eggs, beaten - 1 cup milk, preferably whole for creaminess - 1/2 teaspoon garlic powder for flavor - 1/4 teaspoon ground nutmeg for warmth - Salt and pepper, to taste for seasoning - Fresh parsley, chopped, for garnish (optional) When I make a classic French quiche, I focus on fresh and simple ingredients. The main star is the pie crust. You can use a store-bought one or make your own. If you choose to make it, I love using flour, butter, and water for a flaky texture. Fresh spinach makes the quiche bright and healthy. I chop it into small pieces to blend well with the other ingredients. Ricotta cheese adds creaminess. I prefer it at room temperature for easy mixing. Gruyère cheese brings a nutty flavor that pairs well with the spinach. You can't forget the eggs and milk. They form the quiche's base. Eggs give it structure while milk adds richness. Whole milk is best for a creamy texture. For seasonings, I use garlic powder and nutmeg. They add depth to the flavor. Salt and pepper are essential for balance. Finally, I sometimes sprinkle fresh parsley on top for a pop of color and extra taste. These ingredients come together to create a savory delight that is hard to resist. {{ingredient_image_2}} - Preheat your oven to 375°F (190°C). This helps the crust bake evenly. - Place the pie crust in a 9-inch pie dish. Make sure it fits well. Crimp the edges for a nice look. - Prick the bottom of the crust with a fork. This lets steam escape while baking. - In a skillet over medium heat, add 2 cups of chopped spinach. Sauté for 2-3 minutes until it wilts. - In a large bowl, mix 1 cup of ricotta cheese, 1 cup of shredded Gruyère cheese, 3 beaten eggs, and 1 cup of milk. Whisk until smooth. - Add the sautéed spinach, 1/2 teaspoon of garlic powder, 1/4 teaspoon of ground nutmeg, and salt and pepper. Stir everything until well combined. - Carefully pour the filling into the prepared crust. Use a spatula to spread it evenly. - If you want, add a little extra Gruyère cheese on top for more flavor. - Place the quiche in the oven and bake for 30-35 minutes until the center is set. It should be lightly golden on top. - Ensuring a creamy texture For a creamy quiche, use whole milk and room-temperature ricotta. Mixing these well helps create a smooth blend. Be sure to whisk the eggs thoroughly, as they add richness. - Adjusting baking times for different ovens Ovens can vary in heat. Start checking your quiche at 30 minutes. If it's not set, add time in 5-minute increments. The top should look golden brown. - Cooling times for better slicing Allow the quiche to cool for about 10 minutes after baking. This helps it firm up, making it easier to slice. If you cut it too soon, it may fall apart. - Serving suggestions Serve slices on a rustic wooden board or a nice plate. This adds a homey touch. You can also cut them into smaller pieces for appetizers. - Pairing with salads or sides A light green salad pairs well with quiche. Use a simple vinaigrette for contrast. You can also serve it with fresh fruit for a sweet balance. - Using fresh herbs for garnish Fresh parsley adds color and flavor. Sprinkle chopped parsley on top of each slice before serving. Other herbs like chives or dill also work well. Pro Tips Use Fresh Spinach: Fresh spinach gives a vibrant flavor and better texture compared to frozen spinach. Always wash and chop it just before use for the best results. Let the Quiche Cool: Allow the quiche to cool for at least 10 minutes after baking. This helps it set and makes slicing easier without falling apart. Experiment with Cheeses: While Gruyère adds a wonderful flavor, feel free to mix in other cheeses like feta or cheddar for a unique twist on the classic recipe. Perfect Pairings: Serve your quiche with a light salad or a side of fruit for a refreshing contrast. A simple vinaigrette can enhance the overall flavor profile of your meal. {{image_4}} You can change up the classic quiche in fun ways. Here are some ideas: - Using different vegetables: Try mushrooms, leeks, or bell peppers. Each adds a new taste. Sauté them as you did with the spinach. - Cheese substitutions: Switch Gruyère for feta or cheddar. Feta gives a tangy kick, while cheddar offers a sharp flavor. - Adding proteins: Mix in diced ham or crispy bacon. They bring a hearty touch that many love. You can make quiche in different styles to fit your needs: - Crustless quiche option: Just skip the pie crust. Pour the filling directly into a greased dish. It’s lighter and gluten-free! - Mini quiche or tart variations: Use muffin tins for mini quiches. They’re perfect for brunch or snacks. Tart pans work great too for a fancy touch. - Freezer-friendly options: Bake and cool your quiche, then slice it. Wrap each slice in plastic. You can freeze them for easy meals later. Just reheat in the oven or microwave. To keep your quiche fresh, store it in the fridge. Place it in an airtight container. You can also cover it tightly with plastic wrap. This helps lock in moisture and flavor. Quiche can last up to three days in the fridge. If you want to keep it for a longer time, freeze it. To freeze quiche, let it cool completely first. Wrap each slice in plastic wrap, then place them in a freezer-safe bag. Label the bag with the date. You can freeze quiche for up to three months. Reheating quiche carefully is key to keeping its texture. The best method is using the oven. Preheat your oven to 350°F (175°C). Place the quiche on a baking sheet. Bake for about 15-20 minutes. This method warms it evenly without making it soggy. If you’re in a hurry, you can use the microwave. Heat it on medium power for about 1-2 minutes per slice. Check it often to avoid overcooking. Remember, reheating too fast can make it rubbery. Enjoy your quiche hot and delicious! French quiche comes from the region of Lorraine. It began as a simple dish made with bread dough. The first quiche used eggs and cream, cooked in the crust. Over time, people added different fillings. Today, quiche can have many flavors. It has become a popular dish worldwide. Yes, you can make quiche before serving. Prepare it a day in advance. Cover it and keep it in the fridge. You can bake it the next day. This saves time and is very convenient. Check the quiche after 30 minutes of baking. It should be set in the middle. A light golden color on top means it is ready. You can also insert a knife. If it comes out clean, the quiche is done. Quiche pairs well with a fresh salad. A green salad with vinaigrette adds a nice touch. You can also serve it with fruit. Slices of tomato or cucumber work well too. For a heartier meal, try serving it with soup. Yes, you can make a gluten-free quiche. Use a gluten-free pie crust instead. You can find these at stores or make your own. Just check the labels to ensure they are gluten-free. The filling remains the same. Enjoy your tasty dish! French quiche blends simple ingredients and steps into a delicious dish. We explored the key items like pie crust, fresh spinach, cheeses, and eggs. Then, I shared step-by-step instructions for perfecting your quiche. Tips and variations provided more options for flavor and styling. Finally, I offered storage tips to keep leftovers fresh. Enjoy making your quiche, and impress others with your kitchen skills. You now have the knowledge to create a delightful dish for any occasion.

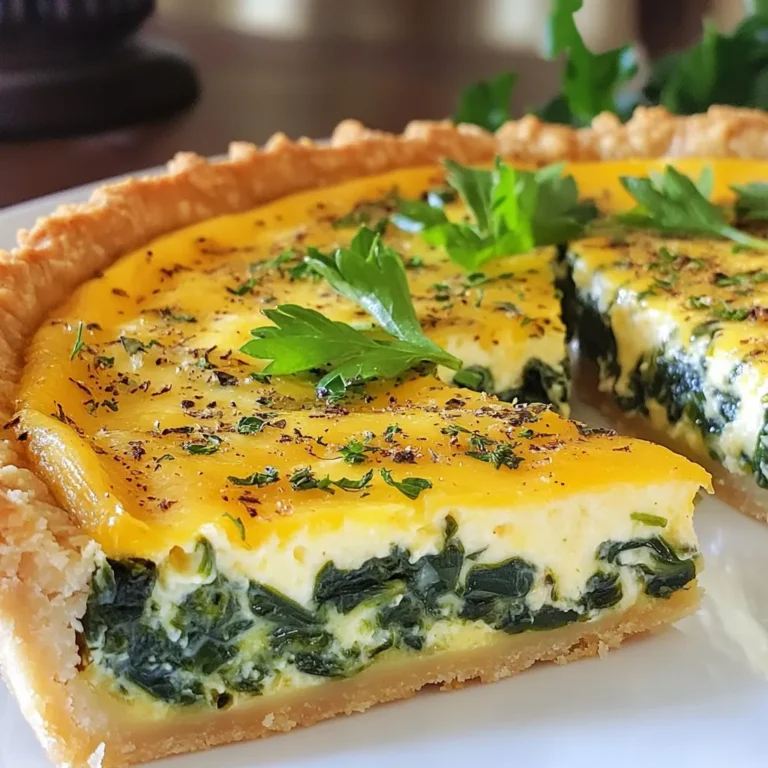
Classic French Quiche Irresistible Savory Delight

- 1 cup graham cracker crumbs - 1/4 cup unsalted butter, melted - 2 tablespoons granulated sugar - 16 oz cream cheese, softened - 1/2 cup granulated sugar (for filling) - 1 teaspoon pure vanilla extract - 2 large eggs, room temperature - 1/4 cup sour cream - Zest of 1 lemon (about 1 tablespoon) - 1/4 cup fresh blueberries (for topping) Using quality ingredients makes a big difference. Choose fresh cream cheese for a smooth texture. Look for unsalted butter to control the salt level. Fresh blueberries add a burst of flavor. Use real vanilla extract for the best taste. Always check the expiration dates on dairy products for freshness. If you need alternatives, here are some ideas: - For graham cracker crumbs, use crushed cookies or whole wheat crumbs. - If you want a dairy-free option, try vegan cream cheese. - You can swap sour cream with Greek yogurt for a tangy twist. - For a sweeter crust, you can add a bit more sugar to the graham cracker mix. These substitutions keep your mini cheesecakes tasty and fun! {{ingredient_image_2}} Start by preheating your oven to 325°F (160°C). This step ensures even baking. While the oven heats, prepare your muffin tin. You can line it with paper liners or lightly grease each cup. This helps prevent the cheesecakes from sticking later. In a medium bowl, mix the graham cracker crumbs, melted butter, and 2 tablespoons of granulated sugar. Stir well until the mixture looks like wet sand. Make sure all the crumbs get coated with butter. This mixture will form the base of your cheesecake. In a large bowl, use an electric mixer to beat the softened cream cheese. Beat it on medium speed for about 2-3 minutes until it’s smooth. Slowly add in 1/2 cup of granulated sugar. Mix until there are no lumps. This creates a creamy texture for your filling. Take about a tablespoon of the crust mixture. Press it firmly into the bottom of each muffin liner. This makes a solid crust. Then, carefully pour the cheesecake filling over the crusts. Fill each muffin liner about three-quarters full. This allows them to rise a bit while baking. Place the filled muffin tin in the preheated oven. Bake for 18-20 minutes. The centers should still be slightly jiggly, but the edges should be set. Once done, remove them from the oven and let them cool in the pan for 15 minutes. After cooling, gently transfer the cheesecakes to the fridge. Chill them for at least 2 hours. This helps them set and makes them taste better. To get a smooth batter, start with room-temperature cream cheese. Cold cream cheese won’t mix well. Beat it for 2-3 minutes. This breaks it down and makes it creamy. Add sugar slowly so it blends in nicely. Mix each egg one at a time. This helps avoid lumps. One common mistake is overmixing the batter. This can cause cracks in your cheesecakes. Mix just until combined. Another mistake is not letting the cheesecakes cool properly. Allow them to chill in the fridge for at least 2 hours. This helps them set and taste better. For a crunchy crust, make sure to use enough butter. The mixture should feel like wet sand. Press it firmly into the muffin cups. Bake for 5 minutes to set it. This gives you a sturdy base for your cheesecake. If it feels too soft, bake it a bit longer. Pro Tips Use Room Temperature Ingredients: Ensure your cream cheese and eggs are at room temperature before mixing. This helps achieve a smoother batter without lumps. Don’t Overbake: Keep an eye on the cheesecakes. They should be slightly jiggly in the center when you take them out of the oven, as they will continue to set while cooling. Chill Thoroughly: Allow the cheesecakes to chill in the refrigerator for at least 2 hours. This step is crucial for the texture and flavor to develop fully. Garnish Creatively: Experiment with different toppings like fresh berries, chocolate shavings, or a drizzle of caramel to elevate the presentation and taste. {{image_4}} You can change the flavor of your mini New York cheesecakes easily. For a chocolate twist, add melted chocolate to the filling. Use about 4 ounces of melted dark chocolate. Mix it in after the cream cheese blends with sugar. For a fall treat, try pumpkin. Add 1 cup of pumpkin puree and 1 teaspoon of pumpkin spice. This gives your cheesecake a warm and cozy flavor. Toppings add a fun touch to your cheesecakes. Fresh fruit works great. You can use strawberries, raspberries, or kiwi. A berry sauce is also a tasty option. Just blend fresh berries with some sugar, and drizzle it on top. Whipped cream is a classic choice too. It adds a light, airy feel to each bite. For a gourmet look, sprinkle some crushed nuts or chocolate shavings on top. You can make these mini cheesecakes fit your diet. For a gluten-free version, swap the graham cracker crumbs for gluten-free ones. You can use almond flour or gluten-free cookies for the crust. If you want a vegan option, substitute the cream cheese with cashew cream or a store-bought vegan cream cheese. Use flax eggs instead of regular eggs. This way, everyone can enjoy these delightful treats! To keep your mini New York cheesecakes fresh, store them in the fridge. Use an airtight container to prevent them from drying out. This helps keep their creamy texture intact. If you have not topped them yet, wait to add toppings until serving time. This keeps the flavors fresh and vibrant. You can freeze your mini cheesecakes for later enjoyment. First, let them cool completely. Then, wrap each cheesecake tightly in plastic wrap. After that, place them in a freezer-safe container. This protects them from freezer burn. Use them within three months for the best taste. In the fridge, your cheesecakes can last about five days. Keep them sealed to maintain their flavor. If frozen, as mentioned, they can last for up to three months. Always check for any signs of spoilage before eating. You can tell mini cheesecakes are done when the edges are set and the center is slightly jiggly. This means they will firm up as they cool. If they look too wobbly, they need more time in the oven. A good baking time is about 18 to 20 minutes at 325°F (160°C). Yes, you can use low-fat cream cheese. However, it may change the texture slightly. Low-fat cream cheese can make your cheesecake less rich and creamy. If you prefer a lighter cheesecake, this is a good option. The best way to serve mini cheesecakes is chilled. Top each one with fresh blueberries for added flavor. You can also sprinkle powdered sugar on top for a nice touch. Present them on a decorative platter for a fancy look. You can buy classic mini New York cheesecakes at many bakeries and grocery stores. Some stores may even sell them in the frozen section. If you want a fresh treat, local bakeries often make these delights daily. You’ve learned about the key ingredients and methods for making mini cheesecakes. I shared tips for smooth batter and a perfect crust. You can explore various flavors and toppings to fit your taste. Plus, I provided storage tips and answered common questions. With these insights, you can bake delicious mini cheesecakes with confidence. Enjoy the process, and don’t be afraid to get creative!

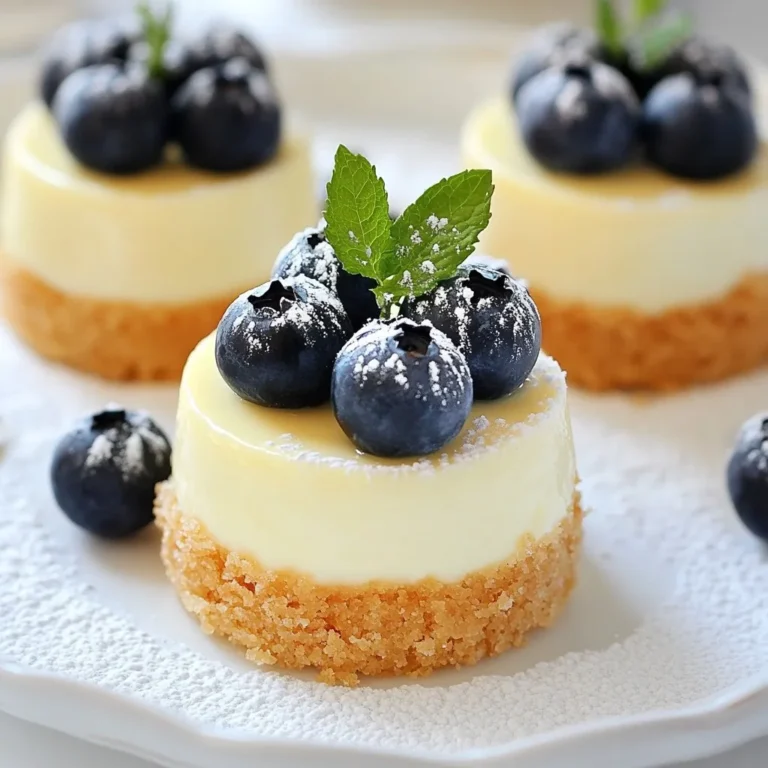
Classic Mini New York Cheesecakes Delightful Recipe

PREV 1 … 44 45 46 … 48 NEXT
easy meal kitchen

explore

DessertsDinnerAppetizersDrinks

Our Policies

  • Cookie Policy
  • Copyright Policy
  • Disclaimer
  • GDPR Policy
  • Terms Of Use
Back to Top
  • About
  • Contact Us
  • Privacy Policy
© 2026 easy meal kitchen