FREE DINNER EBOOK! Get your copy!
  • Cookie Policy
  • GDPR Policy
  • Disclaimer
  • Terms Of Use
  • Visit my other site: Fun Cookie Recipes
easy meal kitchen
  • Home
  • Dinner
  • Desserts
  • Drinks
  • Appetizers
  • Contact
  • About
  • Privacy Policy
  • Home
  • Dinner
  • Desserts
  • Drinks
  • Appetizers
  • Contact
  • About
  • Privacy Policy
  • Cookie Policy
  • GDPR Policy
  • Disclaimer
  • Terms Of Use
Visit my other site: Fun Cookie Recipes

HOME / CATEGORIES /

Latest

To make a creamy Nutella cheesecake, gather these ingredients: - 1 ½ cups graham cracker crumbs - ½ cup unsalted butter, melted - 1 cup Nutella - 16 oz cream cheese, softened to room temperature - ¾ cup powdered sugar - 1 teaspoon pure vanilla extract - 1 cup heavy whipping cream - ¼ cup chocolate shavings (for garnish, optional) - A pinch of flaky sea salt These ingredients come together to create a rich and smooth cheesecake. The graham cracker crumbs form a tasty crust, while the Nutella gives it a sweet and nutty flavor. Cream cheese adds creaminess, and whipped cream lightens the filling. You can add chocolate shavings or a sprinkle of sea salt for extra flair. This simple list makes it easy to prep and enjoy your cheesecake. {{ingredient_image_2}} To start, you need to mix graham cracker crumbs and melted butter. In a medium bowl, combine 1 ½ cups of crumbs with ½ cup of butter. Stir until the crumbs are fully coated. Next, take the mixture and press it firmly into the bottom of a 9-inch springform pan. Make sure it is even and compact. Set this crust aside to firm up while you prepare the filling. Now, let’s create the cheesecake filling. In a large bowl, beat 16 oz of softened cream cheese with an electric mixer. Mix until it is smooth and creamy. Gradually add in 1 cup of Nutella, ¾ cup of powdered sugar, and 1 teaspoon of vanilla extract. Keep mixing until there are no lumps left in the mixture. This should look rich and inviting. Next, we need to whip the cream. In a clean bowl, pour in 1 cup of heavy whipping cream. Use an electric mixer to whip it until stiff peaks form. This means the cream should hold its shape well. Be gentle when folding this whipped cream into the Nutella mixture. Use a spatula to combine them without deflating the whipped cream. This step is key to keeping the filling light and fluffy. Now, it’s time to combine everything. Carefully pour the Nutella filling over your prepared crust. Use your spatula to smooth the top. Make sure it is even and spread uniformly. Once done, cover the springform pan tightly with plastic wrap. Place it in the refrigerator to chill for at least 4 hours. For the best results, let it set overnight. This will help the cheesecake firm up and develop its flavors. To make a creamy Nutella cheesecake, start with room temperature ingredients. This helps the cream cheese mix well. Cold cream cheese can cause lumps in your filling. Let your cream cheese sit out for about 30 minutes before mixing. When you whip the cream, beat it until you see stiff peaks. This makes your cheesecake light and airy. After whipping the cream, fold it gently into the Nutella mixture. Use a spatula to carefully combine them. Do not stir too hard. You want to keep the air in the whipped cream. To make your cheesecake look even better, add garnishes. Sprinkling chocolate shavings on top adds a nice touch. You can also add a pinch of flaky sea salt. This enhances the chocolate flavor. Pairing your cheesecake with fresh fruit is a great idea. Strawberries or raspberries work well. They add a fresh taste that balances the rich cheesecake. Enjoy every bite of your creamy Nutella cheesecake! Pro Tips Use Room Temperature Ingredients: Make sure your cream cheese is at room temperature before mixing. This will help achieve a smooth and creamy texture without lumps. Chill Longer for Best Results: While 4 hours is the minimum chill time, letting the cheesecake set overnight will enhance its flavor and firmness. Quality Nutella Matters: Use a high-quality Nutella for the best flavor. The richer the chocolate hazelnut spread, the more decadent your cheesecake will be. Garnish with Care: When adding chocolate shavings and flaky sea salt, do so just before serving to keep the toppings fresh and visually appealing. {{image_4}} To make a no-bake version, use gelatin. You will need about 2 teaspoons of powdered gelatin. First, dissolve the gelatin in warm water. Mix it with the Nutella and cream cheese. Follow the same steps for mixing, but skip the baking. Chill it for at least 6 hours to set. This way, you get a creamy dessert without turning on the oven. For a vegan option, substitute dairy ingredients with plant-based ones. Use cashew cream instead of cream cheese. Soak raw cashews in water for a few hours, then blend until smooth. Replace heavy cream with coconut cream for a rich texture. Use maple syrup instead of powdered sugar for sweetness. This version keeps all the great Nutella flavor while being dairy-free. You can add espresso or coffee for a tasty twist. Mix in 1 tablespoon of instant coffee with your Nutella for a mocha delight. Swirling in caramel or peanut butter can also enhance the flavor. Just add these ingredients when mixing the filling. This adds depth and makes each bite even more exciting. To keep your Nutella cheesecake fresh, store it in the fridge. Place it in an airtight container. If you don’t have one, cover it tightly with plastic wrap. This helps prevent it from absorbing other flavors. The cheesecake stays good in the fridge for up to a week. Always use a clean knife when cutting pieces. This keeps the slices clean and pretty. You can also freeze cheesecake for later enjoyment. First, let it cool completely in the fridge. Then, wrap it well in plastic wrap. After that, place it in a freezer-safe bag. This way, it can stay fresh for up to three months. When you’re ready to enjoy it, take it out of the freezer. Place it in the fridge overnight to thaw. This method keeps the flavor and texture just right. Nutella cheesecake lasts about 5 to 7 days in the fridge. To keep it fresh, cover it tightly with plastic wrap or foil. You want to avoid air exposure, as it can alter the texture and flavor. Always check for any off smells or changes in texture before serving. Yes, you can use homemade Nutella for the recipe. Homemade Nutella can add a personal touch. Store-bought Nutella is smooth and easy to work with. If your homemade version is a bit thicker, you may need to adjust the mixing time. Make sure it blends well with the cream cheese for a creamy texture. Yes, you can make cheesecake without a springform pan. If you do not have one, use a regular cake pan or a pie dish. Line the bottom with parchment paper. This makes it easier to remove the cheesecake later. Just be careful when slicing, as it may not hold its shape as well. You now have a complete guide to making Nutella cheesecake. We covered every step, from preparing the crust to chilling the cheesecake. You learned tips for the best texture and ways to store it. Whether you want a classic, vegan, or no-bake version, there’s something for everyone. Enjoy sharing this yummy dessert, experimenting with flavors, and impressing your friends. Trust me, this cheesecake will be a hit every time you serve it!

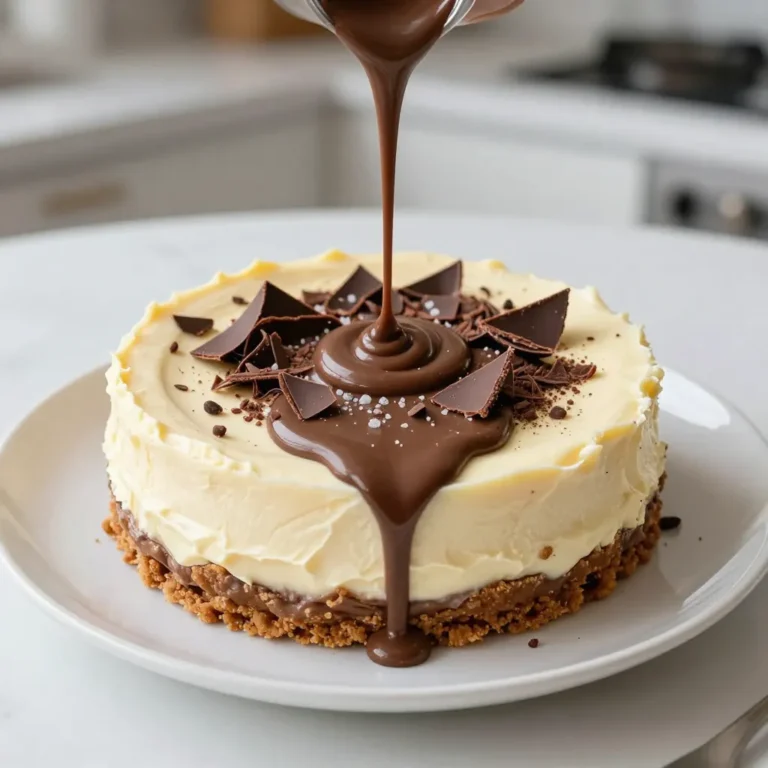
Creamy Nutella Cheesecake Delightful and Easy Recipe

- 1 cup strong brewed coffee or 1-2 shots of espresso - 1 cup milk (your choice: dairy, almond, oat, etc.) - 2 tablespoons unsweetened cocoa powder - 2 tablespoons granulated sugar (adjust to taste) - 1/2 teaspoon pure peppermint extract I love the strong brewed coffee or espresso in this drink. It gives the latte a rich base. You can choose any milk you like. Dairy, almond, or oat milk all work great. Unsweetened cocoa powder adds a deep chocolate flavor. Adjust the sugar based on how sweet you want your drink. The peppermint extract brings in that holiday cheer. - Whipped cream - Crushed peppermint candies - Optional: Chocolate shavings Toppings make this drink shine. Whipped cream adds a fluffy texture. Crushed peppermint candies give a nice crunch and extra flavor. If you want, add chocolate shavings for a sweet touch. These little details turn a simple drink into a festive treat. Enjoy making your Peppermint Mocha Latte just the way you like it! {{ingredient_image_2}} To start, you can brew strong coffee or make espresso. Use a coffee maker or a French press for coffee. For espresso, a machine or stovetop pot works well. The goal is to have a robust base for your latte. Use fresh coffee beans for the best flavor. If using ground coffee, choose a medium to fine grind. Brew about 1 cup of coffee or pull 1-2 shots of espresso. Pour it into a large coffee mug and set it aside while you prepare the cocoa milk. In a small saucepan, pour 1 cup of your choice of milk. You can use dairy milk, almond, or oat milk. Heat the milk over medium heat, but don’t let it boil. Add 2 tablespoons of unsweetened cocoa powder and 2 tablespoons of granulated sugar to the milk. Use a whisk to mix well. Keep stirring until the cocoa and sugar dissolve. This creates a smooth and creamy chocolate base. Once hot, take it off the heat and stir in 1/2 teaspoon of pure peppermint extract. This will give your drink a fresh, minty flavor. Now it’s time to layer your drink! Pour the peppermint cocoa milk gently over your brewed coffee or espresso. This gives a nice layered look. Top it off with a generous swirl of whipped cream. This adds a festive touch to your drink. Then, sprinkle crushed peppermint candies on top for crunch. If you want an extra special treat, add some chocolate shavings as well. Serve your Peppermint Mocha Latte warm and enjoy the cozy flavors! You can change the sugar level to fit your taste. If you want it sweeter, add more sugar. Start with the 2 tablespoons from the recipe. Taste it after mixing and adjust as needed. You can also try honey or maple syrup for a unique touch. These options can add a different flavor too. Want a richer taste? Try adding a touch of vanilla extract. Just 1/4 teaspoon can elevate your latte. You might also use dark chocolate instead of cocoa powder. This can make your drink even more decadent. Another option is to add a splash of flavored syrup. Peppermint or mocha syrups work well and can boost the flavor. A pretty drink makes it more special. Use a clear glass to show off the layers. When you add whipped cream, pile it high for fun. Sprinkling crushed peppermint candies on top adds color and crunch. If you want to impress, add chocolate shavings for a gourmet touch. You can even serve it with a festive straw or a cute stirrer. Pro Tips Use Fresh Coffee: For the best flavor, always use freshly brewed coffee or espresso. The aroma and taste will significantly enhance your latte experience. Experiment with Milk: Try different types of milk to find your perfect match. Almond, oat, or even coconut milk can add unique flavors to your peppermint mocha. Control the Sweetness: Adjust the sugar to your preference. Start with the recommended amount and add more if you like it sweeter. Garnish Creatively: Add a personal touch with various toppings like chocolate shavings, caramel drizzle, or even a sprinkle of cinnamon for an extra festive flair. {{image_4}} You can make a dairy-free Peppermint Mocha Latte. Use non-dairy milk like almond, oat, or coconut milk. Each type gives a unique taste. Almond milk adds a nutty flavor. Oat milk makes it creamy. Coconut milk brings a tropical twist. Simply replace regular milk with your choice. You can enhance your latte with flavors. Try adding vanilla extract for a warm touch. A splash of chocolate syrup gives a richer flavor. Mix in one or both for something special. These small changes can change your drink's whole vibe. Want it cold? Make an iced version! Start by brewing your coffee or espresso. Let it cool completely. In a glass, add ice cubes. Pour in the cooled coffee. Top it with your peppermint cocoa milk mixture. Finish with whipped cream and crushed candies. This will keep you refreshed while enjoying holiday flavors! To store the cocoa mixture and peppermint extract, follow these steps: - Cocoa Mixture: Pour any leftover cocoa mixture into an airtight container. Store it in the fridge for up to five days. When you want to use it, gently reheat it on the stove or in the microwave. Stir well before using. - Peppermint Extract: Keep your peppermint extract in a cool, dark place. It can last for a long time if stored properly. Always make sure the cap is tightly closed. When it comes to reheating your latte ingredients, here’s what I recommend: - Reheating the Cocoa Mixture: Use low heat on the stove. Stir constantly to avoid burning. If using a microwave, heat in short bursts, stirring in between. - Storing Prepared Latte: If you have leftover latte, pour it into a container with a lid. Store it in the fridge for up to two days. To enjoy it later, reheat gently. Stir well to mix the ingredients again before serving. For the best flavor, I recommend using strong brewed coffee or espresso. Espresso gives a rich, bold taste that pairs well with the sweet chocolate and mint. If you choose brewed coffee, make it strong to balance the milk and cocoa. You can use any coffee beans, but look for a medium to dark roast for a deeper flavor. Freshly ground coffee enhances the aroma and taste. Yes, you can make this latte sugar-free! Use sugar substitutes like stevia or monk fruit. These options keep the sweetness without the carbs. However, remember that some sugar substitutes may alter the flavor. Start with a small amount and adjust to your taste. You can also add pure cocoa for a richer flavor without sugar. To make a large batch, simply scale the recipe. For every four servings, brew 4 cups of strong coffee or 8 shots of espresso. Use 4 cups of milk, 8 tablespoons of cocoa powder, and adjust the sugar and peppermint extract to taste. Heat the milk mixture in a larger pot. Serve in individual mugs and top with whipped cream and peppermint candies for a festive touch. In this blog post, we explored how to make a delicious Peppermint Mocha Latte. We covered key ingredients, step-by-step brewing, and tips for customization. You learned how to mix strong coffee with cocoa and peppermint, and we shared variations like dairy-free options and iced lattes. Remember, don’t fear adjusting sweetness and flavors to suit your taste. Get creative with your toppings and enjoy this treat. Making this latte is fun and satisfying, perfect for cozy moments.

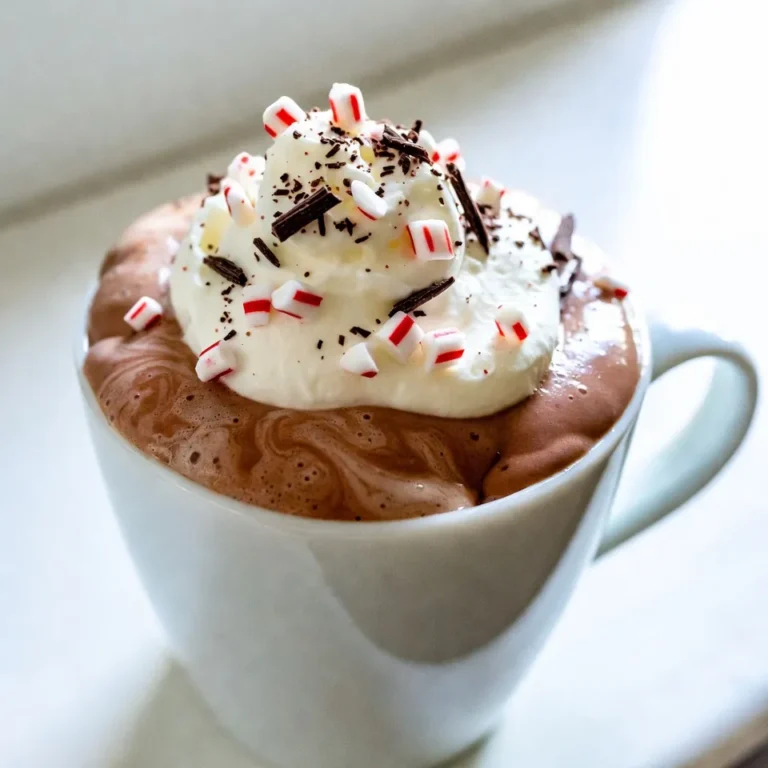
Peppermint Mocha Latte Rich and Smooth Holiday Drink

- 1 ½ cups chocolate cookie crumbs - ¼ cup unsalted butter, melted - 2 tablespoons granulated sugar - 16 oz cream cheese, softened - 1 cup granulated sugar - 3 large eggs, at room temperature - 1 teaspoon pure vanilla extract - Zest of 1 large orange - ½ cup freshly squeezed orange juice - 1 cup semi-sweet chocolate chips, melted - 1 cup heavy whipping cream, chilled - 2 tablespoons powdered sugar - Orange zest, for garnish - Chocolate shavings, for garnish When you make this cheesecake, use top-quality ingredients. The crust needs chocolate cookie crumbs. You can use Oreos or any chocolate cookies you like. The butter should be unsalted and melted. This gives richness to the crust. For the filling, choose full-fat cream cheese. This gives your cheesecake a creamy texture. The eggs should be at room temperature. This helps them mix better. Use pure vanilla extract for the best flavor. The zest of one large orange adds a fresh taste to the filling. Use fresh orange juice for a bright flavor. Melt semi-sweet chocolate chips before you mix them in. This creates a smooth, rich filling. For the topping, chill the heavy whipping cream. This helps it whip up nicely. Powdered sugar makes the topping sweet and light. Finally, add some orange zest and chocolate shavings for a pretty finish. Gather these ingredients, and get ready to create a decadent treat! {{ingredient_image_2}} To start, you need to mix the crust. In a bowl, combine these ingredients: - 1 ½ cups chocolate cookie crumbs - ¼ cup unsalted butter, melted - 2 tablespoons granulated sugar Mix them well. The mixture should look like wet sand. Next, press this mixture firmly into the bottom of a springform pan. Make sure it covers the base evenly. Set it aside to harden. Now, let’s make the filling. In a large bowl, beat together: - 16 oz cream cheese, softened - 1 cup granulated sugar Use an electric mixer. It should be smooth with no lumps. Then, add the eggs one at a time. Mix on low speed after each one. This helps keep the cheesecake smooth and prevents cracking. Next, we add flavor. Stir in: - 1 teaspoon pure vanilla extract - Zest of 1 large orange - ½ cup freshly squeezed orange juice Then, fold in 1 cup of melted semi-sweet chocolate. Mix until smooth. Pour this filling over your crust. Bake at 325°F for about 50-60 minutes. The edges should be set, but the center should jiggle a bit. After baking, turn off the oven. Crack the door open slightly. Let the cheesecake cool there for about 1 hour. After that, refrigerate it for at least 4 hours. This step is key for the best flavor and texture. For the topping, whip together: - 1 cup heavy whipping cream, chilled - 2 tablespoons powdered sugar Whip until soft peaks form. Once the cheesecake has cooled, spread the whipped cream on top. Use a spatula for an even layer. For a nice touch, garnish with orange zest and chocolate shavings. This makes it look pretty and tasty. Now, carefully run a knife around the edge of the pan. Remove the sides and slice the cheesecake. Serve it up and enjoy every bite! How to avoid cracks in cheesecake To avoid cracks, mix your filling gently. Overmixing introduces air, leading to cracks. Always beat in eggs one at a time. Mix on low speed until just combined. This keeps the texture smooth and creamy. Importance of room temperature ingredients Using room temperature ingredients is key. When cream cheese is cold, it clumps. Let eggs and cream cheese sit out for about 30 minutes before mixing. This ensures a smooth filling and helps your cheesecake bake evenly. Drizzling chocolate sauce for serving Drizzling chocolate sauce adds a fun touch. Use a spoon to drizzle it over each slice. This makes your cheesecake look fancy and inviting. It also enhances the chocolate flavor in each bite. Using fresh orange segments as garnish Fresh orange segments bring color to your dessert. They add a burst of citrus flavor, balancing the rich cheesecake. Place a few segments on each plate for a bright, appealing look. Overmixing the filling Be careful not to overmix your filling. It can lead to cracks when baking. Mix just until smooth and creamy. This keeps your cheesecake perfect and beautiful. Not cooling cheesecake properly Cooling is crucial for a perfect cheesecake. After baking, let it cool in the oven with the door slightly open. This prevents sudden temperature changes, which can crack the cheesecake. Refrigerate it for at least four hours to set properly. Pro Tips Use Room Temperature Ingredients: Allow your cream cheese and eggs to reach room temperature before mixing. This helps create a smoother batter and ensures even baking. Don’t Overmix: When adding the eggs, mix only until combined. Overmixing can incorporate too much air, leading to cracks in your cheesecake. Cooling is Key: Letting the cheesecake cool gradually in the oven helps prevent cracking. Once cool, refrigerate to enhance the flavors and texture. Garnish for Elegance: Use fresh orange zest and chocolate shavings as a topping for a beautiful presentation that complements the flavors of your cheesecake. {{image_4}} You can make a no-bake version of this cheesecake. To do this, use a few simple swaps. Instead of baking, chill the cheesecake to set it. - Crust: Use the same chocolate cookie crumbs. - Filling: Replace the eggs with 1 cup of whipped cream cheese. This keeps the filling rich without baking. - Setting: Pour the filling over the crust and chill for at least 4 hours. This method is quick and still delicious. You’ll love the creamy texture! You can mix up the flavors in this cheesecake. Besides orange, other citrus fruits work great. Try lemon or lime for a fresh twist. - Add zest: Mix in lemon or lime zest with the orange for a bright taste. - Chocolate liqueur: For a rich flavor, add 2 tablespoons of chocolate liqueur to the filling. This adds a deeper chocolate taste and a hint of elegance. Feel free to experiment. Your taste buds will thank you! If you have dietary needs, this cheesecake can adapt easily. You can make it gluten-free or dairy-free with some swaps. - Gluten-free crust: Use gluten-free chocolate cookies instead of regular ones. This keeps the crust tasty without gluten. - Dairy-free substitutes: Replace cream cheese with a dairy-free cream cheese option. Use coconut cream for the topping instead of heavy cream. These changes make the cheesecake enjoyable for everyone. You don’t lose flavor with these swaps! To keep your chocolate orange cheesecake fresh, refrigerate it right away. Cover it with plastic wrap or use an airtight container. This helps to keep out air and moisture. If you plan to store it for more than a few days, freezing is a great option. For freezing, wrap the cheesecake tightly in plastic wrap. Then, cover it with aluminum foil. This double layer protects your cheesecake from freezer burn. You can freeze it for up to three months. Just remember to label it with the date! Chocolate orange cheesecake lasts about five days in the fridge. After that, it might start to lose its freshness. If you see any changes in color or smell, it may be spoiled. Any signs of mold mean it’s time to toss it. When you’re ready to enjoy stored cheesecake, refresh it by letting it sit at room temperature for about 30 minutes. This helps bring back its creamy texture. If you froze it, thaw the cheesecake in the fridge overnight. This slow thawing keeps it from getting too watery. After thawing, check the texture and flavor. If needed, top it with fresh whipped cream or more chocolate shavings to make it look fresh and tasty. Yes, you can use dark chocolate or semi-sweet chocolate. Dark chocolate gives a rich taste. It has a stronger flavor than semi-sweet chocolate. If you choose dark chocolate, you may want to reduce the sugar a bit. Semi-sweet chocolate is a great choice for a balanced flavor. It also helps to keep the cheesecake sweet and creamy. I often alternate between both types when I make this dessert. For a lighter topping, you can use coconut cream or Greek yogurt. Coconut cream is rich and adds a nice flavor. Just chill it before whipping. Greek yogurt is lower in fat and adds tang. You can also use whipped topping from a store. It’s easy to use and saves time. I recommend trying these options to find your favorite. Look for set edges and a slightly jiggly center. The edges should appear firm. The middle will still wiggle a bit when you gently move the pan. This means it will be creamy when cooled. If the cheesecake looks too firm, it may overbake. I always check it a few minutes early to make sure it’s perfect! You now know how to make a delicious chocolate orange cheesecake. We covered the ingredients needed for the crust, filling, and toppings. I outlined step-by-step instructions to guide you through baking and cooling. Remember to avoid common mistakes and try out different variations. Proper storage will keep your cheesecake fresh. Enjoy making this treat for yourself or loved ones. I hope you dive in and create a mouth-watering dessert soon!

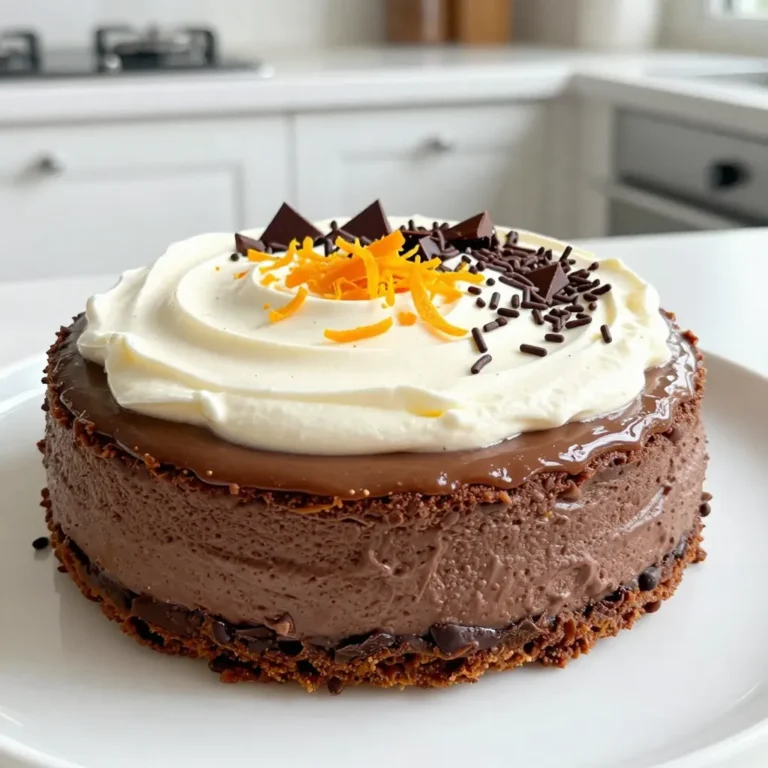
Chocolate Orange Cheesecake Decadent Easy Delight

Fresh cranberries are the star of this dish. They are tart and juicy. You need 12 ounces for the perfect balance. Look for bright red berries that feel firm. Discard any that are soft or blemished. You will use 1 cup of sparkling apple cider. It adds a fun fizz and sweetness to the sauce. Choose a brand that you enjoy drinking. The flavor should be crisp and refreshing, enhancing the cranberries. For a tasty twist, gather these flavorings: - 1 cup granulated sugar - 1 tablespoon fresh ginger, finely grated - 1/2 teaspoon ground cinnamon - Pinch of sea salt - Zest of 1 orange - 1/4 cup chopped pecans (optional) The sugar balances the tartness of the cranberries. Fresh ginger brings warmth and spice. Ground cinnamon adds warmth and depth. A pinch of sea salt brightens all the flavors. Orange zest gives a fresh, citrusy kick. If you like crunch, add chopped pecans. They add a nice texture contrast. {{ingredient_image_2}} Start by rinsing the fresh cranberries under cold water. You want to remove any dirt or stems. Discard any berries that look bad. This step ensures you use only the best cranberries for your sauce. Next, grab a medium saucepan. Combine the rinsed cranberries, sparkling apple cider, and granulated sugar. Stir gently to mix everything well. Then, add the freshly grated ginger, ground cinnamon, and a pinch of sea salt. This mix will create a deep and rich flavor. Turn the heat to medium and bring the mixture to a gentle boil. Stir occasionally to keep it from sticking. As the heat rises, watch for the cranberries to pop open. This usually takes about 10-15 minutes. Lower the heat once it boils. The sauce will start to thicken as you cook it. When the sauce thickens and most berries burst, take it off the heat. Add the zest of one orange for a bright flavor. If you want extra crunch, fold in some chopped pecans. Let the sauce cool to room temperature before putting it into a serving dish or jar. For the best taste, refrigerate the sauce for at least 1-2 hours. If you like it warm, feel free to serve it right away. Enjoy the blend of flavors in your sparkling ginger cranberry sauce! When picking cranberries, look for bright red berries. They should be firm and plump. Avoid any soft or blemished ones. Fresh cranberries give the best taste and texture. You can find them in stores during the fall. If you can't find fresh ones, frozen cranberries work too, but fresh is always best. To make your sauce special, think about adding different flavors. A splash of vanilla extract adds warmth. A hint of nutmeg can give a festive feel. You might also try a touch of maple syrup instead of sugar. This can make the sauce richer. Adding a bit of chopped ginger gives a nice kick, too. Feel free to experiment to find your favorite blend. Serving your sauce well can impress your guests. Use a pretty bowl to hold the sauce. Top it with a sprig of fresh rosemary for color. A few whole cranberries on top look nice, too. You can also serve it with a side of crackers or bread for a tasty pairing. Make sure it stands out on your table! Pro Tips Quality Ingredients: Use fresh, high-quality cranberries for the best flavor and texture in your sauce. Adjusting Sweetness: Feel free to adjust the amount of sugar depending on your taste preference and the tartness of the cranberries. Flavor Depth: For a more complex flavor, consider adding a splash of vanilla extract or a few whole cloves to the simmering mixture. Storage Tips: This sauce can be made ahead of time and stored in the refrigerator for up to a week, making it perfect for holiday meal prep. {{image_4}} You can swap granulated sugar for other sweeteners. Honey or maple syrup works well. These options add a unique flavor twist. Each sweetener brings its own taste and depth. You might also consider using stevia or agave for a lower-calorie option. Adjust the amount based on your taste. Want to spice things up? Add a pinch of cayenne pepper or red pepper flakes. This will give your sauce a nice kick. You can also mix in some freshly grated nutmeg for warmth. A dash of cardamom can add an exotic flair. Be cautious with spice amounts; start small and taste as you go. If you need a nut-free version, simply leave out the pecans. You can still enjoy the sauce's great texture and flavor. Consider adding sunflower seeds for a bit of crunch. They are a great nut alternative and add a nice twist. Enjoy your sauce without worry! To keep your Sparkling Ginger Cranberry Sauce fresh, store it in the fridge. Use an airtight container. It lasts for up to a week. The flavors will deepen as it sits. Chill the sauce for at least 1-2 hours before serving. This helps the taste mix well. You can freeze this sauce if you have leftovers. Pour it into a freezer-safe container. Leave some space at the top for expansion. It can last for about three months in the freezer. When ready to use, thaw it in the fridge overnight. Stir well before serving. Serve Sparkling Ginger Cranberry Sauce with turkey or ham. It also pairs well with cheese. For a fun twist, use it on pancakes or waffles. You can even mix it into yogurt for a tasty snack. Garnish with fresh herbs or whole cranberries for a festive look. Yes, you can use frozen cranberries. Just make sure to thaw them first. Frozen cranberries may not pop as well as fresh ones, but they will still taste great in the sauce. You might need to adjust the cooking time slightly. Keep an eye on the mixture and stir often to prevent sticking. You can make this sauce up to three days in advance. Just store it in an airtight jar in the fridge. The flavors will deepen and improve over time, making it even more delicious. If you want to serve it warm, gently heat it on the stove before serving. Sparkling Ginger Cranberry Sauce is perfect for many occasions. Serve it at Thanksgiving, Christmas, or any festive gathering. It pairs well with roasted meats and adds a vibrant touch to your table. You can also enjoy it with breakfast, on toast, or as a topping for yogurt. This blog post covered every detail for making a tasty Sparkling Ginger Cranberry Sauce. We explored the fresh ingredients, step-by-step instructions, and helpful tips. You learned how to prepare, cook, and present your sauce well. Remember, you can swap sweeteners and add spices for fun twists. Store your sauce with care to keep it fresh. This recipe shines at gatherings or holiday meals. Enjoy creating and sharing this delicious dish!

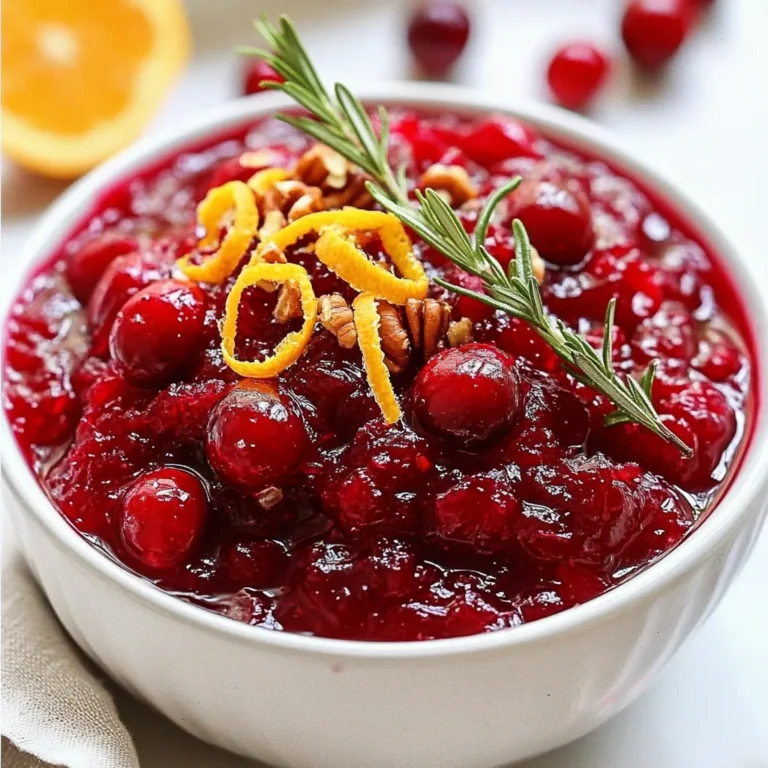
Sparkling Ginger Cranberry Sauce Festive and Flavorful

- 1 package (8 oz) cream cheese, softened - 1 cup powdered sugar, sifted - 1 cup heavy cream, chilled - 1 teaspoon pure vanilla extract - 1 cup chocolate pudding These main ingredients form the base of our Baileys Chocolate Cheesecake Trifle. Cream cheese adds richness. Powdered sugar gives sweetness. Heavy cream brings fluffiness. Vanilla extract enhances flavor. Chocolate pudding adds depth. - 1 cup crushed chocolate cookies (like Oreos) - 1/2 cup grated dark chocolate (for garnish) - Fresh berries (raspberries or strawberries) - Fresh mint leaves (for garnish) These extra items make your trifle special. The crushed cookies provide crunch. Grated chocolate adds a touch of elegance. Fresh berries add color and freshness. Mint leaves brighten the dish. - Recommended brands: For cream cheese, I like Philadelphia. Use Domino for powdered sugar. For heavy cream, try Land O'Lakes. Jell-O makes great chocolate pudding. - Potential substitutes: If you're dairy-free, use vegan cream cheese. For gluten-free, use gluten-free cookies. You can also swap heavy cream for coconut cream for a lighter option. By knowing these ingredients, you can create a delicious trifle that impresses everyone. {{ingredient_image_2}} To make the cream cheese filling, start with your softened cream cheese. Use an electric mixer to beat it. Mix on medium speed until smooth and creamy. You should have no lumps. Next, gradually add in the sifted powdered sugar. Keep mixing until it is all mixed in well. The filling should be smooth and sweet. This step is key to your cheesecake's rich flavor. Now, grab a separate bowl for the heavy cream. Make sure it is chilled well. Add pure vanilla extract to the cream. Use a hand mixer to whip it until you see soft peaks form. This means the cream is fluffy, but be careful not to overbeat. Once you have soft peaks, gently fold the whipped cream into the cream cheese mixture. Use a spatula for this. Mix slowly to keep it light and airy. This will give your filling a nice, fluffy texture. For the fun part, start layering in your trifle dish. Begin with a layer of crushed chocolate cookies at the bottom. This will be your cookie base. Next, spoon a layer of chocolate pudding over the cookie layer. Spread it evenly so it covers all the cookies. Then, add a layer of your cheesecake filling. Smooth it out for a nice look. Keep repeating the layers, alternating between cookies, pudding, and filling. Finish with the cheesecake layer on top. Once done, cover the dish with plastic wrap and refrigerate it for at least 2 hours. This helps all the flavors mix and the trifle firm up. You can prepare the Baileys chocolate cheesecake trifle a day in advance. This gives the flavors time to marry. To do this, layer your trifle as the recipe states. After layering, cover it with plastic wrap. Chill it in the fridge overnight. This helps the trifle taste even better. For a beautiful display, use clear glass cups or a trifle bowl. This highlights the lovely layers. You can top the trifle with fresh berries or mint leaves. These add color and a fresh touch. Pair the trifle with a cup of coffee or a glass of milk for a treat. You can boost the flavor by adding a splash of flavored liqueur. Try coffee or hazelnut liqueur for a twist. Adjust the sweetness by adding more powdered sugar if needed. Taste as you go to find the perfect balance. Pro Tips Use Room Temperature Ingredients: Allow your cream cheese to soften completely at room temperature for a smoother cheesecake filling. This helps to avoid lumps and ensures even mixing with the powdered sugar. Chill the Whipped Cream: Always start with chilled heavy cream for whipping. This helps achieve better volume and stability in your whipped cream, which is crucial for maintaining the lightness of the cheesecake filling. Layering Technique: When layering, make sure each layer is even and spread out gently. This ensures a beautiful presentation and allows each flavor to shine through without overwhelming the others. Garnishing for Appeal: Use fresh berries and mint leaves not just for flavor but also for visual appeal. They add a pop of color and freshness that enhances the overall dessert experience. {{image_4}} You can change the flavor of your Baileys chocolate cheesecake trifle in fun ways. Try using different types of pudding. Instead of chocolate pudding, you might enjoy vanilla or caramel pudding. Each choice adds a new twist to the dish. You can also switch up the cheesecake flavor. Use flavored cream cheese, like strawberry or coffee, for a tasty surprise. These small changes can create a unique dessert experience. If you want a lighter version, there are easy swaps. Use low-fat cream cheese and sugar-free pudding. This will cut calories while still keeping the flavor. You won't miss out on the creaminess you love. For those seeking vegan options, try using plant-based cream cheese and coconut cream instead of heavy cream. This way, everyone can enjoy the treat without dairy. You can also find vegan pudding mixes for added variety. Make your trifle fit the season with themed versions. For holidays, add festive colors and flavors. Use peppermint extract during winter or pumpkin spice in fall. These touches can make your dessert even more special. You can also add seasonal fruits for freshness. In summer, layer in fresh strawberries or raspberries for a bright touch. In winter, try using poached pears or spiced apples for a cozy feel. Each variation will keep your Baileys chocolate cheesecake trifle exciting and fun! To store your Baileys chocolate cheesecake trifle, first, cover it tightly with plastic wrap. This helps keep the trifle fresh and prevents it from absorbing any odors in the fridge. The trifle stays good for up to three days. Keep an eye on the layers; they should stay beautiful and intact. If you want to freeze the trifle, I suggest freezing the layers separately. You can freeze the cheesecake filling and the chocolate pudding in airtight containers. The crushed cookies should stay at room temperature. When you are ready to enjoy it, take the layers out of the freezer. Let them thaw in the fridge overnight. Once thawed, layer them again and serve right away. Check your trifle for any signs of spoilage. Look for changes in smell or texture. If it smells sour or has liquid pooling at the bottom, it's best to toss it. Fresh berries can spoil quickly, so remove them if you see mold. Always trust your senses; when in doubt, throw it out! Yes, you can make this trifle gluten-free. Use gluten-free chocolate cookies. Brands like gluten-free Oreos or chocolate wafer cookies work well. Just crush them like regular cookies. This keeps the delicious layers intact. For the best flavor, chill the trifle for at least 2 hours. This helps the layers set and the flavors blend. If you can, chill it overnight. It will taste even better! Absolutely! Making homemade chocolate pudding is easy. Just cook cocoa powder, sugar, milk, and cornstarch on the stove. Stir until thick. Let it cool before adding to your trifle. Homemade pudding adds a rich touch. You can use a large trifle dish or individual cups. Clear glass dishes are great. They show off the beautiful layers. If using cups, make sure they are clear to highlight your hard work! This blog post explored the delicious world of trifle with key ingredients and steps. You learned about the main items like cream cheese and chocolate pudding, plus fun add-ins like fresh berries. I shared tips for making your trifle ahead of time and storage. Remember to play with flavors and servings to make it your own. Whether for a holiday or a family treat, trifles are versatile and tasty. Enjoy making this easy dessert that’s sure to please everyone!

Baileys Chocolate Cheesecake Trifle Rich and Creamy Delight

- 4 large, ripe tomatoes, chopped into bite-sized pieces - 1 medium onion, finely chopped - 2 cloves of garlic, minced - 4 cups rich vegetable broth - 1 tablespoon extra virgin olive oil - 1 cup all-purpose flour - 1 tablespoon baking powder - ½ teaspoon salt - ½ teaspoon dried thyme - ½ teaspoon dried rosemary - ½ cup whole milk - 2 tablespoons melted butter - 1 teaspoon dried basil - 1 teaspoon dried oregano - ½ teaspoon sugar (to balance acidity) - Salt and freshly cracked black pepper, to taste - Fresh basil leaves, for garnishing - Fresh parsley, chopped, for garnishing When I make this soup, I love using fresh tomatoes. They add a sweet taste. Choose ripe ones for the best flavor. The onion and garlic give depth to the soup. I chop them finely to blend well. The vegetable broth adds richness. I prefer using a good quality broth for the best result. For the herbed dumplings, I mix flour, baking powder, and salt. These ingredients give the dumplings a light and fluffy texture. I also add dried thyme and rosemary for a lovely aroma. The milk and melted butter keep them moist. Finally, seasoning is key. I use dried basil and oregano to bring out the tomato flavor. A bit of sugar balances the acidity of the tomatoes. Don't forget to taste and adjust salt and pepper. Fresh herbs like basil and parsley are perfect for garnishing. They add color and freshness to the dish. {{ingredient_image_2}} Start by grabbing a large pot. Heat one tablespoon of olive oil over medium heat. Once the oil shimmers, add one finely chopped onion. Sauté the onion for about five minutes until it turns translucent. Next, add two minced garlic cloves. Cook the garlic for one minute, stirring often. This helps to avoid burning the garlic. Now, add four chopped ripe tomatoes to the pot. Pour in four cups of rich vegetable broth. Sprinkle in one teaspoon of dried basil and one teaspoon of dried oregano. Add half a teaspoon of sugar to balance the acidity. Season with salt and black pepper to taste. Stir everything together and bring it to a boil. Once boiling, reduce heat and let it simmer for 20 to 25 minutes. This allows the flavors to mix well. After simmering, it’s time to blend the soup. Use an immersion blender to puree the soup until it is smooth and velvety. If you don’t have an immersion blender, pour the soup into a regular blender in batches. Remember to vent the lid slightly with a kitchen towel to let steam escape. Once blended, return the soup to the pot and reheat gently if needed. In a mixing bowl, whisk together one cup of all-purpose flour, one tablespoon of baking powder, and half a teaspoon of salt. Add half a teaspoon of dried thyme and half a teaspoon of dried rosemary. In another bowl, mix together half a cup of whole milk and two tablespoons of melted butter. Pour this mixture into the dry ingredients. Stir gently until just combined. Be careful not to overmix. This helps keep your dumplings light and fluffy. Bring your tomato soup back to a gentle simmer over low heat. Using a spoon, drop small spoonfuls of the dumpling mix into the soup. Cover the pot with a lid. Let the dumplings steam in the soup for about 15 minutes. They should rise and be cooked through. Once the dumplings are fluffy, ladle the soup into bowls. Make sure each bowl has plenty of dumplings. Garnish with fresh basil leaves and a sprinkle of chopped parsley. This adds color and aroma to your soup. Enjoy your comforting bowl of tomato soup with herbed dumplings! Select ripe, flavorful tomatoes for the best soup. I like using heirloom or Roma tomatoes. These types have a rich taste and juicy texture. When choosing tomatoes, look for bright color and a slight softness. Avoid any that feel hard or have blemishes. Ripe tomatoes give your soup a fresh flavor. To make fluffy dumplings, mix gently. Overmixing can make them tough. Be sure to combine the wet and dry ingredients just until you see no dry flour. The dumpling dough should be thick but not dry. When you drop the dumplings into the soup, they will expand while cooking. Cook them covered to keep the steam in. This makes them soft and airy. You can boost the flavor of your tomato soup easily. Add a splash of balsamic vinegar for a tangy kick. A pinch of red pepper flakes can add warmth without being too spicy. Fresh herbs like basil or parsley not only add flavor but also color. You can also stir in a bit of cream for richness. Each of these small changes can elevate your dish. Pro Tips Use Fresh Tomatoes: For the best flavor, opt for in-season, ripe tomatoes. They provide a natural sweetness and vibrant taste that enhances the soup. Season Gradually: Taste your soup as it simmers and adjust the seasoning gradually. This ensures a well-balanced flavor without overpowering the dish. Fluffier Dumplings: Avoid overmixing the dumpling batter. A few lumps are okay; this will help keep the dumplings light and fluffy. Garnish Wisely: Fresh herbs not only add flavor but also enhance the presentation. Consider adding a drizzle of balsamic reduction for a gourmet touch. {{image_4}} You can boost your soup by adding more veggies. For a richer flavor, try adding: - 1 cup chopped carrots - 1 cup diced bell peppers - 1 cup sliced zucchini Simply sauté the veggies with the onion and garlic. This will make the soup heartier and add more nutrients. You can also use vegetables like spinach or kale for a fresh touch. If you need gluten-free dumplings, it's easy to swap out the flour. Use a gluten-free all-purpose blend instead. Check for a blend that has xanthan gum, which helps with texture. You can also use almond flour or chickpea flour for a nutty flavor. Just keep the other ingredients the same, and you will enjoy a tasty dish. To add a kick to your soup, try these spicy options: - 1 teaspoon red pepper flakes - 1 chopped jalapeño pepper - A splash of hot sauce Add these ingredients when you sauté the onions and garlic. This will infuse the soup with heat. Adjust the spice level based on your taste. Enjoy the warmth and flavor! To store leftover tomato soup, let it cool first. Then, transfer it to an airtight container. Make sure to seal it tightly. You can keep it in the fridge for up to three days. If you want to keep it longer, consider freezing it. You can freeze both the soup and dumplings. For best results, freeze them separately. Use a freezer-safe container for the soup. The dumplings can go in a freezer bag. Remove as much air as possible before sealing. When properly stored, they can last up to three months. To reheat the soup, pour it into a pot. Warm it over medium heat, stirring often. If you froze the soup, thaw it in the fridge overnight first. For frozen dumplings, add them directly to the soup while reheating. Cook until they are hot throughout. Enjoy your comforting meal again! The best way to thicken tomato soup is to blend it. You can use an immersion blender to puree the soup until smooth. This method gives a nice, creamy texture. If you want more thickness, add a little cornstarch mixed with water. Stir it in and cook for a few minutes. You can also add some pureed beans for extra body and flavor. Yes, you can use canned tomatoes instead of fresh. Canned tomatoes save time and are easy to find. Look for high-quality canned tomatoes, like San Marzano. They have a sweet taste and rich flavor. Use about two cans for this recipe. Just drain some liquid to avoid making the soup too watery. You know the dumplings are cooked when they have risen and are fluffy. They should not sink or feel doughy. You can check by poking one with a fork. If it feels firm and springs back, they are ready. Cooking them in the simmering soup helps keep them moist. Yes, you can make this recipe vegan. Swap whole milk with plant-based milk, like almond or soy milk. Use vegan butter instead of regular butter. For the broth, choose a vegetable broth that is free from animal products. This way, you can enjoy a tasty vegan version of this soup and dumplings. Tomato soup and dumplings pair well with crusty bread or grilled cheese. A simple salad adds freshness, too. You can also serve some roasted vegetables for extra flavor. For a fun twist, try avocado slices or a dollop of pesto on top. These sides make the meal heartier and more enjoyable. We explored how to make a tasty tomato soup and herbed dumplings. Fresh ingredients and proper seasoning are key for flavor. We also covered step-by-step instructions to ensure your success. Remember to store leftovers right and try different variations for fun. Creating this dish can warm your heart and home. Enjoy cooking, and share your results with others!

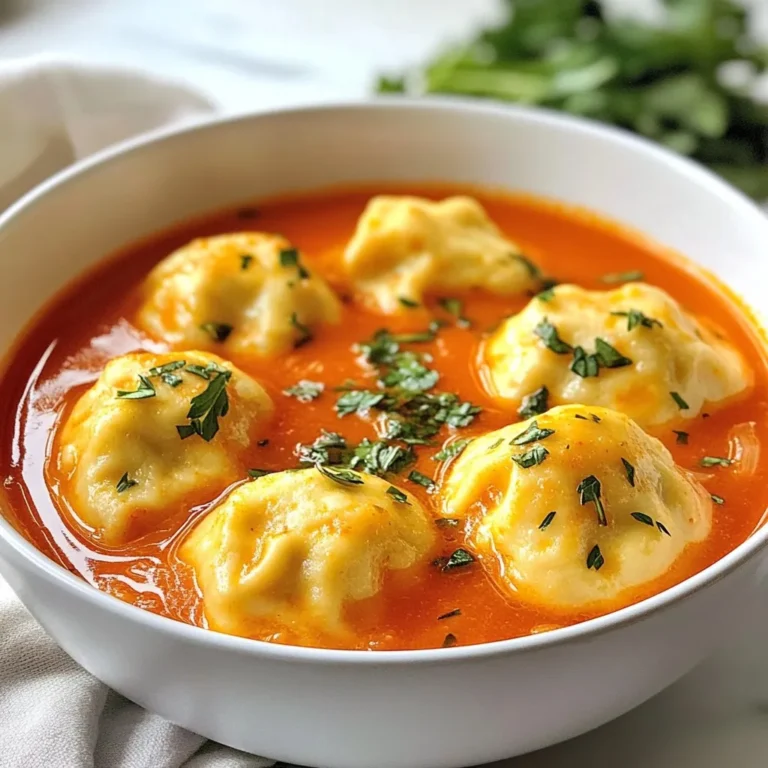
Savory Tomato Soup with Herbed Dumplings Recipe

To make your ten-minute vegan burrito wraps, you need a few key items: - 4 large whole-grain tortillas - 1 can (15 oz) black beans, rinsed and drained - 1 cup corn kernels (fresh, frozen, or canned) - 1 cup cherry tomatoes, halved - 1 ripe avocado, sliced - 1 cup fresh spinach or mixed greens - 1 teaspoon ground cumin - 1 teaspoon smoked paprika - Salt and freshly ground black pepper to taste - Hot sauce or salsa for serving These ingredients work well together. They create a filling and tasty meal. If you don’t have something, don’t worry! Here are some easy swaps: - Use any type of tortilla, like corn or flour. - Replace black beans with pinto beans or chickpeas. - Use any type of tomato, like diced or even salsa. - Swap avocado with guacamole or omit it if you prefer. - Use kale or arugula instead of spinach for a different green. These swaps keep your burrito quick and easy. Want to kick it up a notch? Try adding these: - Chopped bell peppers for a crunchy texture. - Red onion for a zesty bite. - Fresh cilantro for a burst of flavor. - Lime juice for a tangy twist. - Nutritional yeast for a cheesy flavor. Adding these can make your burrito even more delicious! {{ingredient_image_2}} First, gather your ingredients. You need: - 4 large whole-grain tortillas - 1 can (15 oz) black beans, rinsed and drained - 1 cup corn kernels (fresh, frozen, or canned) - 1 cup cherry tomatoes, halved - 1 ripe avocado, sliced - 1 cup fresh spinach or mixed greens - 1 teaspoon ground cumin - 1 teaspoon smoked paprika - Salt and freshly ground black pepper to taste Start by mixing the black beans, corn, tomatoes, cumin, paprika, salt, and pepper in a bowl. Stir well to coat everything with spices. Now, let’s build your burritos. Take one tortilla and lay it flat. Place a handful of spinach or mixed greens in the center. This creates a nice base for the filling. Next, scoop about a quarter of the black bean mixture on top of the greens. Now add a few avocado slices for creaminess. To wrap the burrito, fold the sides of the tortilla inward. Then, roll it up from the bottom. Make sure to enclose the filling well. Repeat this with the rest of the tortillas and mixture. To add a tasty crunch, toast your burritos. Heat a non-stick skillet over medium heat. Place the burritos seam side down in the skillet. Cook each side for 1-2 minutes until golden brown. Make sure to flip them carefully. This step adds texture and flavor. Once toasted, take the burritos out of the skillet. Cut them in half diagonally. Serve with hot sauce or salsa for dipping. Enjoy your vibrant meal! You can make your burrito unique. Start with your favorite greens. Instead of spinach, try kale or arugula. Add in some diced bell peppers or even shredded carrots for extra crunch. Want more spice? Add jalapeños or a sprinkle of chili powder. You can also swap black beans for pinto or kidney beans. This lets you play with flavors and textures. To boost the taste, always rinse your black beans. This helps remove extra salt and enhances the flavors. Toast your tortillas for a minute before filling them. This makes them warm and easy to roll. Use fresh spices like cumin and smoked paprika. They bring out the best in your ingredients. Don’t skip the salt and pepper; they balance the flavors. Pair your burrito with a fresh salad. A simple mix of lettuce, avocado, and lime juice works well. You can also serve it with a side of guacamole or salsa. For a fun twist, try chips for crunch. A light coconut yogurt dip can add a creamy balance. These pairings make your meal more exciting and satisfying. Pro Tips Fresh Ingredients: Using fresh vegetables like cherry tomatoes and spinach will enhance the flavor and nutrition of your burrito wraps. Customize Your Spice: Adjust the amount of cumin and smoked paprika according to your taste preference for a spicier or milder flavor. Perfectly Toasted: Toasting the burritos in a skillet not only adds texture but also helps to meld the flavors together beautifully. Make Ahead: Prepare the black bean mixture ahead of time and store it in the fridge for a quick assembly when you’re ready to enjoy your wraps. {{image_4}} You can use many types of tortillas for your burrito wraps. Whole-grain tortillas are healthy and add fiber. Corn tortillas offer a rich taste and are gluten-free. Spinach or tomato tortillas give a fun color and extra flavor. Flour tortillas are soft and easy to wrap. Try different types to match your taste! Feel free to mix up the fillings for your burrito. You can add cooked quinoa for protein. Roasted sweet potatoes add sweetness and texture. Bell peppers give a crunchy bite and bright color. For a spicy kick, add jalapeños or chili peppers. You can also use different beans, like pinto or kidney beans, to change the taste. The right sauce can make your burrito even better. Try a zesty avocado crema made with blended avocado, lime, and herbs. A simple salsa adds fresh flavor and spice. You can also serve a creamy tahini sauce for a nutty twist. Hot sauce is great for those who like heat. These sauces can elevate your meal and make it more exciting! To keep your leftover burritos fresh, wrap each burrito in foil or parchment paper. Place them in an airtight container. This keeps the flavors locked in and prevents them from drying out. Store them in the fridge for up to three days. If you want to keep them longer, freezing is a better choice. When you’re ready to eat your burritos again, reheat them in a skillet. Heat the skillet over medium heat. Place the burrito seam side down and cook for about three to four minutes. Flip it halfway to warm it through. You can also microwave them. Wrap the burrito in a damp paper towel and heat for 1 to 2 minutes. This helps keep the tortilla soft. To freeze burritos, wrap each one tightly in plastic wrap. Then place them in a freezer-safe bag or container. This method helps avoid freezer burn. You can freeze them for up to three months. When you’re ready to enjoy, thaw them in the fridge overnight before reheating. This ensures they heat evenly. You can use gluten-free tortillas. Look for brands made from rice or corn. These options taste great and roll well. Always check the label to ensure they are certified gluten-free. Yes, you can prepare these wraps in advance. Assemble them, then wrap in foil or plastic wrap. Store them in the fridge for up to two days. When ready to eat, heat them in a skillet for a few minutes. To boost protein, add cooked quinoa or lentils. You can also include extra beans like pinto or chickpeas. For a different taste, try adding nuts or seeds. These options keep the meal tasty and filling. You've now learned how to make delicious burrito wraps. We covered essential ingredients, substitutes, and tips for extra flavor. You also gained step-by-step instructions to prepare and toast your burritos perfectly. Don't forget the creative ways to customize your wraps and pairings to make your meal even better. With the right storage and reheating methods, your burritos can stay fresh and tasty. Enjoy making these simple recipes and share them with friends. Happy cooking!

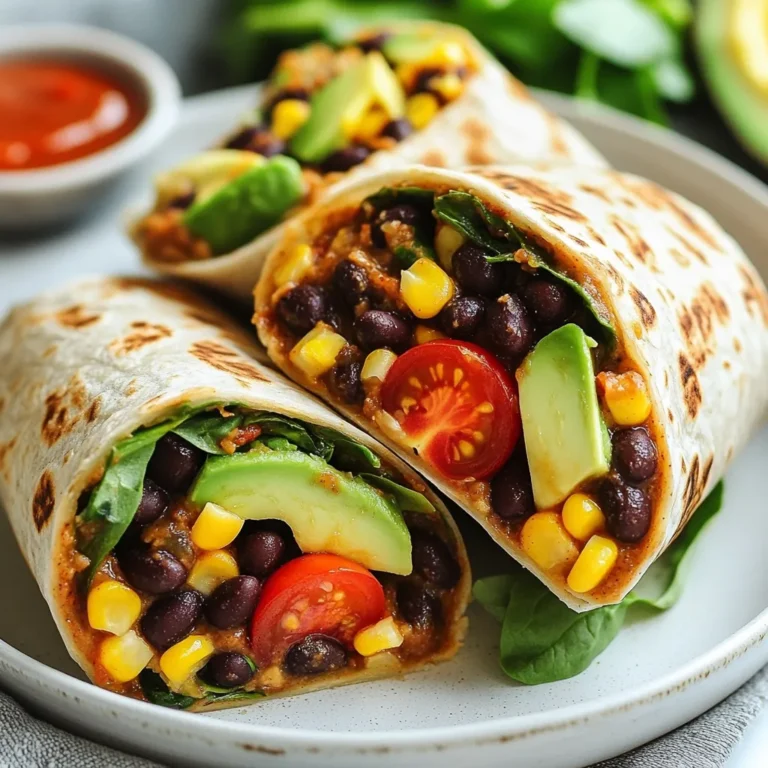
Ten Minute Vegan Burrito Wraps Quick and Easy Recipe

To make the crust and crumble, you need: - 1 ½ cups rolled oats - 1 cup all-purpose flour - ½ cup brown sugar, packed tightly - ½ teaspoon baking powder - ½ teaspoon salt - ½ cup unsalted butter, melted and slightly cooled - Zest of 1 large lemon These ingredients create a base that is both hearty and sweet. The oats give a nice texture, while the lemon zest adds a fresh burst of flavor. For the lemon filling, gather these items: - 1 cup freshly squeezed lemon juice (approximately 4 medium lemons) - 2 large eggs, at room temperature - ½ cup granulated sugar - 2 tablespoons cornstarch - 1 teaspoon pure vanilla extract This filling is bright and tangy. The lemon juice provides a sharp taste, while the eggs help it set beautifully. To make your bars look even better, consider these garnishes: - Powdered sugar for dusting - Thinly sliced lemon wedges - A sprinkle of lemon zest These garnishes add a lovely touch. They not only beautify the bars but also enhance the lemon flavor. {{ingredient_image_2}} Start by preheating your oven to 350°F (175°C). Grease a 9x9 inch baking pan with butter. You can also line it with parchment paper. Leave some paper hanging over the edges. This makes it easier to lift the bars out later. In a large bowl, mix the rolled oats, all-purpose flour, brown sugar, baking powder, and salt. Stir these dry ingredients well. Next, pour in the melted butter and add the lemon zest. Use a fork or your hands to mix until you see a crumbly texture. Set aside half of this oat mixture. In another bowl, whisk together the fresh lemon juice, room temperature eggs, granulated sugar, cornstarch, and vanilla extract. Make sure this mixture is smooth and well blended. This filling adds a bright and zesty flavor. Take the half of the oat mixture you didn’t set aside and press it firmly into the bottom of your baking pan. This forms your crust. Now, pour the lemon filling over the pressed crust. Spread it out evenly. Finally, sprinkle the reserved oat crumble evenly over the lemon filling. Place the pan into your preheated oven. Bake for 25-30 minutes. The top should turn golden brown. When done, the lemon filling may have a slight jiggle. This is fine; it will set as it cools. After baking, carefully remove the pan from the oven. Let it cool completely on a wire rack. This step is key for the bars to firm up. Once cool, lift the bars out using the parchment paper or cut them directly in the pan. Slice them into squares or bars. For an extra touch, dust the top with powdered sugar and add a lemon wedge or some zest before serving. Enjoy this delightful treat! To get a great crumble, start with cold butter. Mix it into your dry ingredients until it looks like coarse crumbs. Do not overmix; you want some clumps. The lemon zest adds flavor, so don't skip it! Half the oat mixture forms the base, while the other half tops your filling. This balance gives you a nice texture. Many people forget to cool the butter. If the butter is too hot, it can melt away your crumble. Another mistake is using too much lemon juice. Stick to one cup; too much can make the filling runny. Also, make sure to let the bars cool fully. Cutting them too soon leads to messy squares. These bars taste great with whipped cream or vanilla ice cream. You can also serve them with a warm cup of tea. For a twist, try adding fresh berries on the side. They add color and a burst of flavor! Pro Tips Use Fresh Lemons: For the best flavor, always use freshly squeezed lemon juice and zest from real lemons instead of bottled juice. This will enhance the tartness and aroma of your bars. Let Them Cool: Allow the bars to cool completely before slicing. This helps the filling set properly and makes it easier to cut clean squares without the filling oozing out. Adjust Sweetness: Taste the lemon filling before baking. If you prefer a sweeter bar, feel free to adjust the sugar to your liking, keeping in mind that the tartness of the lemon is part of the charm. Store Properly: To keep the bars fresh, store them in an airtight container in the refrigerator. They can last up to a week, and the flavors will continue to develop over time. {{image_4}} You can make these bars gluten-free with simple swaps. Use gluten-free rolled oats and almond flour instead of all-purpose flour. This keeps the texture nice while making it safe for those with gluten issues. The flavors will still shine through, making it a treat everyone can enjoy. Want to change things up? Try adding some fresh berries, like blueberries or raspberries, to the lemon filling. Their sweetness pairs well with the tartness of lemon. You can also mix in a bit of ginger or cinnamon to the oat mixture for a warm, spicy twist. While lemon is the star here, other citrus fruits work great too. Try using lime for a zesty change. Or use orange juice and zest for a sweeter, more mellow flavor. Each fruit brings its own unique taste, making the recipe versatile and fun! To keep your lemon oatmeal crumble bars fresh, store them in an airtight container. This method helps maintain their taste and texture. You can place parchment paper between layers to prevent sticking. Keep the container in a cool, dry place or in the fridge for added freshness. You can freeze these bars for later enjoyment. To do this, let them cool completely first. Then, wrap each bar in plastic wrap. After that, place them in a freezer-safe bag or container. They will stay fresh in the freezer for about three months. When you're ready to eat them, just thaw overnight in the fridge. These bars will last in the fridge for about one week. Store them in an airtight container to ensure they stay moist and tasty. If they start to dry out, you can add a slice of bread in the container. This trick helps keep them soft and delicious. Yes, you can use store-bought lemon juice. However, fresh juice gives the best flavor. Fresh lemons have bright, zesty notes that enhance the taste. If you use bottled juice, check for any added sugars. This will make the bars less tart. You will know the bars are done when the top turns golden brown. The lemon filling should be set but may still jiggle slightly. A toothpick inserted into the center should come out mostly clean. Let them cool completely for the best texture. To cut the bars, first let them cool completely. Use a sharp knife for clean cuts. If you used parchment paper, lift the bars out. This makes cutting easier. Aim for even squares or rectangles for nice presentation. Absolutely! You can make these bars a day ahead. Store them in an airtight container at room temperature. If you want to keep them longer, refrigerate them. They taste even better after chilling, as the flavors meld together. In this blog post, we covered how to make delicious lemon bars. We went through the essential ingredients, including the crust, filling, and garnishes. I shared step-by-step instructions for perfect results, from prepping the pan to baking. You learned helpful tips and tricks for the best texture and common mistakes. I've also offered tasty variations and storage tips. Remember, making these lemon bars can be fun and easy. With practice, you’ll create a sweet treat that everyone loves. Enjoy your baking!

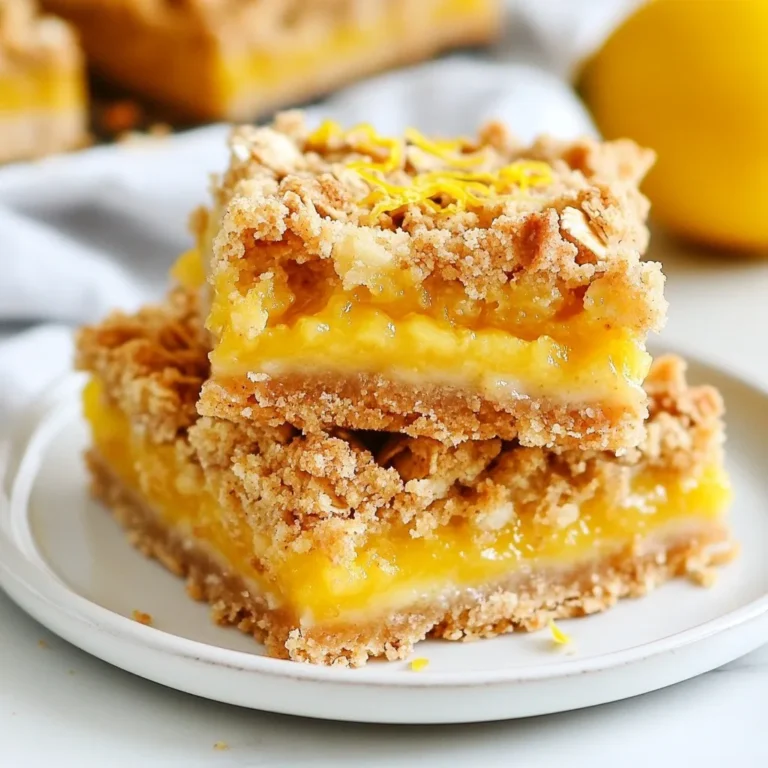
Lemon Oatmeal Crumble Bars Irresistible and Easy Treat

- 1 cup dark chocolate chips (70% cocoa or higher) - 2 tablespoons unsalted butter - 3 large eggs, separated into yolks and whites - 1/4 cup granulated sugar, divided - 1 cup heavy cream - 1 teaspoon vanilla extract - A pinch of salt The main ingredients create a rich and creamy mousse. Dark chocolate chips give the dessert depth. Unsalted butter adds smoothness. Eggs, both yolks and whites, provide structure and lightness. Granulated sugar sweetens the mix. Heavy cream adds volume and softness. Vanilla extract brings warmth. A pinch of salt enhances all the flavors. - Whipped cream - Grated chocolate or chocolate shavings - Fresh mint leaves Garnishing ingredients add a touch of elegance. Whipped cream makes the mousse look inviting. Grated chocolate or shavings give a nice visual contrast. Fresh mint leaves add color and a hint of freshness. - Heatproof bowl - Electric mixer - Mixing bowls - Spatula - Piping bag or spoon Tools make the process easier and more enjoyable. A heatproof bowl is essential for melting chocolate safely. An electric mixer helps whip egg whites and cream quickly. Mixing bowls hold the ingredients and keep things organized. A spatula is great for folding ingredients without losing air. A piping bag or spoon helps fill the cups neatly. {{ingredient_image_2}} To start, you need to melt the chocolate and butter together. Place 1 cup of dark chocolate chips and 2 tablespoons of unsalted butter in a heatproof bowl. Microwave this mix in 30-second intervals. Stir well between each interval until it’s smooth and melted. Once melted, let the mixture cool for a few minutes. Next, let’s whip the egg whites. Take 3 large eggs and separate the yolks from the whites. Place the egg whites in a clean mixing bowl. Add a pinch of salt to help stabilize them. Use an electric mixer to beat the whites. Whip until soft peaks form. Gradually add half of the 1/4 cup of granulated sugar. Keep whisking until you get stiff peaks. Set the whipped egg whites aside. Now, let’s prepare the egg yolks. In another bowl, whisk the 3 egg yolks with the rest of the sugar until it turns pale and creamy. Carefully mix in the slightly cooled chocolate. Don’t forget to add 1 teaspoon of vanilla extract as well. Stir until everything is smooth. Now, gently fold the whipped egg whites into the chocolate mixture in three additions. Use a spatula to lift and fold, so you keep the air in the mix. After combining, it’s time to chill the mousse. You can use a spoon or a piping bag for filling. Carefully fill your individual cups or small glasses until they are about three-quarters full. Cover them with plastic wrap and place them in the fridge. Let them chill for at least 2 hours, but overnight is best for a perfect set. When you are ready to serve, add a dollop of whipped cream on top of each mousse cup. For a lovely finish, sprinkle some grated chocolate or chocolate shavings on top. A fresh mint leaf adds a nice touch too. To present, arrange the cups on a decorative platter. You can place whole mint leaves around them for extra flair. Enjoy your delicious chocolate mousse cups! To get the right texture in your mousse, fold the ingredients gently. Use a silicone spatula to lift and turn the mixture. Start by adding a small amount of whipped egg whites to the chocolate. This helps to lighten it. Then, slowly fold in the rest. Be careful not to stir. Stirring will deflate your mousse, making it less airy. Keep your mousse fresh by covering it tightly with plastic wrap. You can also use a lid if your cups have one. Store your mousse in the fridge. It stays fresh for up to three days. The longer it sits, the firmer it may get. Enjoy your mousse within this time for the best taste! If your mousse turns out grainy, it may be due to not melting the chocolate well. Make sure to melt it slowly, stirring often. If you face deflation, this usually happens from over-folding. Always be gentle and use the right technique. If the mousse is watery, it might need more whipped cream. Add a little more whipped cream and fold gently until mixed. Pro Tips Use Quality Chocolate: For the best flavor, choose high-quality dark chocolate with a cocoa content of 70% or higher. This will enhance the richness of your mousse. Room Temperature Ingredients: Ensure that your eggs and heavy cream are at room temperature before starting. This helps achieve a smoother and creamier mousse texture. Chill Your Bowls: For best results when whipping cream and egg whites, chill your mixing bowls and beaters in the refrigerator beforehand. This helps achieve better volume and stability. Experiment with Flavors: Add a splash of liqueur like Grand Marnier or a hint of espresso powder to the chocolate mixture for a unique flavor twist. {{image_4}} You can have fun with flavors in your chocolate mousse. Try different types of chocolate. Milk chocolate gives a sweeter taste. White chocolate adds a creamy twist. Flavored chocolate, like orange or hazelnut, can surprise your guests. For a festive kick, add liqueurs or extracts. A splash of peppermint or orange will brighten the mousse. Just a teaspoon can change your dessert! If you or your guests have dietary needs, you can still enjoy this treat. For gluten-free options, check your chocolate. Most dark chocolate is naturally gluten-free. You can also use gluten-free cookies for a crust if you want to make a layered version. For dairy-free mousse, swap heavy cream with coconut cream or almond milk. This keeps the mousse rich and tasty without dairy. Garnishes make your mousse look special. Fresh berries like raspberries or strawberries add color and flavor. You can also sprinkle nuts like almonds or hazelnuts for crunch. For a fun twist, use edible cups. You can find chocolate cups or even sugar cones. They make your dessert not just tasty, but also fun to eat! To keep your chocolate mousse fresh, use airtight containers. Glass or plastic containers work well. Cover each mousse cup tightly with plastic wrap. This helps prevent air from getting in and keeps the mousse creamy. Store the mousse in the refrigerator. It lasts for about 3 to 5 days. Look for signs of spoilage like a sour smell or a change in texture. If it looks or smells off, it's best to throw it away. You can freeze chocolate mousse, but it may change texture. Use a freezer-safe container. When ready to eat, thaw it in the fridge overnight. It’s best to eat frozen mousse within 1 to 2 months for the best taste and texture. You can make chocolate mousse a day in advance. Prepare the mousse and fill your cups. Cover each cup with plastic wrap. Place them in the fridge for at least two hours. This chilling time helps the mousse set perfectly. Making it ahead also saves you time on the big day. Yes, you can! Using milk chocolate makes the mousse sweeter and creamier. Dark chocolate gives a rich, bold flavor. White chocolate adds a sweet and buttery taste. Each type will change the mousse's taste and texture. Experiment with different chocolates to find your favorite. Raw eggs can be risky for some people. To stay safe, use pasteurized eggs. They are treated to kill harmful bacteria. If you prefer, you can use egg substitutes like silken tofu or whipped aquafaba. These options will still give you a nice texture. For a stunning look, use clear cups to show off the mousse layers. Add a dollop of whipped cream on top. Sprinkle grated chocolate or chocolate shavings for flair. Finish with a fresh mint leaf. This adds color and a festive touch. Serve the cups on a decorative platter for extra charm. Yes, there is! You can make mousse without eggs. Use silken tofu blended until smooth. Alternatively, whipped aquafaba can replace egg whites. Both options will create a creamy texture. Just adjust the sweetness to your liking. Enjoy your egg-free chocolate mousse without losing flavor! You’ve now learned how to make chocolate mousse from start to finish. We covered the main ingredients, steps to whip it up, and tips for perfecting the texture. Don't forget to try fun variations and presentation ideas to impress your guests. Remember, the key is to handle ingredients gently to stay fluffy. Enjoy your mousse fresh or store it correctly for later. With practice, you’ll master this delightful treat. Enjoy every delicious bite!

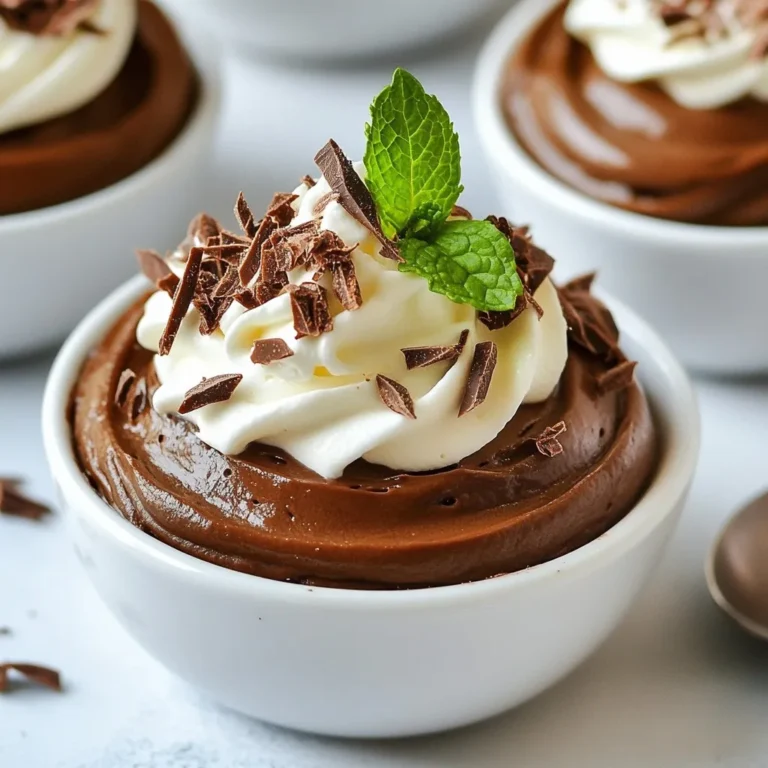
Decadent Christmas Chocolate Mousse Cups Delight

To make Creamy German Hunter’s Sauce, you will need: - 2 tablespoons unsalted butter - 1 medium onion, finely chopped - 3 cloves garlic, minced - 8 oz (225g) mushrooms, sliced (a mix of cremini and button is best) - 1 cup vegetable broth (low sodium preferred) - 1 cup heavy cream (or a dairy-free alternative) - 1 tablespoon Dijon mustard - 1 teaspoon dried thyme - 1 teaspoon smoked paprika - Salt and freshly ground black pepper to taste - Fresh parsley, chopped (for garnish) If you can’t find an ingredient, here are some good swaps: - Use olive oil instead of butter for a vegan option. - Red onion can replace the medium onion for a sweeter taste. - Use shallots if you want a milder onion flavor. - For mushrooms, any wild variety adds depth. - Use chicken broth instead of vegetable broth for a richer flavor. - Coconut cream can replace heavy cream for a dairy-free version. - Yellow mustard works as a substitute for Dijon if needed. The quality of your ingredients matters a lot. Fresh mushrooms give the best flavor and texture. Use fresh herbs like parsley for a bright finish. High-quality broth adds depth to the sauce. Always choose fresh, organic produce when possible. This way, you ensure the best taste in your cooking. Quality ingredients lead to a more satisfying dish, so don’t skimp! {{ingredient_image_2}} Start by gathering your ingredients. You will need: - 2 tablespoons unsalted butter - 1 medium onion, finely chopped - 3 cloves garlic, minced - 8 oz (225g) mushrooms, sliced - 1 cup vegetable broth - 1 cup heavy cream - 1 tablespoon Dijon mustard - 1 teaspoon dried thyme - 1 teaspoon smoked paprika - Salt and black pepper - Fresh parsley for garnish Next, finely chop the onion and mince the garlic. These steps prepare the base for your sauce. Slice the mushrooms into even pieces. This ensures they cook well and blend nicely into the sauce. Heat a large skillet over medium heat. Add the butter and let it melt until bubbling. Once melted, add the chopped onion. Sauté it for about 4-5 minutes. You want the onion to be soft and translucent. Now, add the minced garlic and stir for one minute. You want it fragrant but not brown. Next, pour in the sliced mushrooms. Stir well and sauté for 7-8 minutes. The mushrooms should lose moisture and turn golden brown. After that, pour in the vegetable broth. Increase the heat slightly to bring it to a gentle simmer. Let it simmer for about 5 minutes. This helps to reduce the liquid and boost the flavor. Lower the heat back to medium-low. Stir in the heavy cream and Dijon mustard. Mix until the sauce is smooth. Then, sprinkle in the dried thyme and smoked paprika. Season with salt and freshly ground black pepper. Let it simmer for another 5-7 minutes. Stir occasionally until the sauce thickens to your liking. To achieve the perfect sauce consistency, keep an eye on the heat. Too high, and it may separate. Too low, and it won’t thicken properly. If the sauce seems too thin, let it simmer a bit longer. Stirring helps to blend the flavors and thicken it. If it’s too thick, add a splash of vegetable broth or cream. This will help loosen it up. For a creamier texture, use heavy cream rather than alternatives. And always taste before serving! Adjust the seasoning as needed for the best flavor. To boost the taste of Creamy German Hunter's Sauce, use fresh herbs. Thyme adds a nice depth. You can also try adding rosemary for a fragrant twist. Dijon mustard brings a tangy kick. If you enjoy a bit of spice, add a pinch of cayenne pepper. This little change makes a big difference. Using a mix of mushrooms, like cremini and button, gives the sauce more layers of flavor. Cook them until golden brown to enhance their taste. One common mistake is overcooking the garlic. Cook it just until fragrant, or it will turn bitter. Another mistake is adding salt too early. Wait until the end to taste and adjust seasoning. This way, you won’t risk over-salting the sauce. Also, don’t rush the simmering process. Let the sauce reduce properly for the best flavor. A thicker sauce gives a better mouthfeel and taste. Serve this sauce over grilled chicken for a hearty meal. It also pairs well with sautéed seasonal veggies for a lighter option. Try it over roasted potatoes or homemade spaetzle for a comforting dish. For a full experience, add a side salad with a simple vinaigrette. This will balance the richness of the sauce and make your meal shine. Pro Tips Use Fresh Herbs: Fresh thyme and parsley will elevate the flavor of the sauce, giving it a more vibrant taste than dried herbs. Experiment with Mushrooms: Mixing different types of mushrooms, such as shiitake or portobello, can add depth and complexity to the sauce. Adjust the Creaminess: For a lighter version, substitute half of the heavy cream with more vegetable broth or use a dairy-free alternative. Serve Warm: This sauce is best enjoyed warm; reheat gently on low heat if it cools down, and add a splash of broth to loosen it if necessary. {{image_4}} You can easily make this sauce dairy-free. Use a plant-based cream, like coconut cream or cashew cream. Both options add a rich texture and flavor. Look for unsweetened versions. This choice keeps the taste just as creamy and satisfying. Want to jazz up your sauce? Try adding different herbs and spices. Fresh thyme or rosemary can add a nice touch. You can also mix in a dash of crushed red pepper for some heat. A splash of white wine enhances the richness. Feel free to experiment with flavors that you enjoy. This sauce pairs well with many proteins. Try it over grilled chicken or pork chops for a hearty meal. It also works great with sautéed mushrooms for a vegetarian option. You can even use it with fish like salmon. The creamy sauce complements all of these choices beautifully. Enjoy mixing and matching your favorite proteins! To keep your creamy German hunter's sauce fresh, first let it cool. Transfer the sauce into an airtight container. Store it in the fridge for up to three days. If you plan to keep it longer, freezing is a great option. When you're ready to enjoy the leftovers, reheat the sauce gently. Pour it into a saucepan over low heat. Stir often to prevent sticking. If the sauce thickens too much, add a splash of broth or cream to restore the texture. Keep the heat low to preserve the flavor. Freezing is an excellent way to save the sauce for later. Pour the cooled sauce into freezer-safe bags or containers. Leave some space in the container for expansion. Label the bags with the date. The sauce can last for up to three months in the freezer. To thaw, place it in the fridge overnight before reheating. Creamy German Hunter's Sauce is great with many dishes. You can serve it over grilled chicken, beef, or pork. It also pairs well with sautéed vegetables or roasted potatoes. I love drizzling it over homemade spaetzle or creamy mashed potatoes. The sauce adds a rich flavor to any meal. Yes, you can make this sauce ahead of time. Just cook it as normal, then let it cool. Store it in an airtight container in the fridge for up to three days. When you are ready to eat, warm it on low heat. You may need to add a splash of vegetable broth to thin it out. To thicken the sauce, you have a few options. One way is to simmer it longer to let it reduce. Another option is to mix a tablespoon of cornstarch with cold water, then stir it into the sauce. Let it simmer for a few more minutes until it thickens. You can also add more heavy cream for a richer sauce. In this blog post, we explored key ingredients and their quality for great results. I shared step-by-step instructions for perfect preparation and cooking techniques. You learned tips to enhance flavors and avoid common mistakes. We discussed variations, including dairy-free options and protein pairings. Lastly, I covered storage methods to keep your sauce fresh. Remember, good ingredients and careful steps lead to tasty meals. Keep experimenting and enjoy every bite!

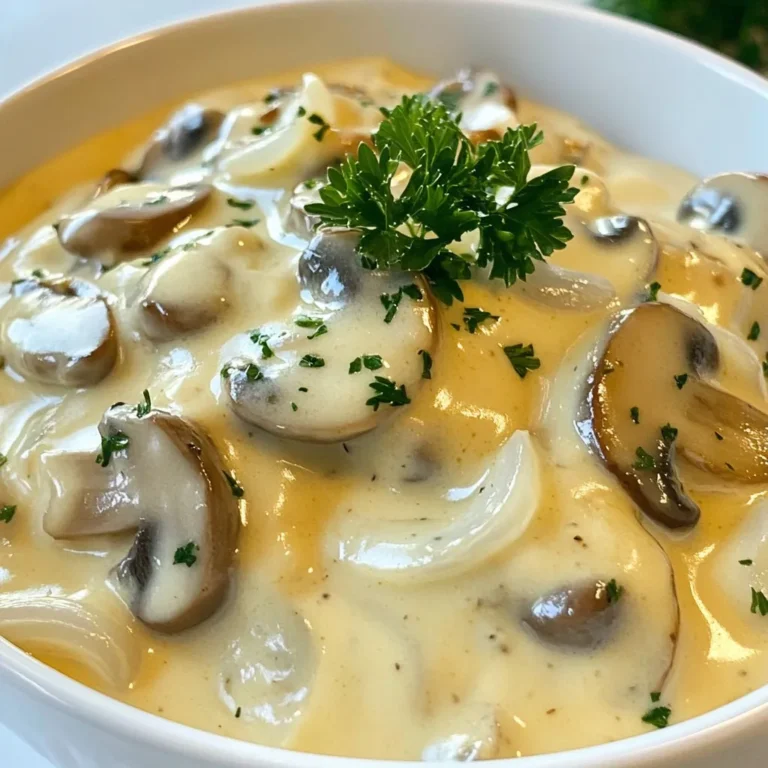
Creamy German Hunter’s Sauce Flavorful Cooking Guide

PREV 1 … 5 6 7 … 48 NEXT
easy meal kitchen

explore

DessertsDinnerAppetizersDrinks

Our Policies

  • Cookie Policy
  • Copyright Policy
  • Disclaimer
  • GDPR Policy
  • Terms Of Use
Back to Top
  • About
  • Contact Us
  • Privacy Policy
© 2026 easy meal kitchen