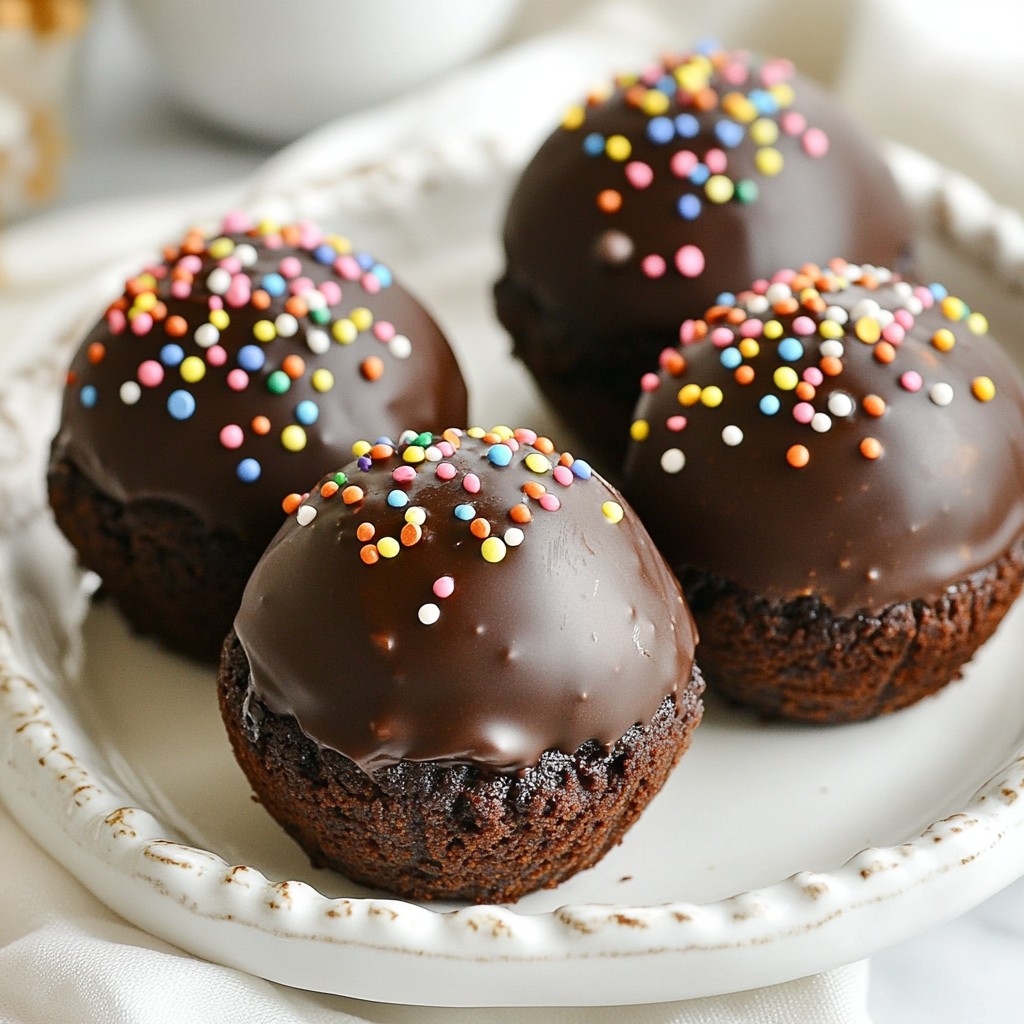
Are you ready to indulge in a sweet treat that combines two favorites? Chocolate Chip Cookie Dough Brownie Bombs are the ultimate delight! These tasty bites mix rich brownie and cookie dough for a dessert that’s hard to resist. In this post, I’ll walk you through the simple steps to make these treats, along with tips for fun variations and perfect presentation. Let’s dive into the delicious world of brownie bombs!
Why I Love This Recipe
- Decadent Flavor Combination: The rich chocolate brownie combined with the sweet, creamy cookie dough creates a dessert that is truly irresistible.
- Fun to Make: Layering the brownie and cookie dough is a fun and creative process, perfect for baking with friends or family.
- Customizable Toppings: Feel free to add your favorite toppings, like sprinkles or extra chocolate chips, making each batch uniquely yours.
- Perfect for Any Occasion: These brownie bombs are great for parties, holidays, or just a sweet treat to enjoy at home.
Ingredients
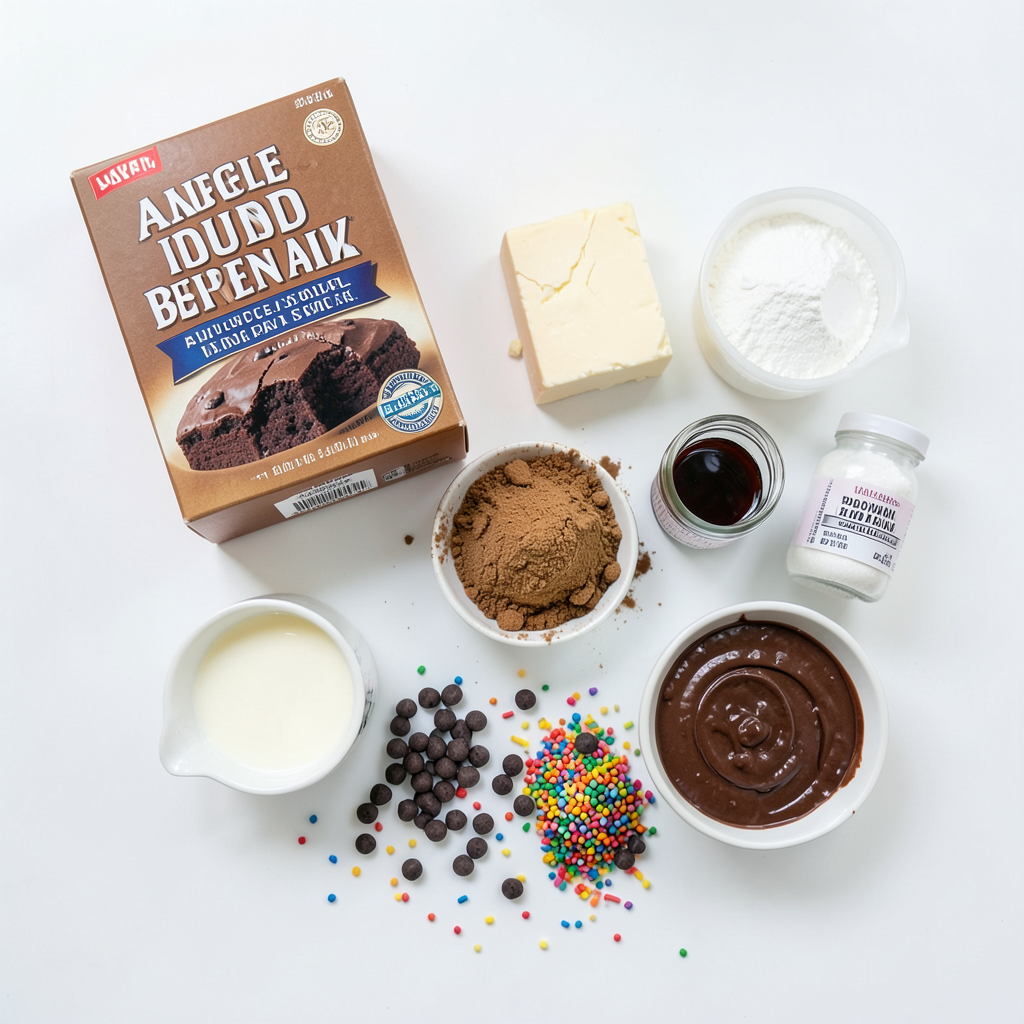
Main Ingredients for Brownie Bombs
- 1 box of brownie mix (plus ingredients specified on the box)
- 1 cup all-purpose flour
- 1/2 teaspoon baking soda
- 1/2 teaspoon salt
- 1/2 cup unsalted butter, softened to room temperature
- 1/2 cup packed brown sugar
- 1/4 cup granulated sugar
- 2 tablespoons milk
- 1 teaspoon vanilla extract
- 1/2 cup mini chocolate chips
- 12 oz chocolate coating or additional chocolate chips for melting
For the perfect brownie bombs, start with a box of brownie mix. Follow the instructions on the box for the required ingredients. You will also need all-purpose flour and dry ingredients to make the cookie dough. Baking soda and salt are essential for balance and rise. Softened butter, brown sugar, and granulated sugar add a rich flavor. Don't forget the milk and vanilla extract for that sweet touch. Finally, mini chocolate chips make the cookie dough extra special.
Optional Ingredients
- Decorative sprinkles
- Variations of chocolate chips
For a fun twist, consider adding decorative sprinkles on top of your brownie bombs. They add color and joy. You can also use different types of chocolate chips. For example, dark chocolate, white chocolate, or even peanut butter chips can make your treats unique. Feel free to mix and match these options for your own tasty creation!
Step-by-Step Instructions
Preparing the Brownie Base
First, preheat your oven as per the brownie mix box. This step is key for great brownies. Grease a 9x9 inch baking pan and add parchment paper. It helps with easy removal. Pour half of the brownie batter into the pan. Bake it for about 15 minutes. The center should be slightly undercooked. Remove the pan from the oven and let the brownies cool completely.
Making the Cookie Dough
In a medium bowl, whisk together the flour, baking soda, and salt. This helps mix the dry ingredients well. In a larger bowl, cream the softened butter, brown sugar, and white sugar with an electric mixer. Mix until it looks light and fluffy. Add milk and vanilla extract next. Stir until smooth. Gradually add the flour mixture to the wet ingredients. Mix until just combined. Now, gently fold in the mini chocolate chips.
Forming Cookie Dough Balls
Once your brownie layer has cooled, scoop out the centers with a small spoon. Make little cups that are about 1/2 inch deep. Take about one tablespoon of cookie dough. Place it inside each brownie cup. Cover the cookie dough with the leftover brownie batter. Make sure the dough is fully sealed inside. Repeat until you use all the batter and cookie dough.
Tips & Tricks
Achieving the Perfect Brownie Base
To avoid overbaking, keep an eye on the time. Bake the brownies for only 15 minutes. The center should look a bit undercooked. Use a 9x9 inch baking pan. This size holds the batter well and allows for even cooking. To check for doneness, insert a toothpick into the center. If it comes out with moist crumbs, it’s perfect.
Cookie Dough Consistency
To maintain the right dough texture, mix the wet and dry ingredients just until combined. Avoid overmixing to keep it soft. If you need to substitute ingredients, try using coconut oil for butter. You can also use almond flour instead of all-purpose flour for a gluten-free option.
Chocolate Coating Tips
The best method to melt chocolate is using a microwave. Heat it in short bursts, stirring in between. This helps prevent burning. For even coating, dip the brownie bomb fully in the melted chocolate. Use a fork to lift it out. Gently tap to shake off excess chocolate. This gives a smooth finish, perfect for presentation.
Pro Tips
- Chill for Perfection: Make sure to chill the brownie bombs after filling them to help the chocolate coating adhere better and make them easier to handle.
- Quality Chocolate: Use high-quality chocolate for coating to enhance the flavor. Good chocolate melts smoothly and has a richer taste.
- Experiment with Fillings: Feel free to add different mix-ins to the cookie dough, such as nuts or dried fruit, for added texture and flavor.
- Storage Tips: Store the brownie bombs in an airtight container in the refrigerator for up to a week to keep them fresh and delicious.
Variations
Flavor Variations
You can change the flavor of your brownie bombs easily. Use flavored chocolate for the coating. Try dark chocolate, milk chocolate, or even white chocolate. Each option brings a new taste to the treat. You can also mix in nuts like walnuts or pecans into the cookie dough. This adds a nice crunch. Don’t forget to sprinkle some on top for a fun look!
Dietary Adjustments
If you need a vegan option, swap butter with coconut oil. Use plant-based milk for a rich flavor. For gluten-free brownies, choose a gluten-free brownie mix. You can even make the cookie dough with gluten-free flour. Reducing sugar is simple, too. Use natural sweeteners like honey or maple syrup instead of refined sugar. These choices still keep the flavor strong.
Creative Serving Ideas
For serving, think about presentation. Place your brownie bombs on a nice platter. Drizzle warm chocolate or caramel sauce on top. You can also dust them with powdered sugar for a fancy touch. Pair them with ice cream to make it extra special. A scoop of vanilla or chocolate ice cream fits perfectly alongside. Enjoy these brownie bombs any way you like!
Storage Info
How to Store Brownie Bombs
To keep your brownie bombs fresh, use an airtight container. Layer them with parchment paper to prevent sticking. You can store them in the fridge for a few days. If you want to save them for longer, freeze them. Wrap each brownie bomb in plastic wrap or foil, then place them in a freezer bag. This keeps them safe from freezer burn.
Shelf Life
In the fridge, your brownie bombs can last up to a week. If you freeze them, they stay good for about three months. Always check for signs of spoilage. Look for changes in color or texture. If they smell off or taste strange, it's best to throw them away. Keeping an eye on your treats helps ensure they stay delicious!
FAQs
Can I use homemade brownie mix?
Yes, you can use homemade brownie mix. When making brownies from scratch, be sure to follow a trusted recipe. You want to achieve a moist and fudgy texture. Use high-quality cocoa powder for rich flavor. Adjust baking time based on your recipe. Start checking for doneness a few minutes early. You want the edges to set, but the center should be a bit soft.
How do I make the cookie dough safe to eat?
To make cookie dough safe, use heat-treated flour. You can heat it in the oven at 350°F for about 5 minutes. This kills any harmful bacteria. Also, avoid raw eggs in your dough. Use milk and vanilla extract to get that classic flavor. Follow these steps, and your cookie dough will be safe and tasty.
What can I do if my chocolate coating isn’t smooth?
If your chocolate coating isn't smooth, check the melting method. Use a microwave in short bursts, stirring often. If it’s too thick, add a little vegetable oil. This will help it become glossy. If you see lumps, it may have overheated. Start fresh with a new batch and melt slowly. This way, you’ll get that perfect shiny finish.
Brownie bombs are a fun treat you can easily make at home. We covered the main ingredients, step-by-step instructions, and tips to ensure perfection. You learned how to customize flavors and make them vegan or gluten-free. Remember to store them properly to enjoy later. Brownie bombs are not just tasty; they’re also a great way to impress friends and family. Now, gather your ingredients and start baking your delicious creations!