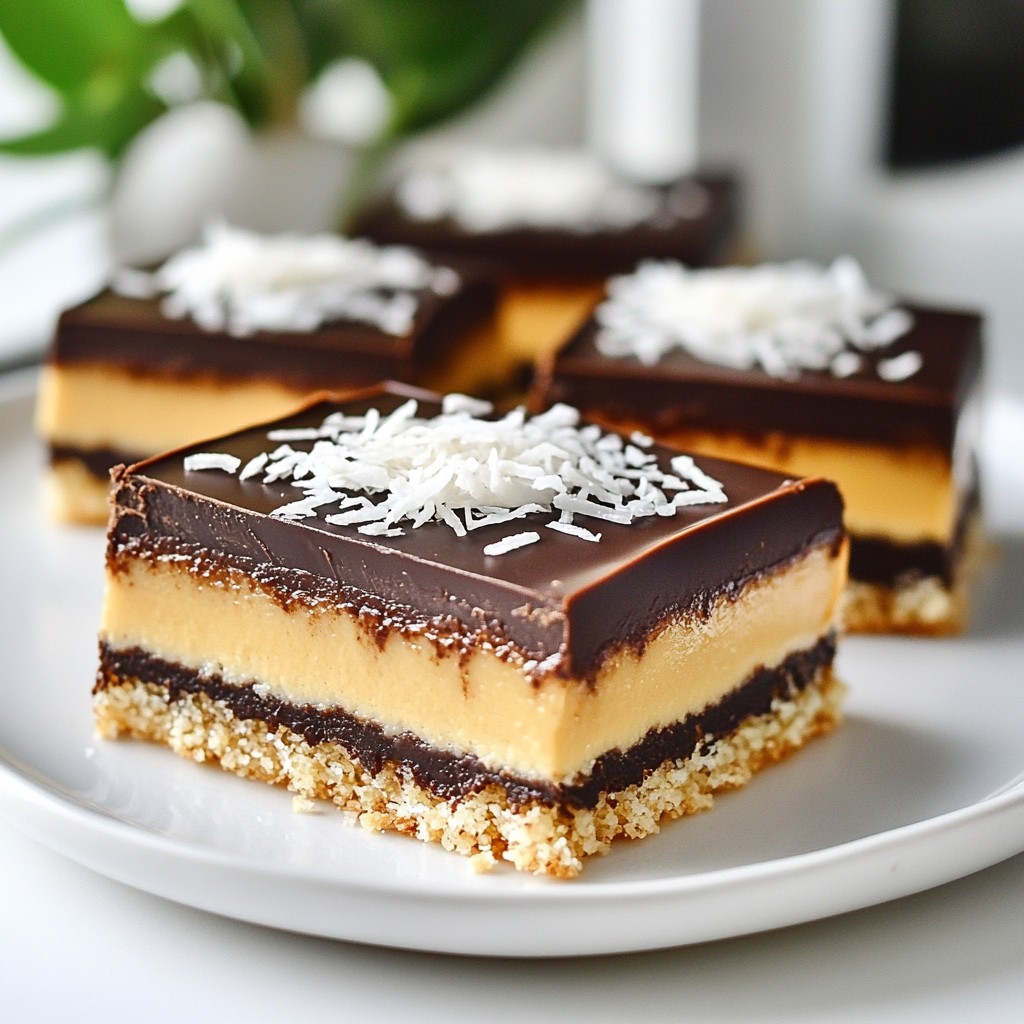
If you crave a sweet treat that's simple and fun to make, I have the perfect recipe for you! Classic No-Bake Nanaimo Bars are a delightful dessert that needs no oven. With layers of chocolate, cream, and a graham cracker base, these bars are both tasty and easy to prepare. Let's dive into this delicious no-bake recipe, and I'll help you impress your friends and family without breaking a sweat!
Error: Connection error.
Ingredients
List of Ingredients
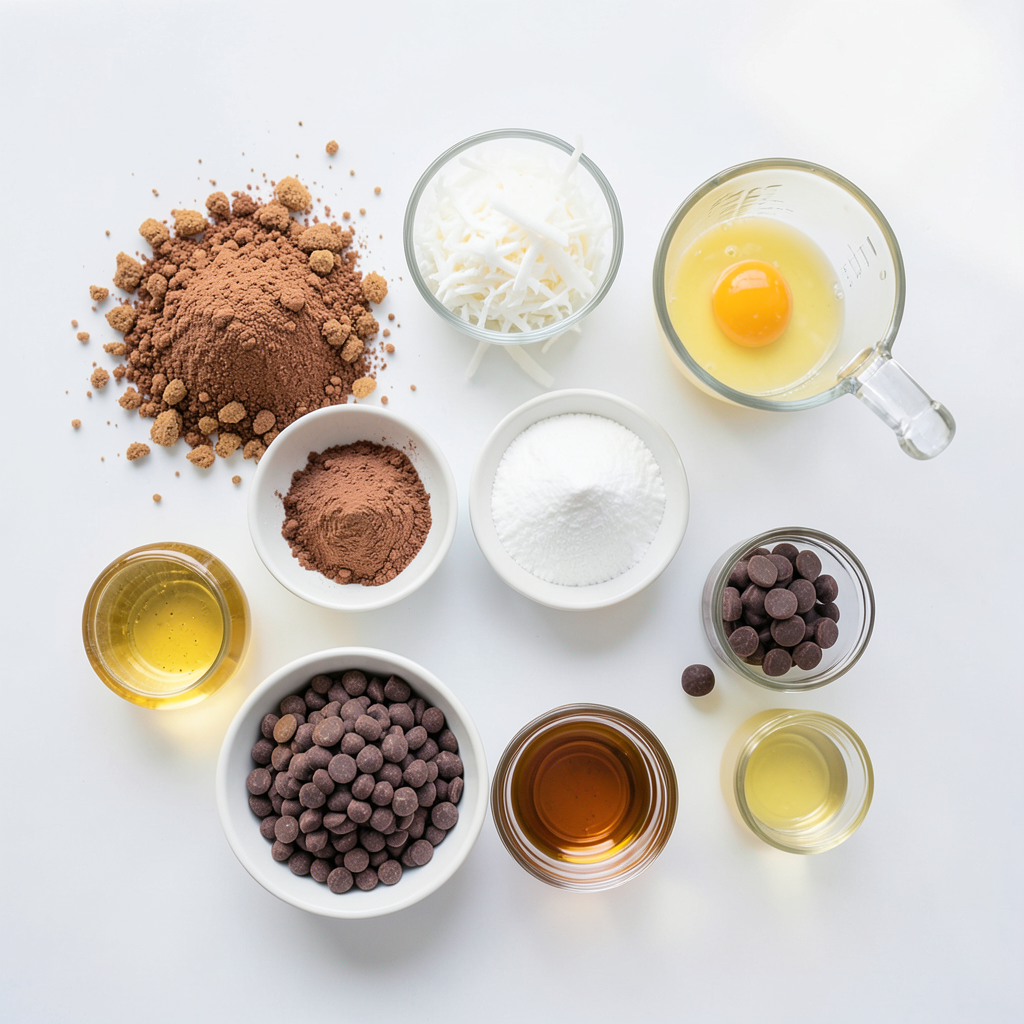
To make classic no-bake Nanaimo bars, gather these simple ingredients:
- 1 cup graham cracker crumbs
- 1/2 cup unsweetened cocoa powder
- 1/2 cup shredded coconut
- 1/2 cup unsalted butter, softened to room temperature
- 1 cup powdered sugar
- 1 large egg, beaten lightly
- 2 tablespoons vanilla extract
- 1/2 cup unsweetened cocoa powder (for the top layer)
- 1 cup semi-sweet chocolate chips
- 1 tablespoon coconut oil
Measurements and Substitutions
Using the right amounts is key. If you do not have graham cracker crumbs, you can use crushed cookies like digestive biscuits. For the egg, you can use a flaxseed meal mix if you want a vegan option; mix one tablespoon of flaxseed meal with three tablespoons of water. If you want less sugar, reduce the powdered sugar slightly. Just keep in mind that it may change the texture a bit.
Importance of Fresh Ingredients
Fresh ingredients make a big difference in taste. Softened butter blends better, giving you a creamy filling. Using fresh eggs helps bind everything together. Always check your cocoa powder and chocolate chips for freshness. Old chocolate can taste dull and may not melt well. Fresh ingredients help you create a dessert that is rich and full of flavor, just like Nanaimo bars should be!
Step-by-Step Instructions
Preparation Method
To make Nanaimo bars, start by mixing the dry ingredients. In a medium bowl, combine 1 cup of graham cracker crumbs, 1/2 cup of cocoa powder, and 1/2 cup of shredded coconut. Stir until blended. In another bowl, beat 1/2 cup of softened butter and 1 cup of powdered sugar until light and fluffy. This takes about 3-5 minutes. Add 1 beaten egg and 2 tablespoons of vanilla extract. Mix until smooth. Gradually add the dry mix to the wet mix. Stir until you have a thick batter.
Layering Techniques
Next, prepare an 8x8 inch baking dish. Line it with parchment paper, leaving some overhang. Spoon the thick batter into the dish. Press it down evenly with a spatula. This forms the first layer. Now, melt the chocolate for the top layer. In a small saucepan, add 1 cup of chocolate chips and 1 tablespoon of coconut oil. Stir over low heat until melted and glossy. Pour this chocolate on top of the graham cracker layer. Spread it evenly with a spatula.
Tips for Melting Chocolate
Melting chocolate can be tricky. Keep the heat low to prevent burning. Stir slowly and often for even melting. If the chocolate is too thick, add a bit more coconut oil. This helps create a smooth finish. Once melted, pour it over your base layer. Let the assembled bars chill in the fridge for at least 2 hours. This sets the chocolate well. When ready, lift the bars out using the parchment paper. Cut into squares or bars as you like.
Tips & Tricks
How to Perfect the Graham Cracker Layer
To get a great graham cracker layer, use fresh crumbs. I like to crush them myself. This gives a better texture. Mix the crumbs with cocoa powder and coconut well. Stir until everything looks even. Press the mixture firmly into the baking dish. This step helps it hold together. Use the back of a spatula for a smooth top.
Ensuring a Smooth Chocolate Topping
For the chocolate topping, melt chocolate chips with coconut oil. Do this slowly over low heat. Keep stirring to avoid burning. Once the chocolate is glossy, pour it over the graham cracker layer. Spread it evenly using a spatula. This makes it look nice and smooth. For a shiny look, let it cool slightly before chilling.
Serving Suggestions
When it's time to serve, cut the bars into squares. For a fun touch, sprinkle more coconut on top. You can also pair these bars with coffee or tea. They make a great dessert for gatherings. If you want to impress, use a fancy plate. Everyone will love this treat!
Error: Connection error.
Variations
Gluten-Free Options
You can make Nanaimo bars gluten-free. Use gluten-free graham cracker crumbs. Many brands offer tasty options. Check labels to ensure they are certified gluten-free. The rest of the recipe remains the same. You still get that rich, layered taste without the gluten.
Flavor Additions
Want to shake things up? Add flavors like mint or almond. For mint, use a few drops of mint extract in the butter mixture. This gives a fresh taste. If you love almond, add almond extract instead. You can also mix in nuts, like chopped almonds or walnuts, for added crunch.
Adjusting Sweetness Levels
You can change the sweetness in your Nanaimo bars. If you prefer less sugar, cut down on the powdered sugar. You can replace some with unsweetened cocoa powder to balance flavors. Taste the mixture before you spread it out. This way, you can adjust it to your liking.
Storage Info
Best Practices for Refrigeration
To keep your Nanaimo bars fresh, store them in the fridge. Place them in an airtight container. This will stop them from drying out or absorbing odors. If you stack them, use parchment paper between layers. This prevents the chocolate from sticking. Chill them for at least two hours before serving for the best taste.
Freezing Instructions
You can freeze Nanaimo bars for later enjoyment. Wrap them tightly in plastic wrap, then place them in an airtight container. This way, they stay safe from freezer burn. When you want to eat them, take them out and let them thaw in the fridge for a few hours. This keeps the texture nice and smooth.
Shelf Life of Nanaimo Bars
Nanaimo bars last about a week in the fridge. If you freeze them, they can stay good for up to three months. Just remember, the longer they sit, the more the texture may change. Keep an eye on them for the best flavor and texture. Enjoy them fresh for the best experience!
FAQs
Can I make Nanaimo Bars without eggs?
Yes, you can make Nanaimo Bars without eggs. To replace the egg, use 1/4 cup of unsweetened applesauce or a mashed banana. Both of these options will keep the texture smooth. They also add a hint of sweetness. This swap works great in no-bake recipes.
What can I use instead of graham cracker crumbs?
If you don't have graham cracker crumbs, you can use crushed cookies like digestive biscuits or vanilla wafers. These alternatives give a similar taste and texture. You can also use crushed nuts or oats for a gluten-free option. Just blend them into fine crumbs before mixing.
How to tell when Nanaimo Bars are set?
To know if your Nanaimo Bars are set, check the chocolate layer. It should feel firm and not sticky. You can also lightly touch the top with your finger. If it feels solid, they are ready. Chill them for at least two hours for the best results.
We explored key ingredients and their importance for great Nanaimo Bars. I shared steps for preparation and tips for making the chocolate perfect. You learned how to create variations, ensuring everyone can enjoy these treats. I also covered storage tips to keep your bars fresh.
In the end, follow these steps for success. Enjoy your Nanaimo Bars with friends and family!