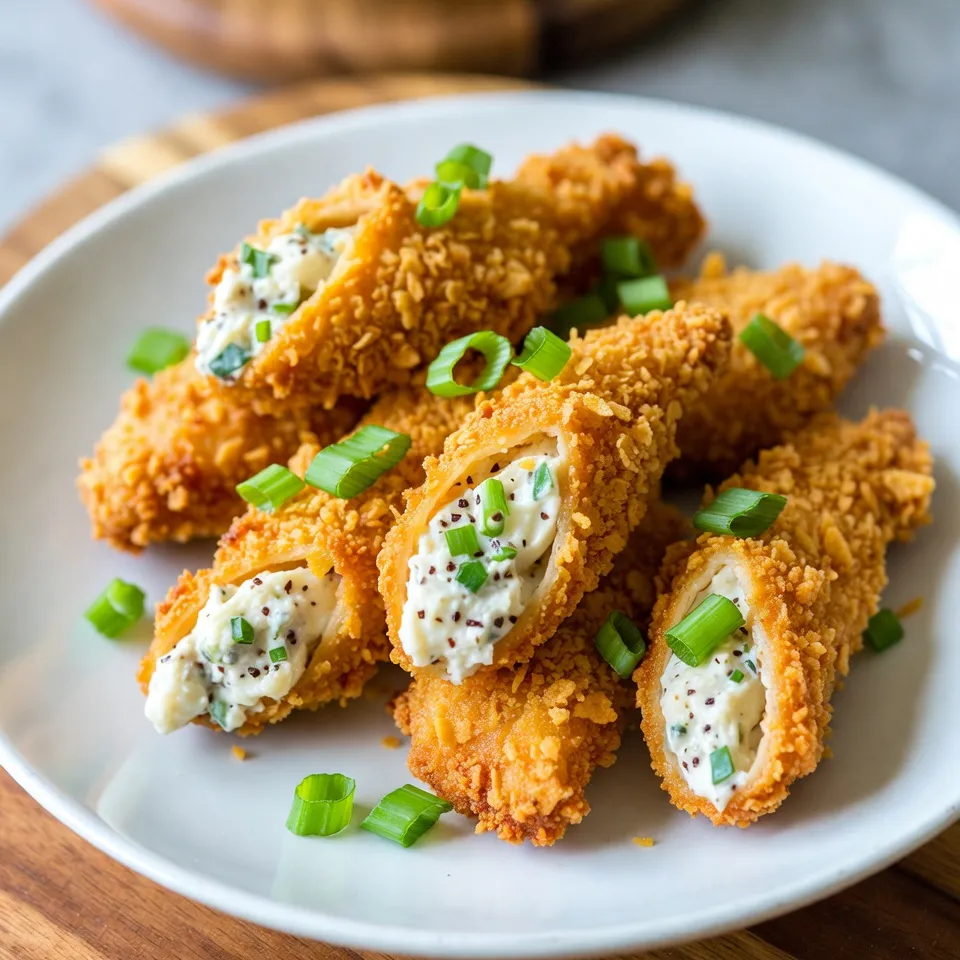
If you crave a fun, tasty dish, look no further than Crack Chicken Tenders! They are savory, crispy delights perfect for any meal. Imagine tender chicken coated in cheesy goodness, seasoned to perfection, and baked to a crispy finish. In this guide, I’ll walk you through the simple steps to create this mouthwatering treat. Let’s dive into a world of flavors that will have everyone asking for seconds!
Why I Love This Recipe
- Deliciously Cheesy: The combination of mozzarella and cream cheese creates a rich and creamy filling that elevates the chicken tenders to a whole new level of flavor.
- Easy to Make: This recipe is straightforward with simple steps, making it perfect for busy weeknights or casual gatherings with friends and family.
- Customizable: You can easily customize the filling by adding your favorite ingredients, such as spinach or jalapeños, to suit your taste preferences.
- Crispy and Crunchy: The cornflake coating gives these tenders a delightful crunch that contrasts beautifully with the cheesy filling, making each bite satisfying.
Ingredients
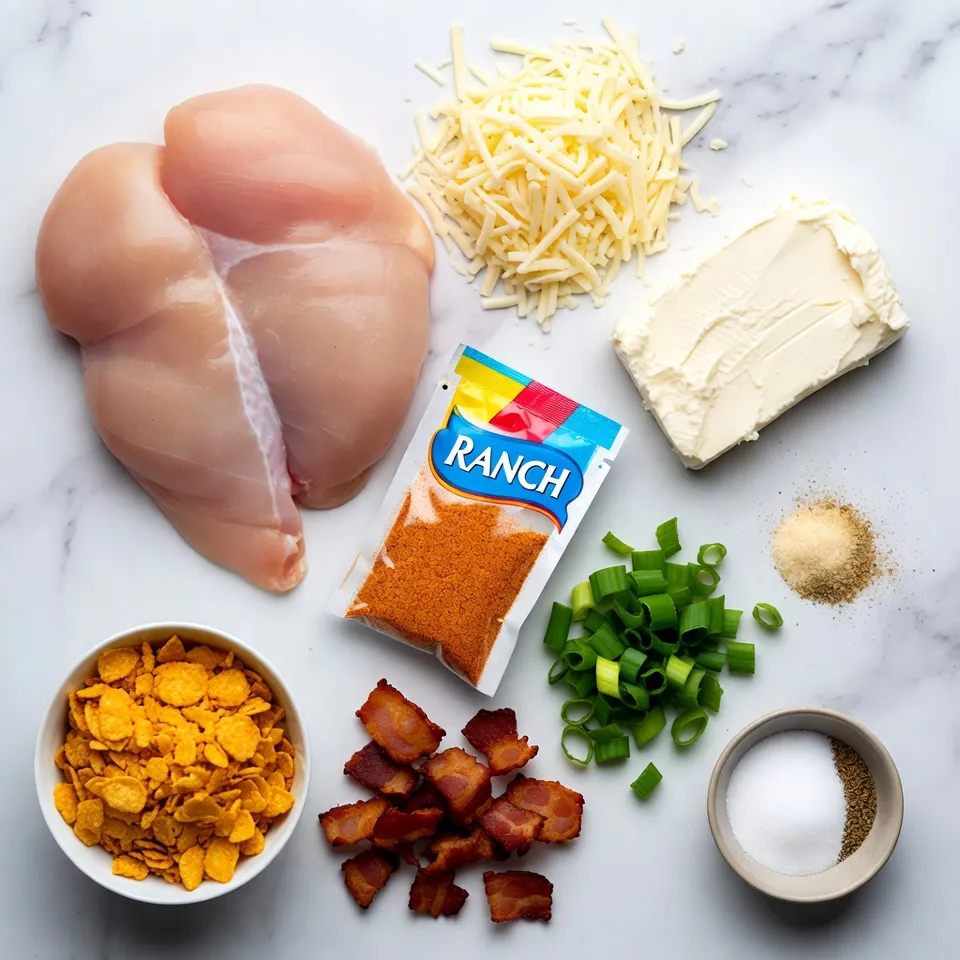
To make the perfect Crack Chicken Tenders, you need these simple ingredients:
– 1 lb (450 g) chicken tenderloins
– 1 cup shredded mozzarella cheese
– 1/2 cup softened cream cheese
– 1 packet (about 1 oz) ranch seasoning mix
– 1/4 cup chopped green onions
– 1/4 cup cooked bacon bits (optional, for added flavor)
– 1 cup crushed cornflakes (for a crispy coating)
– 1/2 teaspoon garlic powder
– Salt and pepper to taste
– Cooking spray or olive oil (for frying)
These ingredients create a delightful mix of flavors and textures. The chicken tenderloins serve as the base, while the cheeses bring creaminess. Ranch seasoning adds a zesty kick. Green onions and bacon bits provide freshness and richness. The cornflake coating gives a satisfying crunch that makes every bite enjoyable.
Using these simple items, you can create a dish that is not just tasty but also fun to make!
Step-by-Step Instructions
Prepping the Ingredients
First, get your oven ready. Preheat it to 400°F (200°C). This helps the chicken cook evenly. Next, line a baking sheet with parchment paper. This makes cleanup easier and keeps the tenders from sticking. In a medium bowl, mix the softened cream cheese and shredded mozzarella. Add the ranch seasoning mix, chopped green onions, and bacon bits if you want extra flavor. Stir this well until it is creamy and smooth.
Now, let’s prepare the chicken. Take 1 pound of chicken tenderloins and season them. Use salt, pepper, and garlic powder. Make sure each piece is coated well. This adds great taste to your chicken.
Assembling the Chicken Tenders
Now, it’s time to fill the chicken. For each tender, take a spoonful of the creamy cheese mixture. Place it in the center of the chicken. Fold the tender over the filling. Make sure it is mostly closed. If it needs help, use a toothpick to hold it together.
Next, let’s coat the chicken. Pour 1 cup of crushed cornflakes into a shallow dish. Take each filled chicken tender and roll it in the cornflakes. Press down lightly to help them stick. This will give your chicken a nice, crispy texture.
Baking Instructions
Place the coated chicken tenders on the prepared baking sheet. Lightly spray them with cooking spray or drizzle olive oil on top. This helps them brown and become crispy in the oven. Bake the tenders for 20 to 25 minutes. You want them to be cooked through and golden brown. Check that the chicken reaches an internal temperature of 165°F (75°C).
When they are done, take them out and let them rest for about 5 minutes. This allows the flavors to settle before you serve them. Enjoy your crunchy, cheesy chicken tenders!
Tips & Tricks
Achieving Perfect Crispiness
To get the best crunch on your chicken tenders, use crushed cornflakes. They give a great texture. Press the cornflakes on the chicken firmly. This helps the coating stick. Another tip is to mist the tenders with cooking spray. This adds moisture and helps them brown well. Bake them at 400°F (200°C) for a golden finish. Keep an eye on them as they bake. They should be crisp and golden in about 20-25 minutes.
Enhancing Flavor Variations
You can change the flavor of your tenders easily. Try adding spices like paprika or cayenne for heat. Mix in different herbs like parsley or thyme for freshness. You can also swap the ranch seasoning for taco seasoning for a fun twist. If you love cheese, try using sharp cheddar or pepper jack. Each change will give a new taste. Be creative and mix flavors that you enjoy.
Presentation Tips
Make your chicken tenders look as good as they taste. Arrange them neatly on a colorful platter. Sprinkle chopped green onions on top for a pop of color. Serve with a small bowl of ranch dressing for dipping. This adds a nice touch. You can also add some fresh veggies or a salad on the side. A bright presentation makes the meal more inviting. Enjoy showcasing your delicious creation!
Pro Tips
- Use Fresh Ingredients: Always opt for fresh chicken and high-quality cheese for the best flavor and texture in your cheesy ranch chicken tenders.
- Customize the Coating: Feel free to experiment with different coatings like panko breadcrumbs or crushed potato chips for a unique twist on the crispy exterior.
- Make Ahead: Prepare the chicken tenders in advance and refrigerate them before baking. Just add a few extra minutes to the baking time if cooking from cold.
- Serving Suggestions: Pair these tenders with a variety of dipping sauces such as BBQ, honey mustard, or sriracha for an extra flavor kick at your gathering.
Variations
Different Cheese Options
You can switch up the cheese in your crack chicken tenders. If you want a bolder taste, try sharp cheddar or pepper jack. These cheeses add a nice kick. For a creamier texture, use gouda or fontina. Both melt well and give a rich flavor. Mixing different cheeses can create a unique taste. Just remember to adjust the amount to keep the filling creamy.
Alternative Coatings
While cornflakes provide a great crunch, you can use other coatings too. Panko breadcrumbs give a light and airy crisp. You can also try crushed potato chips for a salty twist. If you want a gluten-free option, almond flour works well. Just make sure to coat the chicken well for maximum crunch. Each coating changes the flavor and texture, so feel free to experiment!
Vegan or Vegetarian Adaptations
You can make crack chicken tenders vegan or vegetarian with simple swaps. Replace chicken tenderloins with firm tofu or seitan. Both will absorb flavors well. For the cheese, use dairy-free cream cheese and mozzarella. Many brands offer great plant-based options. Ensure the ranch seasoning is vegan-friendly too. These changes keep the dish tasty while catering to different diets. Enjoy the same chewy, crispy delight with these adaptations!
Storage Info
Best Practices for Storing Leftovers
To keep your Crack Chicken Tenders fresh, store them in an airtight container. Make sure they cool down to room temperature first. You can place parchment paper between layers to avoid sticking. This will help maintain their crispiness. Properly stored, they last for up to three days in the fridge.
Reheating Instructions
When you’re ready to enjoy your leftovers, preheat your oven to 350°F (175°C). Place the chicken tenders on a baking sheet. Cover them with foil to prevent drying out. Heat for about 10-15 minutes or until warm. If you want extra crispiness, remove the foil for the last 5 minutes.
Freezing for Future Meals
If you want to freeze your tenders, let them cool completely. Wrap each tender in plastic wrap, then in aluminum foil. This doubles the protection against freezer burn. They can stay in the freezer for up to three months. To reheat, thaw them overnight in the fridge and follow the reheating instructions above.
FAQs
How do I know when the chicken is done?
You can tell when the chicken is done by checking its internal temperature. Use a meat thermometer to ensure it reaches at least 165°F (75°C). The chicken should also look golden brown and crispy on the outside. If the juices run clear when you cut into it, that is a good sign too.
Can I make these tenders ahead of time?
Yes, you can prepare these tenders ahead of time! You can assemble them, then store them in the fridge for up to 24 hours. Just keep them covered to prevent drying out. When you are ready to cook, simply bake them as directed. They will still taste great!
What can I serve with Crack Chicken Tenders?
Crack Chicken Tenders are great on their own, but you can pair them with many sides. Here are some ideas:
– Fresh veggie sticks (carrots, celery, or bell peppers)
– A crisp salad with your favorite dressing
– Sweet potato fries for a tasty crunch
– Garlic bread for extra flavor
– Ranch dressing for dipping
These options will make your meal even more enjoyable!
This blog post covers how to make delicious Crack Chicken Tenders. You learned about the tasty ingredients, simple steps to bake them, and tips for crispiness and flavor. We also discussed storage options and answered common questions.
Now, you can enjoy homemade tenders that suit your taste. Whether you prefer different cheeses or a vegan twist, the options are endless. Try these tips and enjoy your cookin