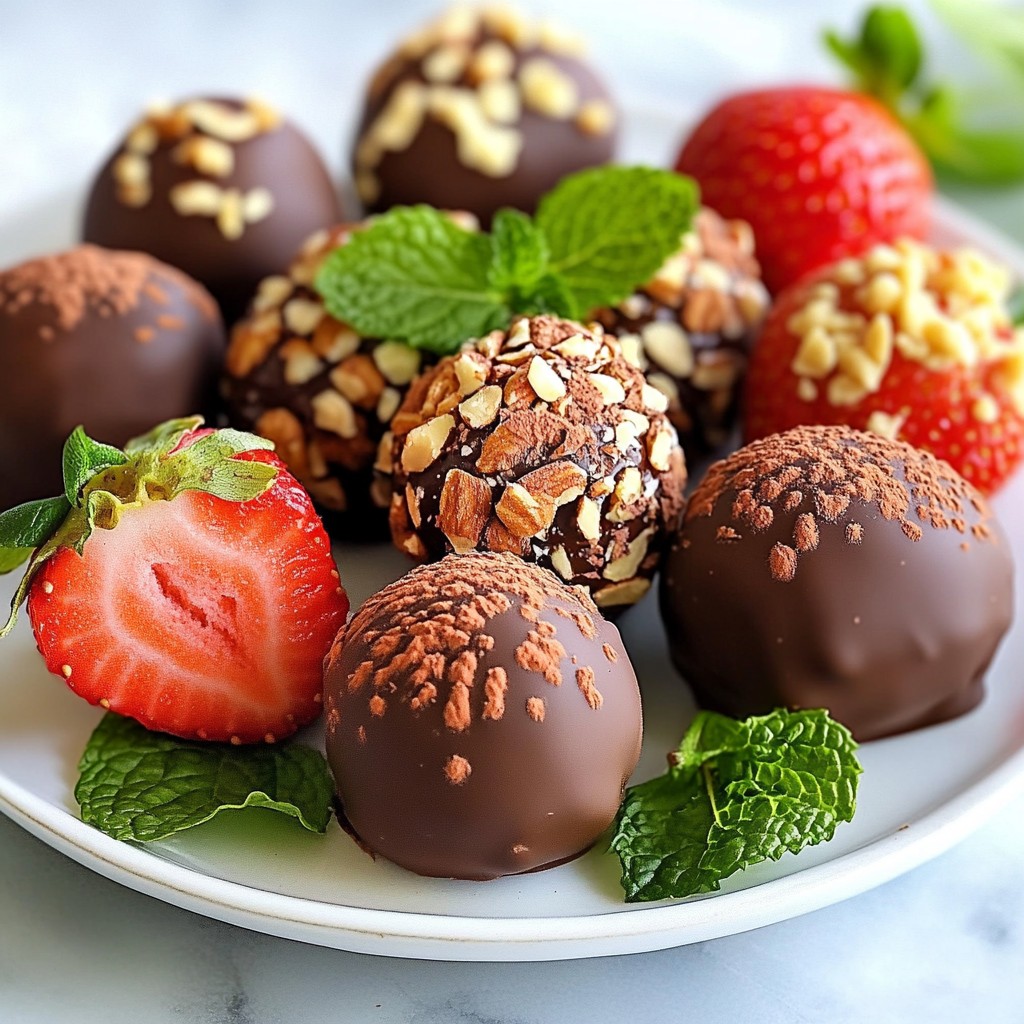
Indulge in the rich, sweet world of creamy strawberry truffles! These delightful treats combine fresh strawberries, smooth chocolate, and just the right touch of sweetness. As you dive into this recipe, I’ll guide you through each step, ensuring you create the perfect truffle every time. Whether you’re an experienced baker or just starting, these truffles will surely impress. Let’s bring some joy to your kitchen with these simple yet delicious bites!
Why I Love This Recipe
- Fresh and Fruity: The use of fresh strawberries gives these truffles a vibrant flavor that is both refreshing and indulgent.
- Easy to Make: This recipe is straightforward and requires minimal ingredients, making it perfect for bakers of all skill levels.
- Perfect for Any Occasion: These truffles are versatile and can be served at parties, holidays, or as a sweet treat just for you!
- Customizable Coating: Whether you prefer cocoa powder or crushed nuts, you can easily customize the exterior to suit your taste.
Ingredients
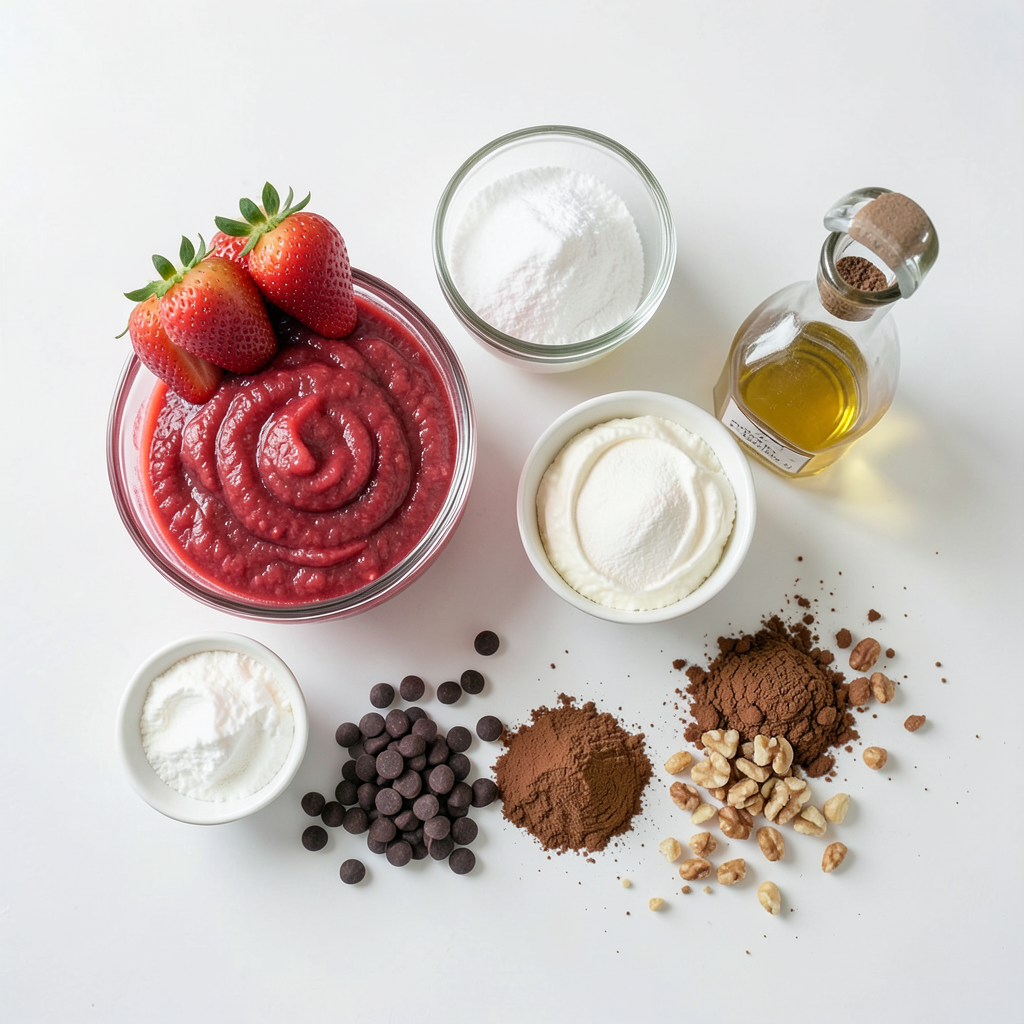
Fresh Strawberries
For this truffle recipe, you need 1 cup of fresh strawberries. Make sure they are ripe and sweet. Hulling them is key; it removes the green tops. Next, puree the strawberries until they are smooth. This adds a fresh, fruity flavor to your truffles. Fresh strawberries give the best taste, making your truffles burst with berry goodness.
Dairy and Sweeteners
You will also need 8 oz of cream cheese. It should be softened to room temperature. This gives the truffles their creamy texture. Along with the cream cheese, you need 1 cup of powdered sugar. This sweetens the mix and helps it hold together. A teaspoon of pure vanilla extract adds extra flavor and depth. These ingredients combine to create a rich and sweet filling.
Chocolate Coating
To coat your truffles, gather 2 cups of semisweet chocolate chips. This chocolate will melt down to create a smooth coating. You also need 1 tablespoon of coconut oil. This helps the chocolate stay shiny and smooth. For rolling the truffles, you can use cocoa powder or crushed nuts, like almonds or hazelnuts. These add a nice crunch and look great on your finished truffles.
Step-by-Step Instructions
Preparation of Strawberry Mixture
Start by gathering all your ingredients. You will need fresh strawberries, cream cheese, powdered sugar, and vanilla extract. First, hull and puree the strawberries until smooth. In a large mixing bowl, add the pureed strawberries, cream cheese, powdered sugar, and vanilla. Beat this mixture with an electric mixer on medium speed. It should take about 2-3 minutes to become smooth and creamy.
Chilling and Shaping Truffles
After mixing, cover the bowl with plastic wrap. Place it in the fridge for 1 to 2 hours. This will help the mixture firm up. Once chilled, take it out and use a small cookie scoop or your hands to form the truffles. Roll the mixture into balls about 1 inch wide. Place each truffle on a baking sheet lined with parchment paper. Return the tray to the fridge for another 30 minutes to chill.
Coating with Chocolate
While the truffles chill, prepare the chocolate coating. In a microwave-safe bowl, mix semisweet chocolate chips and coconut oil. Microwave in 30-second intervals, stirring in between, until melted. This usually takes 1-2 minutes. Carefully take the chilled truffles out of the fridge. Use a fork to dip each truffle into the melted chocolate. Let excess chocolate drip off, then place them back on the parchment-lined sheet. If you want, roll some truffles in cocoa powder or crushed nuts while the chocolate is still wet. Let them sit for 30 minutes to set or refrigerate for 15 minutes. Once the chocolate hardens, serve them on a nice plate.
Tips & Tricks
Achieving the Right Texture
To make the best creamy strawberry truffles, texture matters. First, blend the strawberries and cream cheese well. You want a smooth mix, so take your time. If it feels too soft, chill it longer. This step helps the truffles hold their shape.
Melting Chocolate Perfectly
Melting chocolate can be tricky. Use a microwave-safe bowl for the chocolate chips and coconut oil. Heat it in 30-second bursts. Stir well after each interval. This keeps the chocolate from burning. Aim for a smooth, glossy finish. You want it to coat the truffles nicely.
Serving Suggestions for Truffles
Serve your truffles on a lovely platter. Add fresh strawberry slices and mint leaves for color. This makes your truffles look fancy. You can also roll them in cocoa powder or crushed nuts for a fun twist. These small touches make a big difference in presentation.
Pro Tips
- Use Fresh Strawberries: For the best flavor, always use fresh, ripe strawberries for pureeing. Frozen strawberries can alter the texture and taste of your truffles.
- Chill Thoroughly: Ensure your truffle mixture is adequately chilled before rolling. This helps maintain the shape and makes it easier to work with.
- Experiment with Coatings: Don't just stick to cocoa powder or nuts; try rolling your truffles in crushed freeze-dried strawberries or shredded coconut for a unique twist.
- Storage Tips: Store your truffles in an airtight container in the refrigerator for up to a week. They can also be frozen for longer storage, just allow them to thaw in the fridge before serving.
Variations
Vegan Strawberry Truffles
You can make vegan strawberry truffles by swapping out cream cheese. Use vegan cream cheese or cashew cream. To make cashew cream, soak cashews in water for 4 hours, then blend them until smooth. This gives a rich texture. The rest of the recipe stays the same. Use maple syrup instead of powdered sugar for sweetness.
Gluten-Free Options
These truffles can easily be gluten-free. All the ingredients, like strawberries and chocolate, are naturally gluten-free. Just ensure the chocolate chips you select are certified gluten-free. This way, everyone can enjoy these sweet treats without worry.
Flavor Enhancements
Want to spice things up? You can add liqueurs to your truffles. A tablespoon of strawberry liqueur or chocolate liqueur will add a fun twist. Just mix it into your filling before chilling. You can even try a splash of rum or vodka for a unique flavor. This option is great for adult gatherings.
Storage Info
Best Practices for Storing Truffles
To keep your creamy strawberry truffles fresh, store them in an airtight container. Line the bottom of the container with parchment paper. Place the truffles in a single layer. If you have more truffles, add another layer of parchment paper before stacking. This helps prevent sticking. Keep the container in the fridge. This keeps the truffles cool and safe.
How Long Do They Last?
When stored properly, the truffles last about one week in the fridge. If you notice any changes in smell or texture, it’s best to toss them. Enjoy them fresh for the best taste.
Freezing Instructions
You can freeze the truffles to enjoy later. First, place the truffles on a baking sheet. Make sure they are not touching. Freeze them for about one hour. Once they are firm, transfer them to an airtight container or a freezer bag. They can last up to three months in the freezer. When you are ready to eat them, move them to the fridge to thaw overnight. Enjoy the taste of strawberry and chocolate anytime!
FAQs
Can I use frozen strawberries?
Yes, you can use frozen strawberries. Just thaw them first. After thawing, drain any excess liquid. This step is key. Too much water can change the texture of your truffles. Puree the thawed strawberries as you would with fresh ones.
What's the best type of chocolate for coating?
I recommend using semisweet chocolate chips. They melt well and taste great. You can also use dark chocolate if you like a richer flavor. Milk chocolate works too, but it may be sweeter. Choose what you enjoy most!
How do I prevent the chocolate from cracking?
To prevent cracking, ensure your chocolate is smooth and warm. Dip the truffles quickly and let them set at room temperature. If you chill them too fast, the chocolate may crack. A gentle setting is best.
In this blog post, we explored how to make delicious strawberry truffles. We covered all the essential ingredients, like fresh strawberries and sweeteners, to create the perfect blend. You learned step-by-step instructions, along with helpful tips for texture and chocolate melting. We talked about fun variations, including vegan and gluten-free options. You now know the best practices for storing your truffles and how long they last. Enjoy making these tasty treats and impress your friends and family with your new skills!