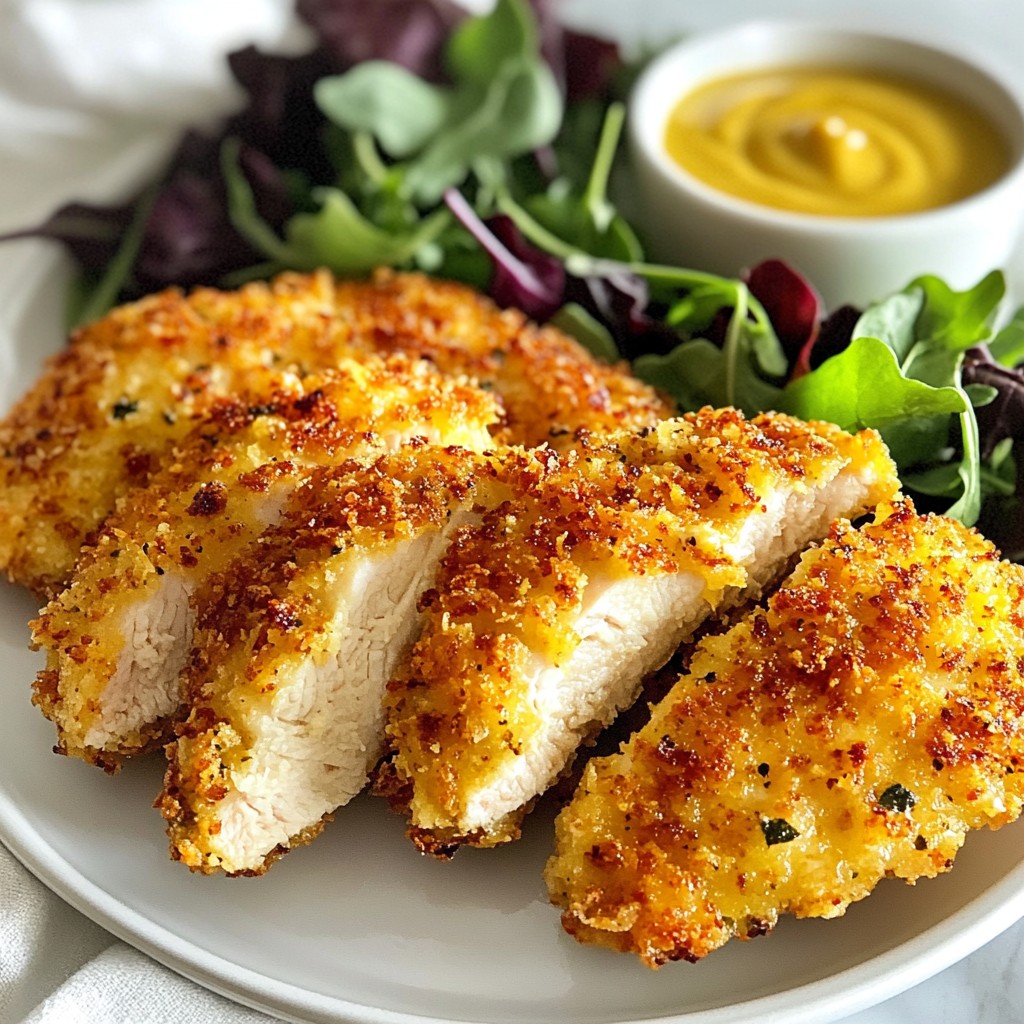
Are you craving a dish that delivers on flavor and crunch? Look no further! My Crispy Chicken Cutlets are simple to make and sure to please everyone at your table. With just a few fresh ingredients and easy steps, you can whip up this golden delight in no time. Dive into the full recipe and discover tips for achieving the perfect crispiness that will leave your taste buds dancing!
Why I Love This Recipe
- Perfectly Crispy Texture: The use of panko breadcrumbs gives these cutlets an extra crunch that elevates the dish to restaurant-quality.
- Quick and Easy to Make: This recipe can be prepared in just 30 minutes, making it perfect for a weeknight dinner or a last-minute meal.
- Versatile Dish: Crispy chicken cutlets can be served in various ways, whether as a main dish, in sandwiches, or atop salads.
- Flavorful Seasoning: The combination of garlic powder, paprika, and Parmesan cheese adds a delightful depth of flavor to each bite.
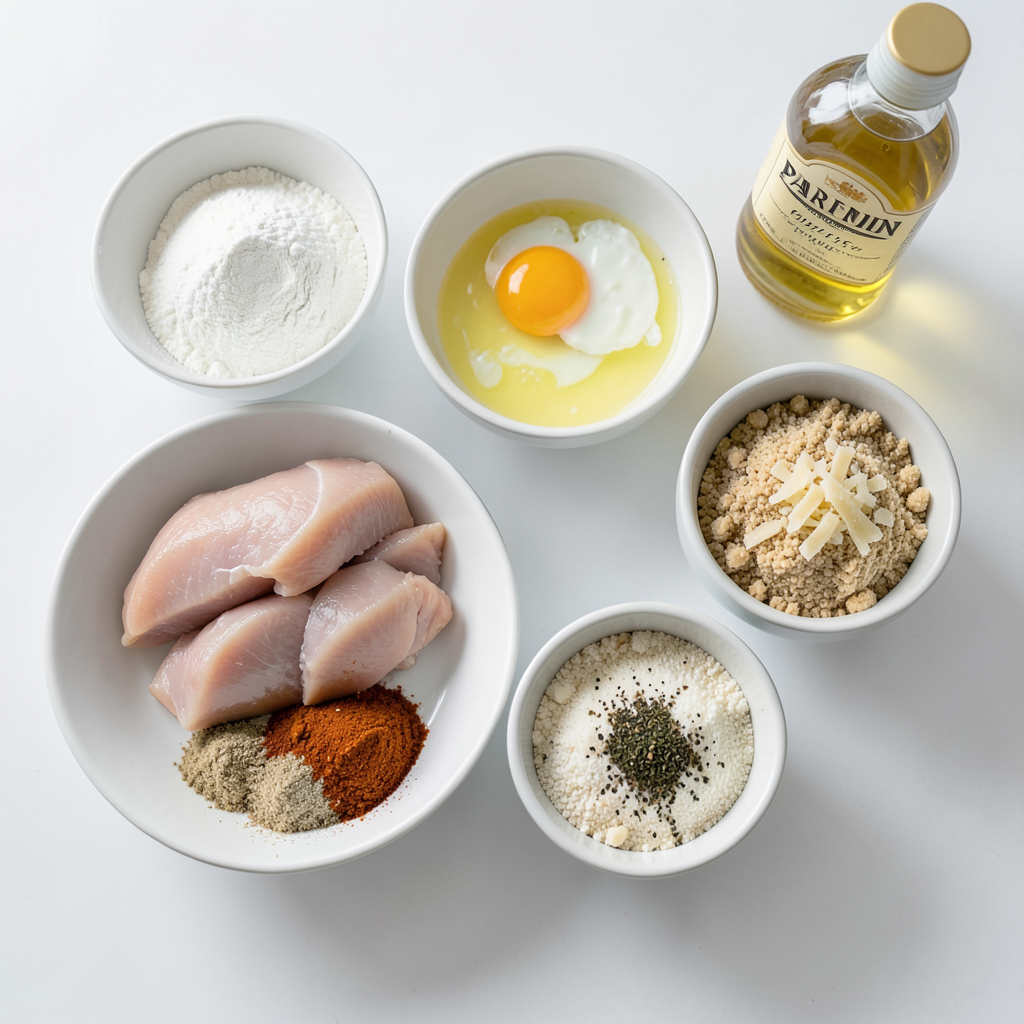
Ingredients
Chicken and Seasoning
- 2 large chicken breasts, pounded to an even thickness
- Salt and pepper to taste
- 1 teaspoon garlic powder
- 1 teaspoon paprika
- 1 teaspoon dried oregano
Breading Components
- 1 cup all-purpose flour
- 2 large eggs
- 1 cup breadcrumbs (preferably panko)
- ½ cup grated Parmesan cheese (optional)
Cooking Essentials
- Vegetable oil for frying
When I make crispy chicken cutlets, I always start with the right ingredients. I use two large chicken breasts. I pound them to get an even thickness. This step is key for even cooking. I season the chicken with salt, pepper, garlic powder, paprika, and dried oregano. These spices add great flavor.
Next, I prepare my breading station. I grab three shallow dishes. In the first dish, I mix all-purpose flour with salt, pepper, garlic powder, and paprika. The second dish holds two beaten eggs. The third dish combines breadcrumbs with dried oregano and optional Parmesan. Using panko breadcrumbs gives the cutlets extra crunch.
For frying, I need vegetable oil. I pour enough to cover the pan's bottom. The oil should shimmer when hot. This ensures the chicken fries perfectly. With these ingredients ready, I’m set to create a delicious meal that everyone will enjoy.
Step-by-Step Instructions
Preparing the Chicken
Start by laying chicken breasts between two sheets of plastic wrap. Use a meat mallet or rolling pin to pound them gently. Pound until they reach an even thickness of about ½ inch. This step helps the chicken cook evenly and stay moist.
Setting Up the Breading Station
Next, set up your breading station. Use three shallow dishes. In the first dish, mix the flour with salt, pepper, garlic powder, and paprika. In the second dish, beat the eggs until they are fully blended. In the third dish, combine the breadcrumbs with dried oregano and grated Parmesan cheese if you want extra flavor.
Bread the Chicken Cutlets
Take one chicken breast and dredge it in the seasoned flour. Ensure it's completely coated. Gently shake off any extra flour. Dip the chicken into the beaten eggs, letting the excess drip back into the bowl. Then coat it in the breadcrumb mixture, pressing lightly to ensure they stick. Repeat this with the other chicken breast.
Frying the Cutlets
In a large frying pan, pour enough vegetable oil to cover the bottom by about ¼ inch. Heat the oil over medium-high heat until it shimmers. To check if the oil is ready, drop in a small piece of bread; it should sizzle and brown right away. Carefully place the breaded chicken cutlets into the hot oil. Fry each cutlet for about 4-5 minutes on each side or until golden brown. Make sure they reach an internal temperature of 165°F (75°C).
Draining and Serving
Once the cutlets are cooked, use a slotted spatula to transfer them to a plate lined with paper towels. This step absorbs excess oil, keeping the cutlets crispy. Serve them right away while they are hot. Pair with your favorite dipping sauces, like honey mustard or zesty aioli, and add a side of salad or steamed veggies for a complete meal.
Tips & Tricks
Achieving Maximum Crispiness
To get the best crispiness, I always use panko breadcrumbs. They are lighter and crunchier than regular breadcrumbs. This makes your cutlets extra crispy.
Next, heat your oil properly. Use a pan and pour in enough oil to cover the bottom by ¼ inch. Heat it over medium-high heat until it shimmers. You can test it by dropping a small piece of bread in. If it sizzles and browns right away, the oil is ready.
Preventing Oil Spattering
Frying can get messy, so I take a few steps to keep things safe. First, don’t overcrowd the pan. This prevents oil from splattering. Fry one or two cutlets at a time for the best results.
To keep the oil at the right temperature, adjust the heat as you fry. If the oil smokes, it’s too hot. Lower the heat a bit. This way, your cutlets won’t burn.
Ensuring Juicy Chicken
Keeping the chicken juicy is key. First, avoid overcooking the cutlets. Cook them for about 4-5 minutes on each side. Then, check the internal temperature. You want it to reach 165°F (75°C). This means the chicken is safe to eat and still juicy.
Pro Tips
- Even Thickness: Pounding the chicken breasts to an even thickness ensures they cook uniformly, preventing dry or undercooked spots.
- Panko Breadcrumbs: Using panko breadcrumbs instead of regular breadcrumbs will give your cutlets that extra crunch and crispiness.
- Oil Temperature: Make sure the oil is hot enough before adding the chicken. If it’s too cool, the cutlets will absorb more oil and become greasy.
- Let Them Rest: After frying, allow the cutlets to rest for a few minutes on paper towels. This helps maintain their crispiness and lets the juices redistribute.
Variations
Flavor Enhancements
You can spice up your crispy chicken cutlets easily. Try adding cayenne pepper for a kick. Just a pinch adds a nice heat without overwhelming the dish. Fresh herbs make a big difference too. Chopped parsley brings brightness and freshness to the flavor. You could also use thyme or basil for a different twist.
Alternative Coatings
If you're looking for gluten-free options, almond flour works great. It gives a nice crunch while keeping it light. You might also enjoy using crushed nuts. Almonds or pecans can add a unique texture. This change not only tastes good but makes your meal more interesting.
Serving Suggestions
Pair your chicken cutlets with sauces for extra flavor. Honey mustard is a classic choice, and it’s sweet and tangy. A zesty aioli can elevate the dish further. For side dishes, consider a fresh salad or steamed veggies. Both options balance the meal nicely and add color to your plate.
Storage Info
Storing Leftovers
Keep your crispy chicken cutlets in airtight containers. Glass or plastic containers work well. Store them in the fridge. They last for up to three days.
Reheating Tips
To keep cutlets crispy, use an oven. Preheat it to 375°F (190°C). Place the cutlets on a baking sheet. Heat for about 10-15 minutes. This method keeps them crunchy. If you use a microwave, they may get soggy.
Freezing Options
You can freeze breaded cutlets for later use. Place them in a single layer on a baking sheet. Freeze until solid, then transfer to a freezer bag. They stay fresh for about two months. For the best results, thaw them overnight in the fridge before reheating.
FAQs
How long do crispy chicken cutlets last?
Crispy chicken cutlets last about 3 to 4 days in the fridge. Store them in an airtight container. Make sure they cool down before you put them away. This keeps them fresh and tasty. You can also freeze them for up to 3 months. Just wrap them well to avoid freezer burn.
Can I bake the chicken cutlets instead of frying?
Yes, you can bake chicken cutlets for a healthier option. Preheat your oven to 400°F (200°C). Place the breaded cutlets on a baking sheet. Use parchment paper for easy cleanup. Spray the cutlets lightly with cooking spray. Bake them for about 20 minutes. Flip them halfway through for even browning. They may not be as crispy, but they will still taste great!
What can I use instead of panko breadcrumbs?
If you don’t have panko, use regular breadcrumbs instead. You can also crush crackers or cornflakes for a crunchier texture. Ground nuts are another option for a unique flavor. Each alternative brings a different taste and texture to your dish.
How do I know when the chicken is fully cooked?
To check if the chicken is done, use a meat thermometer. The internal temperature should reach 165°F (75°C). If you don’t have one, cut into the chicken. The meat should be white and the juices clear. Avoid any pink areas, as this means it's not cooked through.
Can I use chicken thighs instead of breasts?
Absolutely! Chicken thighs can be a great substitute. They have more fat, which can keep them juicy and flavorful. Just make sure to pound them to an even thickness. This way, they cook evenly like the breasts. Adjust the cooking time slightly, as thighs may take a bit longer.
In this post, we covered how to make crispy chicken cutlets, from ingredient selection to cooking techniques. You learned about preparing the chicken, breading, and frying for the best results. Remember to use panko for crispiness and manage oil temperature for safe frying. Variations like gluten-free options and flavorful herbs can enhance your dish. Proper storage and reheating maintain freshness. This method will ensure your cutlets are tasty and satisfying every time. Enjoy your cooking adventure!