Get ready to indulge in a sweet delight! Fried Strawberry Cheesecake Sandwiches turn a classic dessert into a fun, hands-on treat. With creamy cheesecake, fresh strawberries, and a crispy coating, these sandwiches are a game-changer. Whether you're looking for a special snack or a dessert for a gathering, I've got all the secrets to make them perfect. Let’s dive into this delicious recipe that will impress your taste buds!
Why I Love This Recipe
- Decadent Flavor: The combination of creamy cheesecake and fresh strawberries creates a delightful flavor explosion.
- Fun to Make: Assembling and frying these sandwiches is a fun cooking experience, perfect for involving the whole family.
- Visual Appeal: These sandwiches are not only delicious but also visually stunning, making them perfect for any occasion.
- Versatile Serving: Enjoy them warm, topped with whipped cream, or even as a dessert treat at a brunch gathering.
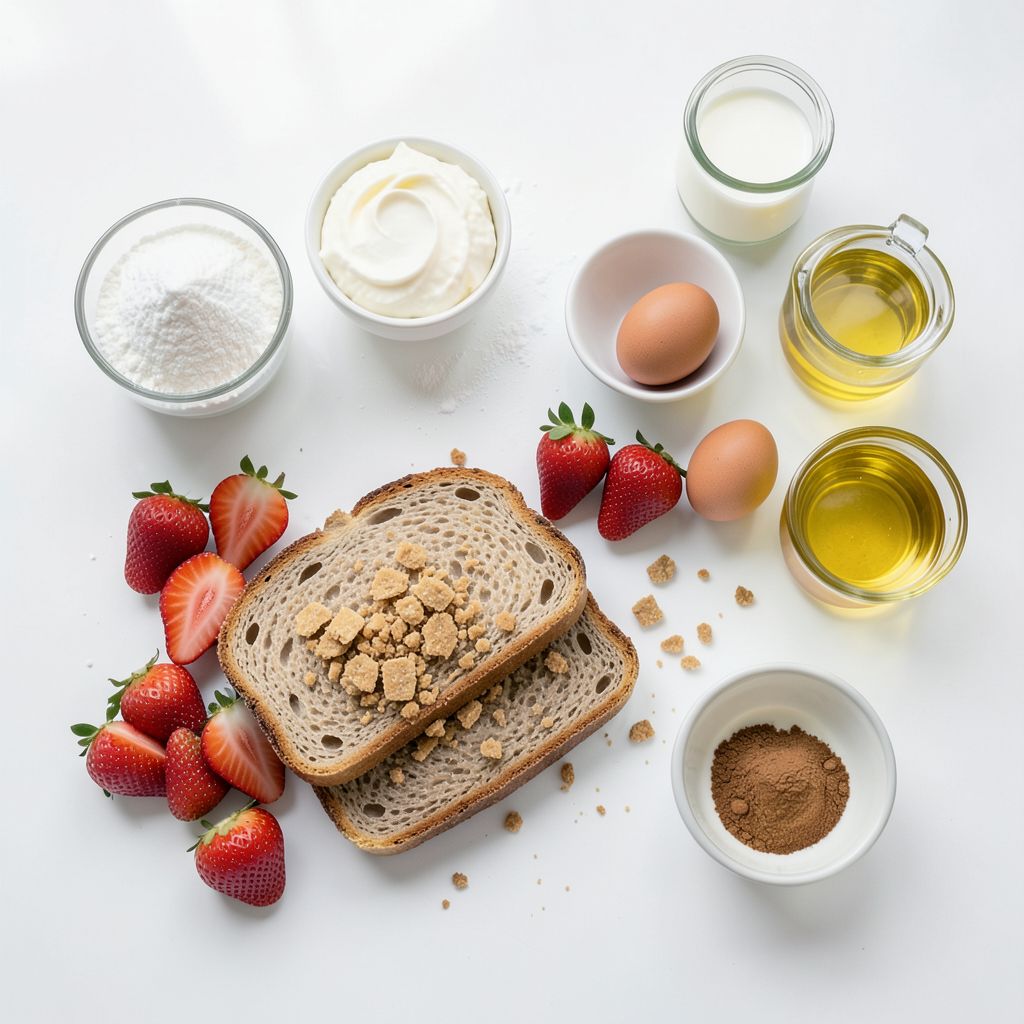
Ingredients
Main Ingredients
- 8 ounces cream cheese, softened
- 1/4 cup powdered sugar
- 1 teaspoon vanilla extract
- 1 cup fresh strawberries, hulled and sliced
- 4 slices of thick bread (like brioche or challah)
Coating Ingredients
- 1/2 cup crushed graham crackers
- 2 large eggs
- 1/2 cup milk
- 1/2 teaspoon ground cinnamon
- Vegetable oil for frying
Optional Serving Suggestions
- Whipped cream
- Additional strawberry slices
Step-by-Step Instructions
Preparing the Cheesecake Filling
To start, gather your ingredients. In a bowl, mix 8 ounces of softened cream cheese with 1/4 cup powdered sugar and 1 teaspoon vanilla extract. Blend until the mixture is smooth and creamy. Make sure there are no lumps. This will be the dreamy filling for our sandwiches.
Assembling the Sandwiches
Next, take two slices of thick bread, like brioche or challah. Spread a nice layer of the cheesecake mixture on one slice. Then, layer fresh strawberries on top. Next, place the second slice of bread on top to create a sandwich. Repeat this with the rest of the bread and cheesecake mixture. You will have two delicious sandwiches.
Coating and Frying
Now, let’s coat and fry the sandwiches. In a shallow dish, whisk together 2 large eggs, 1/2 cup milk, and 1/2 teaspoon ground cinnamon until it’s smooth. In another shallow dish, spread out 1/2 cup crushed graham crackers.
Heat vegetable oil in a skillet over medium heat until it shimmers. Dip each sandwich in the egg mixture, covering both sides well. Then, press each sandwich into the crushed graham crackers, coating them evenly.
Carefully place the sandwiches into the hot oil. Fry for about 3-4 minutes on each side, or until they turn golden brown and crispy. Once done, remove them from the skillet and let them drain on paper towels.
Serve them warm and enjoy this sweet delight!
Tips & Tricks
Perfecting the Ice Cream Mixture
To make the cheesecake filling easy to spread, we need a smooth mix. Start with softened cream cheese. Add powdered sugar and vanilla extract. Blend until creamy and lump-free. This makes spreading a breeze. If the mix is too thick, add a splash of milk to loosen it.
Frying Techniques
The right oil temperature is key for crispiness. Heat vegetable oil in a large skillet over medium heat. You want the oil to shimmer but not smoke. Test the heat by dropping a small piece of bread into the oil. If it sizzles, you are ready. Fry each sandwich for about 3-4 minutes on each side. Look for a golden brown color. This ensures a crispy texture on the outside.
Serving Suggestions
Make your sandwiches look special. Cut each sandwich diagonally and place them on a nice plate. Lightly dust with extra powdered sugar for a sweet touch. Drizzle with whipped cream for extra indulgence. For color, add fresh strawberry slices or a sprig of mint. This makes your dish pop and looks inviting.
Pro Tips
- Use Cold Cream Cheese: For easier mixing and spreading, ensure your cream cheese is cold. This prevents it from becoming too runny when combined with the powdered sugar.
- Choose the Right Bread: Opt for thick slices of bread like brioche or challah for a sturdier sandwich that holds up well during frying.
- Monitor Oil Temperature: To achieve the perfect golden brown color, make sure the oil is hot enough before frying. A drop of batter should sizzle immediately upon contact.
- Let Them Drain: After frying, place the sandwiches on paper towels to drain excess oil. This keeps them crispy and prevents them from becoming soggy.
Variations
Berry Swaps
You can switch out strawberries for other berries. Blueberries add a sweet burst. Raspberries give a tart kick. Both options taste great with the creamy filling. Feel free to mix different berries for added flavor. This makes your sandwiches colorful and fun!
Flavor Enhancements
Want to spice things up? Add chocolate chips or Nutella to the filling. Chocolate pairs wonderfully with cream cheese. It gives each bite a rich taste. You can even swirl in some Nutella for a delightful look. Your friends will love this twist on the classic!
Alternative Breads
Don't feel stuck with one type of bread. You can use brioche or challah for a soft bite. Or try whole wheat for a heartier option. Even gluten-free bread works well. Each choice changes the flavor and texture of your sandwich. Experiment to find your favorite!
Storage Info
How to Store
To keep your leftover fried strawberry cheesecake sandwiches fresh, follow these steps:
- Let the sandwiches cool completely at room temperature.
- Wrap each sandwich in plastic wrap or aluminum foil.
- Place the wrapped sandwiches in an airtight container.
- Store them in the refrigerator for up to 2 days.
This method helps maintain their flavor and texture while minimizing moisture loss.
Freezing Options
You can freeze these sandwiches for longer storage. Here's how:
- Assemble the sandwiches as directed but do not fry them yet.
- Wrap each sandwich tightly in plastic wrap.
- Place the wrapped sandwiches in a freezer-safe bag or container.
- Label with the date and store in the freezer for up to 2 months.
When ready to enjoy, thaw them in the fridge overnight before frying.
Reheating Tips
To keep your sandwiches crispy when reheating, follow these tips:
- Preheat your oven to 350°F (175°C).
- Place the sandwiches on a baking sheet lined with parchment paper.
- Bake for about 10-15 minutes until heated through and crispy.
Avoid using the microwave, as it can make the bread soggy. Enjoy your delicious treat!
FAQs
Can I make these sandwiches in advance?
Yes, you can prepare the filling ahead of time. Mix the cream cheese, powdered sugar, and vanilla. Store this in the fridge for up to two days. You can also slice the strawberries and keep them in an airtight container. Assemble the sandwiches right before frying for the best taste.
What can I use instead of cream cheese?
If you need a dairy-free option, try using vegan cream cheese. For a lighter choice, you can use Greek yogurt. Both options work well in the filling and provide a nice flavor. You can also try mascarpone cheese for a richer taste.
Can I bake these sandwiches instead of frying?
Yes, you can bake these sandwiches! Preheat your oven to 375°F (190°C). After coating the sandwiches, place them on a baking sheet lined with parchment paper. Bake for about 15-20 minutes, flipping halfway through, until golden brown. This makes a healthier version without frying.
This blog post covers a delicious dessert recipe: cheesecake-stuffed French toast. We explored the key ingredients like cream cheese, strawberries, and brioche. You learned how to prepare the filling and assemble the sandwiches. We discussed frying techniques and various tips for the best results.
In closing, this dish is versatile and fun to make. Enjoying it with friends or family adds to the joy. Experiment with your favorite flavors and serve it creatively. This dessert is sure to impress and satisfy!