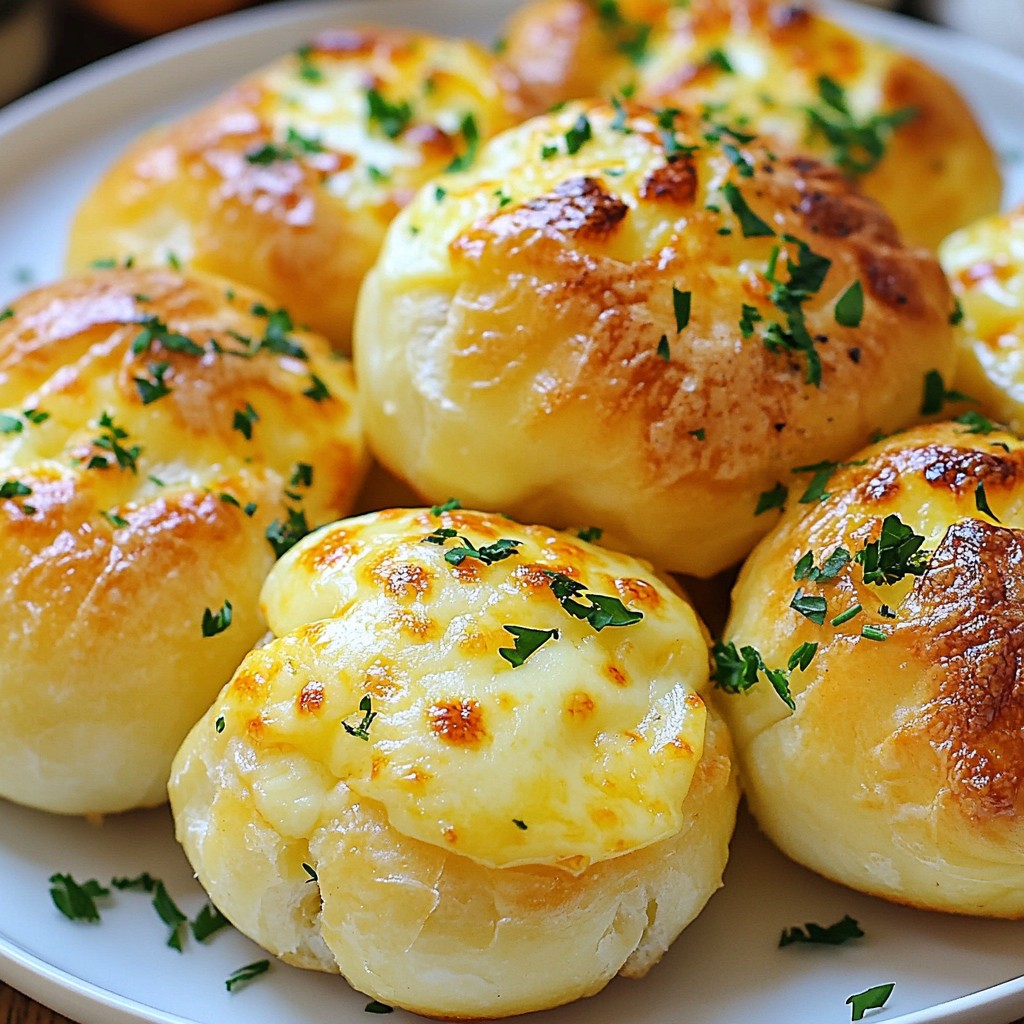
Get ready to treat your taste buds! Garlic Butter Cheese Bombs are a mouthwatering delight you can't resist. Picture soft dough bursting with gooey cheese and rich garlic butter. Whether you're hosting a party or just craving a snack, these bites are sure to impress. In this post, I'll guide you through simple steps, tasty ingredients, and clever tips, so you can create these cheesy wonders at home. Let's dive in!
Why I Love This Recipe
- Delicious Flavor: The combination of garlic and melted cheese creates a mouthwatering explosion of flavors in every bite.
- Easy to Make: This recipe requires minimal ingredients and simple steps, making it perfect for both novice and experienced cooks.
- Perfect for Sharing: These cheese bombs are great for parties, gatherings, or as an appetizer, easily serving a crowd.
- Versatile Options: You can customize the filling with different cheeses or herbs, allowing for endless variations!
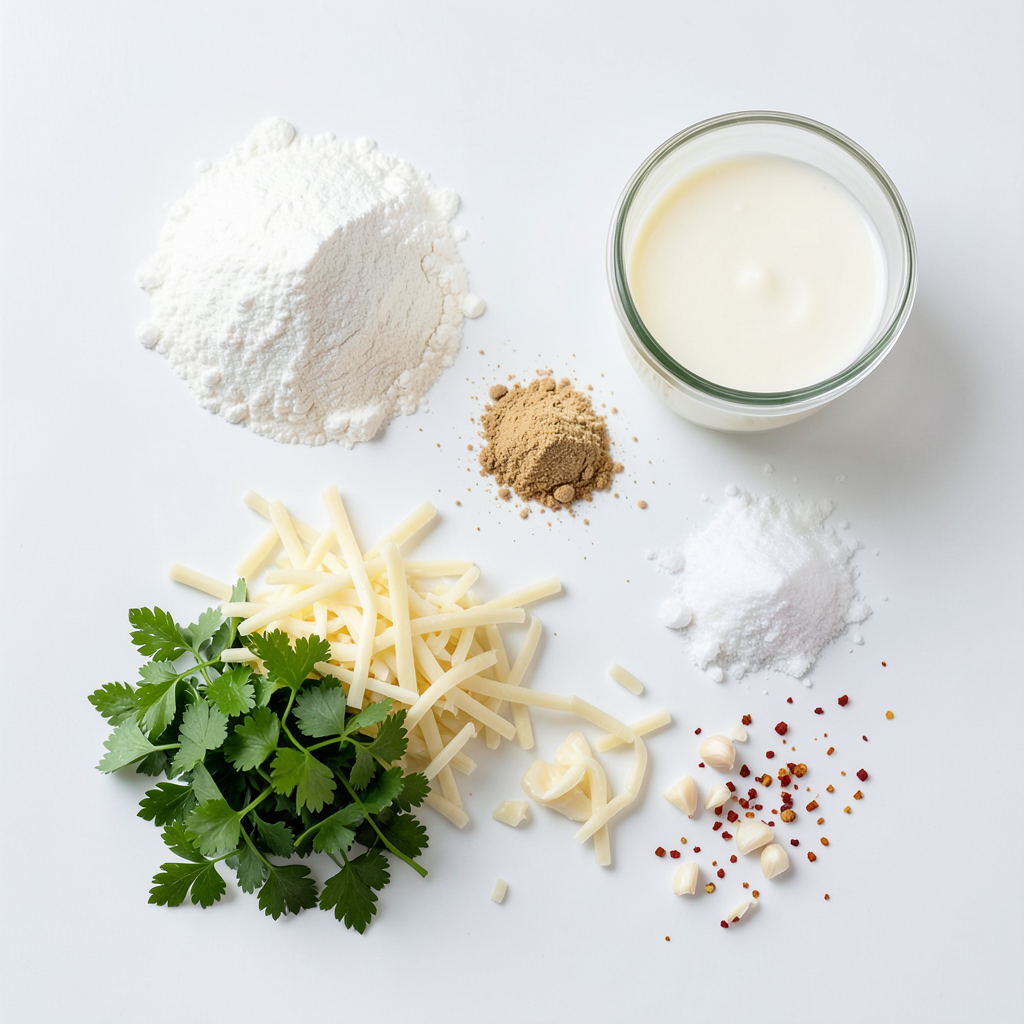
Ingredients
Main Ingredients
- 1 cup all-purpose flour
- 1 cup shredded mozzarella cheese
- ¼ cup unsalted butter, melted
Garlic Butter Cheese Bombs are simple yet flavorful. The main ingredients make them a delight. All-purpose flour provides the base, keeping the texture light. Shredded mozzarella cheese adds a delicious, gooey center. Unsalted butter gives richness and helps with browning.
Optional Add-ins
- 2 tablespoons fresh parsley, finely chopped
- ¼ teaspoon red pepper flakes
Feel free to customize your cheese bombs! Fresh parsley brightens the flavor and adds color. Red pepper flakes bring a nice kick. You can mix and match these add-ins based on your taste.
Seasoning and Flavor Enhancers
- ½ teaspoon garlic powder
- 2 cloves garlic, minced
Garlic powder and minced garlic offer bold flavors. Garlic powder blends well in the dough. Minced garlic creates a tasty surprise inside each bomb. This combination ensures each bite bursts with garlic goodness.
Step-by-Step Instructions
Preparation
- Preheat your oven to 375°F (190°C).
- Prepare a baking sheet by greasing it lightly or lining it with parchment paper.
In this step, the oven needs to be hot before you bake. The baking sheet should be ready for the cheese bombs. Parchment paper helps with easy cleanup.
Dough Formation
- In a bowl, mix together:
- 1 cup all-purpose flour
- 1 tablespoon baking powder
- ½ teaspoon fine salt
- ½ teaspoon garlic powder
Stir until the mix is uniform. This will be the dry mixture.
- Add 1 cup shredded mozzarella cheese to the dry mix. Toss gently to coat. This helps prevent clumping.
- In another bowl, mix together:
- ½ cup whole milk
- ¼ cup melted unsalted butter
Slowly pour this wet mixture into the dry blend. Stir gently until a dough forms.
- Knead the dough for about 1 minute on a floured surface. Cut it into 12 equal pieces.
Kneading makes the dough smooth and elastic. This is key for good texture.
Filling and Shaping
- For each piece, flatten it into a disc. Spoon a small amount of:
- 2 cloves minced garlic
- ¼ teaspoon red pepper flakes (optional)
Place this in the center of each disc.
- Pinch the edges of the dough to seal the filling inside. Shape it into a ball.
- Place the balls seam-side down on the baking sheet. Ensure there is space between them for expansion.
This ensures they bake evenly and do not stick together.
Tips & Tricks
Achieving the Perfect Texture
Kneading is key to getting the right texture for your Garlic Butter Cheese Bombs. It helps the dough become smooth and elastic. Knead for about one minute. This short time will create a nice base for your bombs. To prevent clumping, coat the cheese with flour before mixing. This simple step will help keep your cheese evenly distributed.
Flavor Enhancement
To boost the flavor, consider adding spices. Red pepper flakes give a nice kick. You can also try Italian herbs like oregano or basil. For garlic infusion, use minced garlic in the filling. Combine it with melted butter for a rich taste. Let it soak in for a few minutes before using it.
Visual Presentation
Garnishing with fresh parsley adds a bright touch. Sprinkle it on top of your cheese bombs after baking. It makes the dish look appealing. Serve your bombs warm on a colorful platter. You can also add toothpicks for easy eating. This way, everyone can enjoy them at parties or gatherings.
Pro Tips
- Use Fresh Garlic: Freshly minced garlic provides a more vibrant flavor than pre-packaged garlic, enhancing the overall taste of your cheese bombs.
- Experiment with Cheeses: While mozzarella is delicious, try mixing different cheeses like cheddar or gouda for a unique flavor profile.
- Adjust the Spice Level: If you prefer a milder flavor, omit the red pepper flakes, or increase them for a spicier kick!
- Serve Immediately: These cheese bombs are best enjoyed warm right out of the oven when the cheese is gooey and delicious.
Variations
Cheese Alternatives
You can switch up the cheese to create new flavors. Cheddar gives a sharp taste. Cream cheese adds a creamy texture. Use pepper jack for some heat. Mixing cheeses can make your bombs even better. Adding herbs or spices can also change the flavor. Try fresh basil or oregano for an Italian twist. A sprinkle of Italian seasoning works well too.
Additional Fillings
Want to add more to your cheese bombs? You can include meats. Cooked bacon or sausage adds a savory touch. Shredded chicken makes it heartier. You can also sneak in veggies. Try chopped spinach or roasted bell peppers for color and taste. Cooked mushrooms or jalapeños are great too. Get creative with what you have!
Dietary Modifications
If you need gluten-free options, use gluten-free flour. This way, you can still enjoy these treats. For vegan alternatives, replace the butter with coconut oil. Use a vegan cheese that melts well. You can mix in almond milk instead of whole milk. These options make your cheese bombs enjoyable for everyone!
Storage Info
Storing Leftovers
To keep garlic butter cheese bombs fresh, use airtight containers. Glass or plastic containers work well. You can store leftovers in the fridge or freezer. In the fridge, they stay fresh for a few days. If you want to keep them longer, freeze them.
Reheating Tips
For reheating, the best method is the oven. Preheat the oven to 350°F (175°C). Place the cheese bombs on a baking sheet. Heat for about 10 minutes. This keeps them soft and tasty. You can also use a microwave, but they may get chewy. If using a microwave, heat in short bursts to maintain texture.
Shelf Life
In the fridge, garlic butter cheese bombs last about 3 to 4 days. If you freeze them, they can last up to 3 months. Just make sure to wrap them well. This helps avoid freezer burn and keeps the flavor intact.
FAQs
Can I make these ahead of time?
Yes, you can prep garlic butter cheese bombs in advance. Here are some tips:
- Prepare the dough and fill the cheese bombs.
- Place them on a baking sheet and cover with plastic wrap.
- Refrigerate for up to 24 hours.
- When ready to bake, just pop them in the oven.
How do I know when they're done?
Your garlic butter cheese bombs are done when they are golden brown. Here are some signs to look for:
- They should puff up nicely as they bake.
- The tops will be lightly browned and firm to touch.
- If you peek inside, melted cheese should ooze out.
What can I serve with garlic butter cheese bombs?
These cheese bombs pair well with many dishes. Here are some ideas:
- Serve with marinara sauce for dipping.
- Pair with a fresh salad for balance.
- Enjoy alongside a bowl of soup for warmth.
This article covered key ingredients for garlic butter cheese bombs, along with step-by-step instructions. I shared tips for texture, flavor, and how to present your dish nicely. You learned about variations, including dietary options. Finally, I provided storage advice and answered common questions.
Enjoying these tasty treats is easy when you follow the steps. Experiment with flavors and fillings to make them uniquely yours!