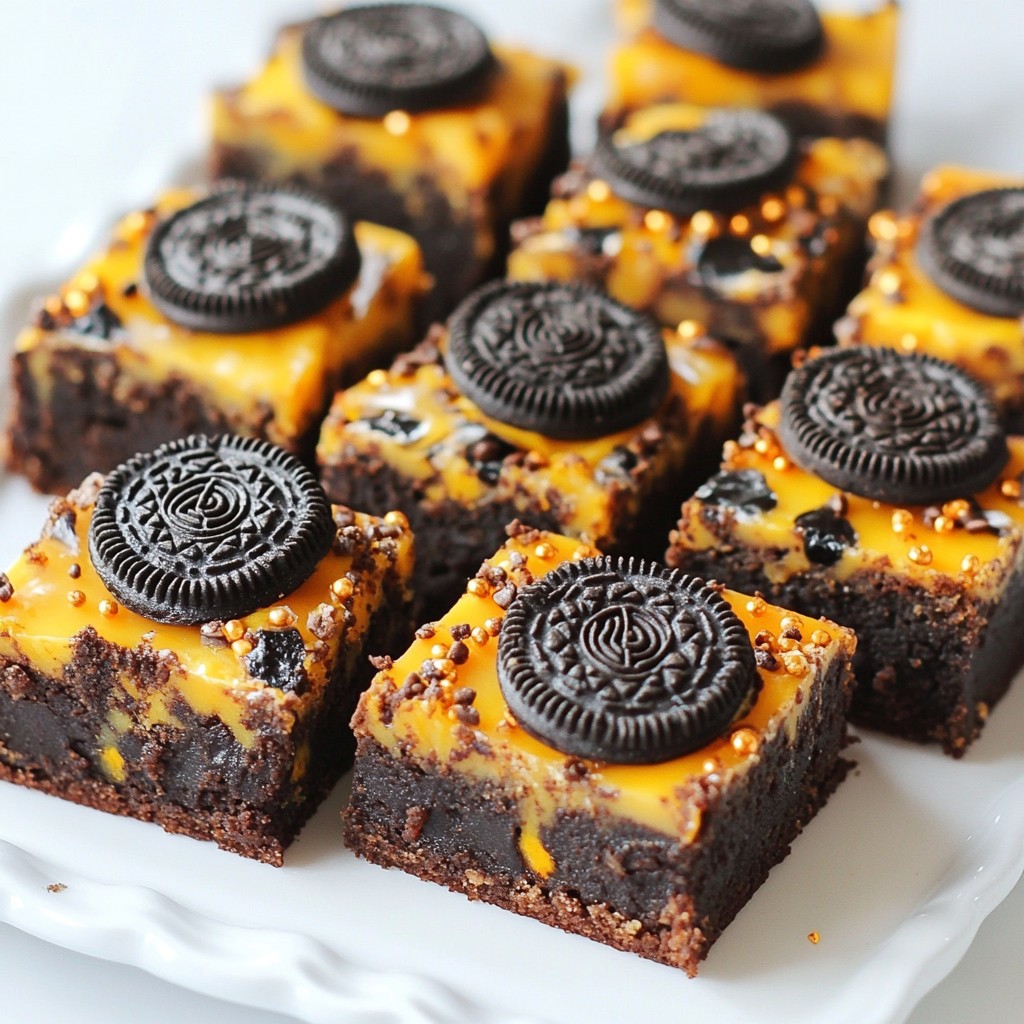
Get ready for a spooky treat with my Halloween Oreo Brownies! These rich, chocolatey goodies mix classic ingredients with fun Halloween flair. With each bite, you’ll enjoy creamy Oreos, festive sprinkles, and a melt-in-your-mouth brownie base. Perfect for parties or cozy nights! Join me as I guide you through the simple steps to make these delightful brownies, sure to impress friends and family alike. Let’s dive in!
Why I Love This Recipe
- Deliciously Decadent: These brownies are rich and fudgy, combining the classic chocolate flavor with the iconic taste of Oreos for a treat that's impossible to resist.
- Festive Fun: With Halloween-themed Oreos and vibrant orange and black sprinkles, these brownies are perfect for any Halloween gathering or party, adding a festive touch to your dessert table.
- Easy to Make: This straightforward recipe requires minimal effort and common ingredients, making it accessible even for novice bakers looking to impress.
- Customizable Delight: Feel free to get creative! Add your favorite mix-ins or toppings to make these brownies even more personalized and enjoyable.
Ingredients
List of Ingredients
- 1 cup unsalted butter
- 1 cup granulated sugar
- 1 cup packed brown sugar
- 4 large eggs
- 1 teaspoon vanilla extract
- 1 cup all-purpose flour
- 1 cup unsweetened cocoa powder
- 1 teaspoon baking powder
- 1/2 teaspoon salt
- 10 Halloween-themed Oreo cookies
- 1/2 cup chocolate chips (optional)
- 1/2 cup orange and black sprinkles
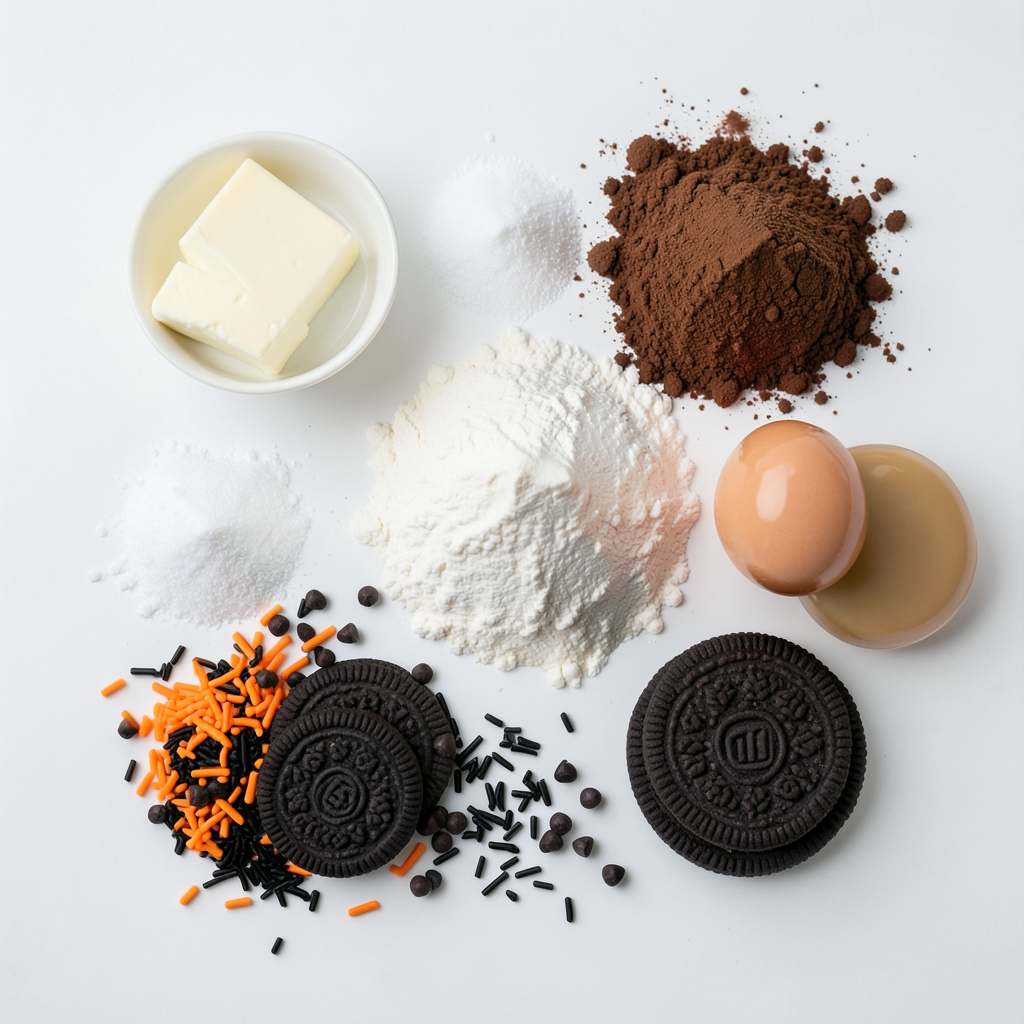
When making Halloween Oreo brownies, I love how simple it is to gather the ingredients. The butter adds richness, while the sugars provide sweetness. Four eggs give the brownies their creamy texture. I always include vanilla extract for flavor.
For the dry ingredients, I use all-purpose flour and cocoa powder. The baking powder helps the brownies rise a bit, and salt brings out the sweetness. The Halloween-themed Oreos add fun and color.
Using chocolate chips is optional, but they make the brownies extra rich. Lastly, the orange and black sprinkles are perfect for decoration. They add a festive touch that everyone loves.
These ingredients come together to create a treat that is not only delicious but also visually appealing. I enjoy seeing the smiles on everyone's faces when they take a bite.
Step-by-Step Instructions
Preparation Steps
1. Preheat your oven to 350°F (175°C). Prepare a 9x13 inch baking pan. You can grease it or use parchment paper. This helps with easy brownie removal.
2. In a medium saucepan, melt 1 cup of unsalted butter over low heat. Stir it occasionally. Once melted, take it off the heat and let it cool for a few minutes.
3. In a large mixing bowl, mix 1 cup of granulated sugar, 1 cup of packed brown sugar, 4 large eggs, and 1 teaspoon of vanilla extract. Whisk it until smooth and creamy.
4. Gradually pour the slightly cooled butter into the sugar-egg mixture. Whisk as you pour to mix well. This stops the eggs from cooking.
5. In another bowl, sift together 1 cup of all-purpose flour, 1 cup of unsweetened cocoa powder, 1 teaspoon of baking powder, and 1/2 teaspoon of salt. This makes the brownies lighter.
Baking Process
6. Slowly add the dry mixture to the wet mixture. Use a whisk to combine until just mixed. Be careful not to overmix, or your brownies will be dense.
7. Gently fold in 1/2 cup of chocolate chips and half of the Oreo cookie halves. Use a spatula to mix without deflating the batter.
8. Pour the brownie batter into your prepared baking pan. Spread it out evenly with a spatula.
9. Press the remaining Oreo cookie halves into the top of the brownie batter. Arrange them for a spooky design.
10. Place the pan in the oven. Bake for 25-30 minutes. Check with a toothpick in the center. If it comes out with a few moist crumbs, they are done.
11. Once baked, remove the brownies from the oven. Let them cool in the pan for 10-15 minutes. Then, move them to a wire rack to cool completely.
12. After cooling, cut the brownies into squares. Sprinkle with orange and black sprinkles for a fun Halloween touch.
Tips & Tricks
Perfecting Brownies
To get the best brownies, follow these tips:
- Avoid overmixing batter. Mix until just combined. This keeps your brownies soft.
- Check doneness with a toothpick. Insert it into the center. A few moist crumbs mean they are ready.
- Ensure proper cooling before cutting. Let them cool for at least 10-15 minutes. This helps with clean cuts.
Decorating Ideas
Decorating adds fun to your Halloween Oreo brownies:
- Using sprinkles effectively. Sprinkle orange and black ones right after cutting. It makes them pop.
- Additional Halloween-themed toppings. Try mini candy pumpkins or spooky gummy worms. These extras make the brownies even more festive.
Pro Tips
- Choose the Right Cocoa Powder: Use a high-quality unsweetened cocoa powder for richer chocolate flavor; Dutch-processed cocoa can also add a unique depth.
- Don’t Overmix the Batter: To achieve the fudgiest brownies, mix just until the ingredients are combined. Overmixing can lead to dense and cakey brownies.
- Cool Before Cutting: Allow the brownies to cool completely before cutting to ensure clean edges and prevent them from falling apart.
- Customize Your Toppings: Feel free to swap the Halloween-themed Oreos for other seasonal treats or add nuts for extra crunch and flavor.
Variations
Ingredient Swaps
You can easily change up your Halloween Oreo brownies. Using different types of Oreos can add fun flavors. Try mint, peanut butter, or even pumpkin spice Oreos. Each type brings a new twist. Your brownies will be unique and exciting!
If you need a gluten-free option, swap the all-purpose flour for a gluten-free blend. Many blends work well in brownies. Just make sure to check the package for the right measurement. Your brownies will still taste amazing and be safe for all to enjoy.
Flavor Additions
Adding nuts can give your brownies a crunchy texture. Chopped walnuts or pecans work great. Just fold them in with the chocolate chips. This extra crunch makes each bite even better.
You can also incorporate flavored extracts for a twist. Try almond or orange extract to boost the flavor. Just use a small amount, about half a teaspoon. These additions can make your brownies taste even more special and festive!
Storage Info
How to Store Brownies
To keep your Halloween Oreo brownies fresh, store them properly.
- Room temperature storage: Place brownies in an airtight container. They stay good for about 3 to 4 days. If you want to keep them longer, consider freezing.
- Refrigerator storage tips: If you live in a warm area, refrigerate the brownies. Just place them in an airtight container. They can last for up to a week in the fridge.
Reheating Instructions
Sometimes, you might want warm brownies. Here’s how to do it right.
- Best methods for reheating brownies: Use the microwave for quick heating. Heat for 10-15 seconds. Check if they are warm enough. You can also use the oven. Preheat it to 350°F (175°C). Place brownies on a baking sheet and warm for about 5-10 minutes. Enjoy them warm and gooey!
FAQs
Common Questions
Can I use regular Oreos instead of Halloween-themed? Yes, you can use regular Oreos. They will taste just as good. The Halloween-themed Oreos add fun colors, but the flavor is the same.
How do I make brownies fudgier? To make brownies fudgier, use less flour. You can also add an extra egg. Another trick is to bake for a shorter time. Check them often to avoid overbaking.
Can these brownies be frozen? Absolutely! You can freeze the brownies for up to three months. Just wrap them tightly in plastic wrap. Place them in a freezer bag to keep them fresh.
What is the best way to cut brownies? For the best cuts, use a sharp knife. Dip the knife in hot water first, then wipe it dry. This helps you cut neat squares.
This blog post covered everything you need to make delicious Halloween brownies. We explored the ingredients, simple steps, and tips for perfecting your treat. You can even customize the brownies with various Oreos or fun decorations. Remember, storing them properly keeps them fresh. Enjoy your baking and make it a fun experience! With these ideas, you can impress your friends and family all season long. Now, go create some yummy memories!