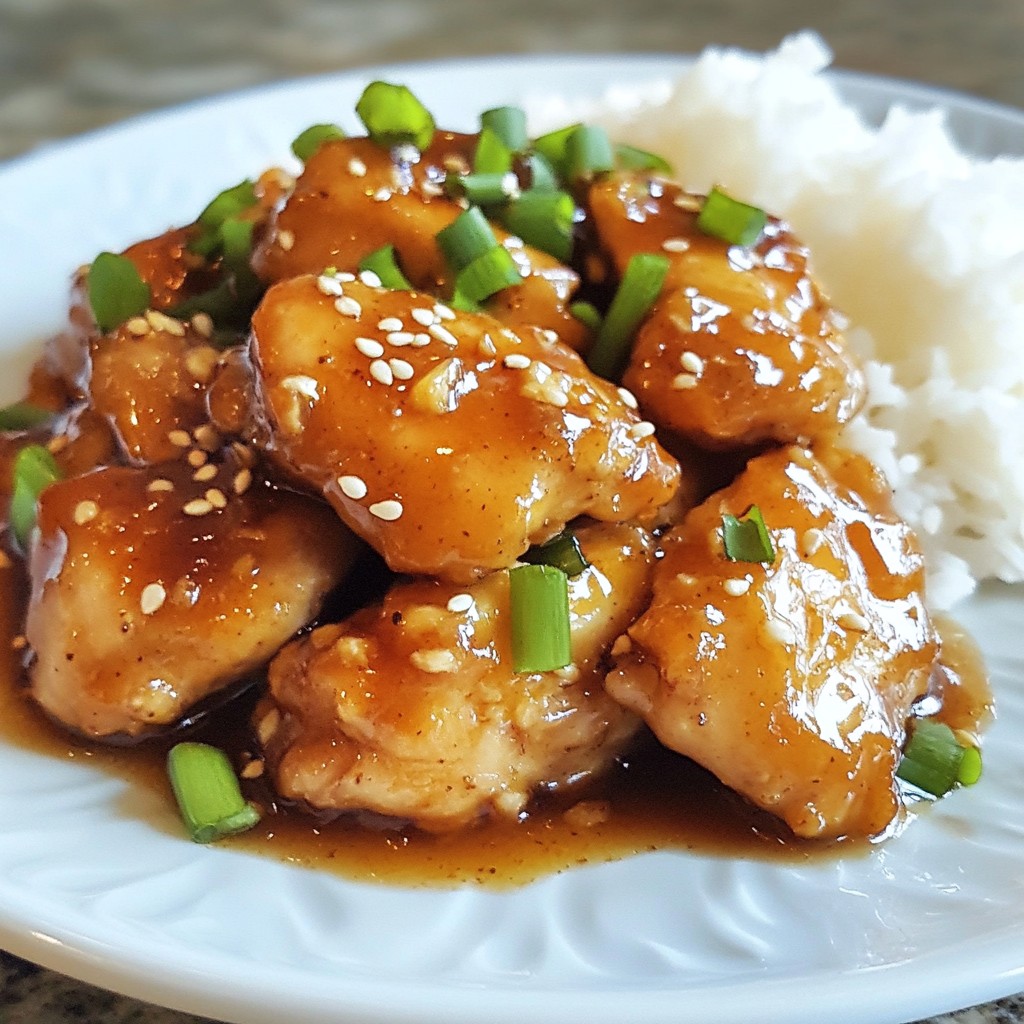
Are you ready for a quick and tasty meal? This Instant Pot Honey Garlic Chicken is your answer! It’s simple, flavorful, and perfect for busy nights. With just a few main ingredients and easy steps, you'll have dinner on the table in no time. Let’s dive into how to create this delicious dish that will impress your family and friends!
Why I Love This Recipe
- Quick and Easy: This recipe takes only 30 minutes from start to finish, making it perfect for busy weeknights.
- Flavorful Sauce: The combination of honey, garlic, and ginger creates a deliciously sweet and savory sauce that perfectly complements the chicken.
- Versatile Dish: Serve it over rice, quinoa, or even noodles, and pair it with your favorite vegetables for a complete meal.
- Instant Pot Magic: The Instant Pot locks in moisture, ensuring the chicken is tender and juicy every time.
Ingredients
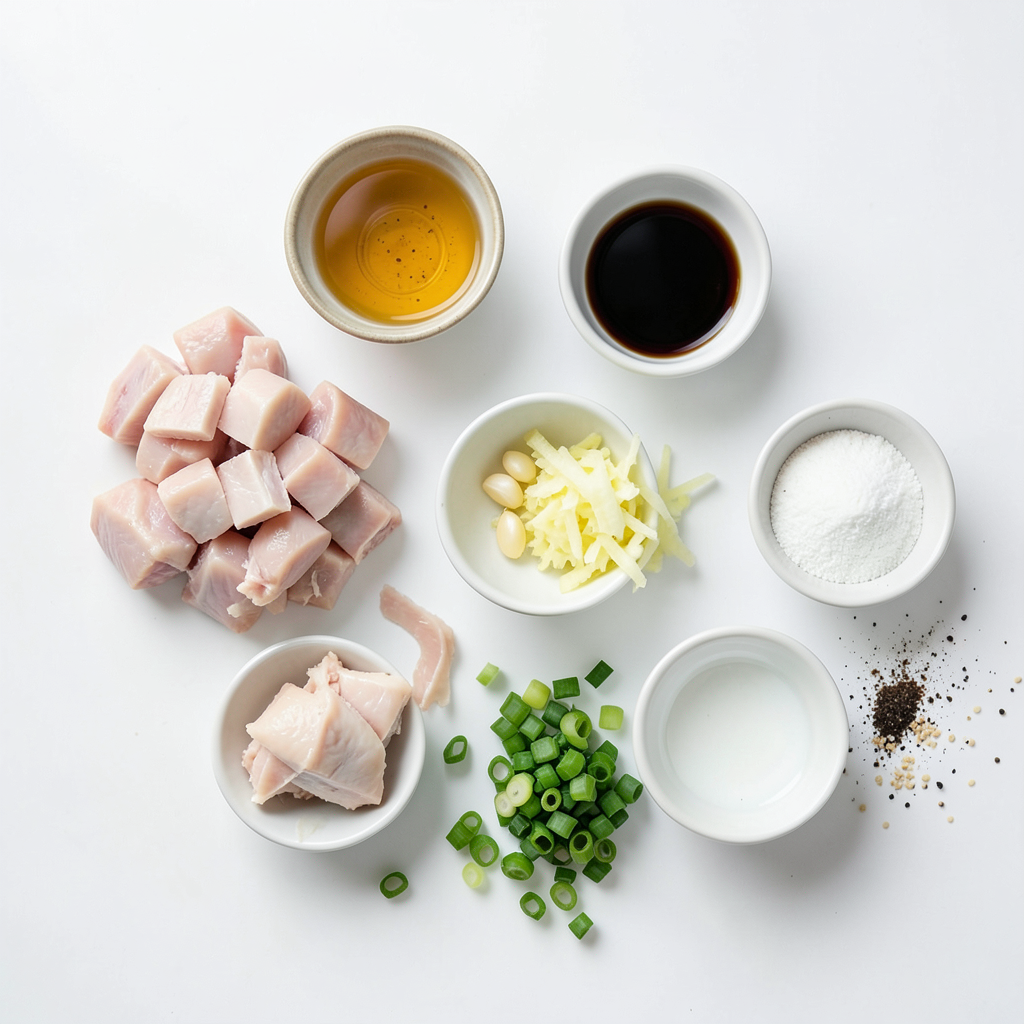
Main Ingredients Needed
- 2 lbs boneless and skinless chicken thighs or breasts
- 1/3 cup honey
- 1/4 cup low sodium soy sauce
- 3 cloves garlic, minced
- 1 tablespoon fresh ginger, grated
- 1 tablespoon sesame oil
- 1 tablespoon cornstarch
- 2 tablespoons water
- Salt and pepper, to taste
The main ingredients for Instant Pot honey garlic chicken bring tons of flavor. You start with chicken, which gives protein. The honey adds a sweet taste that balances the salty soy sauce. Garlic and ginger give a lovely kick and aroma. Sesame oil adds richness. Cornstarch helps thicken the sauce, making it cling to the chicken.
Garnishes
- 2 green onions, thinly sliced (for garnish)
- Sesame seeds, for garnish
Garnishing your dish adds a nice touch. Green onions provide a fresh taste and color. Sesame seeds add crunch and a nutty flavor. Together, they make your dish look beautiful and inviting.
Step-by-Step Instructions
Preparing the Chicken
Start by seasoning your chicken. Use salt and pepper to coat both sides. This adds depth to the dish. Make sure to cover every piece evenly.
Making the Sauce
Next, whisk together the sauce. In a medium bowl, mix honey, low sodium soy sauce, garlic, and ginger. Blend until smooth. This sauce will give a sweet and savory flavor.
Cooking in the Instant Pot
Add the seasoned chicken to the Instant Pot. Lay the pieces flat for even cooking. Pour the honey garlic sauce over the chicken. Close the lid and set the pressure valve to sealing. Cook on high pressure for 10 minutes. Once done, release pressure quickly by turning the valve to venting. Wait until the steam stops before opening the lid.
Finishing Touches
Carefully remove the chicken and place it on a plate. To thicken the sauce, mix cornstarch with water in a small bowl. Stir until smooth. Switch the Instant Pot to sauté mode. Add the cornstarch slurry to the pot. Stir for about 2-3 minutes until thick. Return the chicken to the pot and coat it well in the sauce. Serve the dish over rice or quinoa, garnished with green onions and sesame seeds. Enjoy your delicious meal!
Tips & Tricks
Optimizing Flavor
To boost the taste of your honey garlic chicken, try these tips. Use fresh garlic and ginger for the best flavor. You can add a splash of rice vinegar for a tangy kick. If you like spice, a dash of red pepper flakes works well too. Adjust the honey based on your sweetness preference. If you want a thicker sauce, add more cornstarch. This simple step makes a big difference in texture.
Cooking Time Adjustments
Cooking time can change based on chicken size. For small pieces, cut the cooking time to 8 minutes. For larger pieces, increase it to 12 minutes. Always check the thickest part of the chicken to ensure it is fully cooked. The internal temperature should reach 165°F. This way, you guarantee juicy and tender meat every time.
Instant Pot Best Practices
Using the Instant Pot safely is key. Always make sure to seal the lid properly. Before cooking, check the pressure valve is set to sealing. After cooking, use a quick release method to avoid splatters. Be cautious when opening the lid. Always point the lid away from you to prevent steam burns. Regularly clean the sealing ring and valve for best results. This helps maintain the pot's performance and safety.
Pro Tips
- Use High-Quality Honey: Opt for raw or organic honey for a richer flavor and added health benefits.
- Marinate for Extra Flavor: If time allows, marinate the chicken in the honey garlic sauce for at least 30 minutes before cooking for enhanced taste.
- Adjust Sweetness: Modify the amount of honey based on your preference; you can use less for a less sweet dish.
- Serve with Fresh Herbs: Consider adding fresh cilantro or basil as a garnish for a pop of freshness and color.
Variations
Ingredient Substitutions
If you want to change things up, consider these options. For honey, try maple syrup or agave nectar. Both provide sweetness without the same flavor. If you need a soy sauce alternative, use coconut aminos. This option is great for gluten-free diets. For a different taste, low-sodium teriyaki sauce works too.
Flavor Profile Tweaks
Want to spice it up? You can add red pepper flakes or sriracha for heat. These spicy elements give your dish a nice kick. Fresh herbs like cilantro or basil can add a fresh twist. Mix these herbs in right before serving for a burst of flavor.
Serving Options
Pair your honey garlic chicken with a few different sides. Steamed broccoli or green beans are great options. You can also serve it over rice or quinoa for a filling meal. For a fun twist, try it in a wrap with veggies. This adds crunch and makes a great lunch option.
Storage Info
Storing Leftovers
To store your honey garlic chicken, let it cool first. Place it in an airtight container. You can keep it in the fridge for up to four days. For longer storage, freeze it in freezer-safe bags. Make sure to remove as much air as possible. This helps prevent freezer burn.
Reheating Instructions
When you are ready to eat, reheat the chicken gently. The best way is to use the microwave. Place the chicken in a microwave-safe dish. Cover it with a damp paper towel. Heat for 1-2 minutes, or until warm. You can also reheat it on the stove. Add a little water or sauce to keep it moist.
Shelf Life
The honey garlic chicken stays fresh in the fridge for about four days. If frozen, it can last up to three months. For the best taste, eat it within the first month after freezing. Always check for any off smells or changes in texture before eating stored food.
FAQs
Can I use frozen chicken in this recipe?
Yes, you can use frozen chicken. The Instant Pot cooks frozen chicken well. Just add a few extra minutes to the cooking time. For chicken thighs, cook for 12-15 minutes. You should still use the same sauce.
Tips on handling frozen chicken in the Instant Pot
- Season the frozen chicken with salt and pepper.
- Pour the honey garlic sauce over it.
- Make sure to seal the lid tight before cooking.
- After cooking, do a quick release of pressure.
How can I make this recipe healthier?
You can swap honey for a sugar-free sweetener. Use low-sodium soy sauce to limit salt. You can also add more veggies to boost nutrition. Try adding bell peppers or broccoli for color and crunch.
Suggestions for reducing sugar or sodium content
- Replace honey with maple syrup or agave syrup.
- Use coconut aminos instead of soy sauce.
- Add more ginger and garlic for flavor without calories.
What to serve with honey garlic chicken?
Serve it over rice or quinoa for a filling meal. Steamed vegetables like broccoli or carrots complement the dish well. You can also add a fresh salad on the side for a crunchy texture.
Pairing recommendations for a complete meal
- White or brown rice for a classic base.
- Quinoa for a protein boost.
- A side of steamed green beans for added fiber.
This recipe for honey garlic chicken is simple and tasty. You learned about key ingredients, like chicken, honey, and soy sauce. I shared step-by-step instructions for cooking in the Instant Pot. We discussed tips to enhance flavor and storage options. Finally, I provided answers to common questions.
Now you can make this dish with confidence. Enjoy the flavors and feel free to experiment with variations. Happy cooking!