If you’re craving a snack that’s both fun and easy, the Mini Hawaiian Roll Grilled Cheese is for you! I’ll show you how to make these cheesy bites that are perfect for parties or just a quick treat. With sweet rolls, gooey cheese, and garlic butter, you can’t go wrong. Ready to impress your taste buds? Let’s dive into this simple recipe that will have everyone asking for more!
Why I Love This Recipe
- Deliciously Cheesy: The combination of sharp cheddar and creamy Swiss creates a melt-in-your-mouth experience that is irresistible.
- Quick and Easy: With just 10 minutes of prep and 20 minutes total cooking time, these mini sandwiches are perfect for a quick snack or meal.
- Perfect for Sharing: These bite-sized sandwiches are great for gatherings, making it easy for guests to enjoy a tasty treat without feeling too full.
- Customizable: Easily switch up the cheese or add extras like bacon or tomatoes to suit your taste and make it your own!
Ingredients
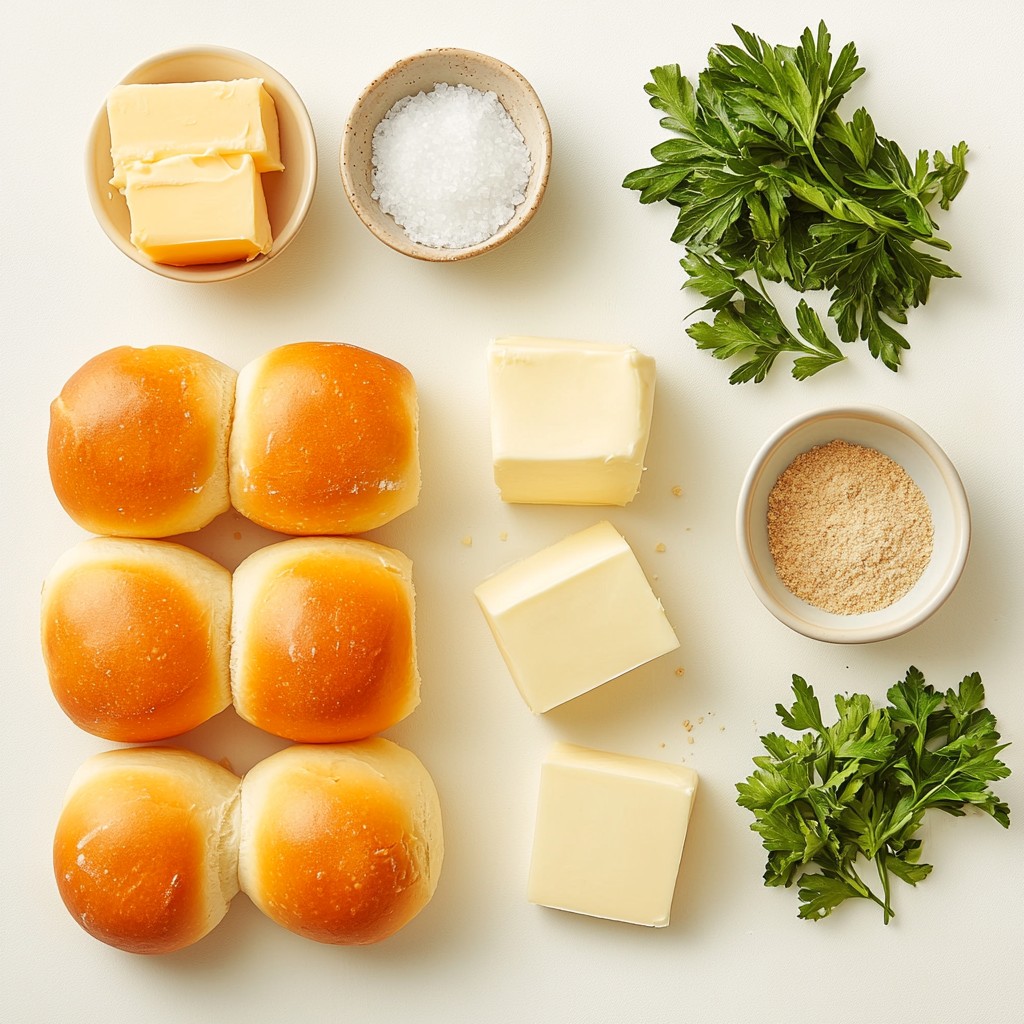
To make the Mini Hawaiian Roll Grilled Cheese, you need a few key items. Here’s what you will need:
- 12 mini Hawaiian rolls
- 6 slices of sharp cheddar cheese
- 6 slices of creamy Swiss cheese
- 4 tablespoons unsalted butter, at room temperature
- 1 tablespoon garlic powder
- 1 tablespoon fresh parsley, finely chopped (optional)
- Pinch of sea salt
These ingredients blend perfectly to create a tasty and gooey sandwich. The mini Hawaiian rolls give a sweet touch. The sharp cheddar and creamy Swiss cheese melt together nicely. The garlic powder adds a nice kick, while butter gives richness. Adding parsley is optional, but it brightens the flavor and looks great.
Make sure to have all the ingredients ready before you start. This way, you can move smoothly through the recipe. Enjoy the process of making these delightful snacks!
Step-by-Step Instructions
Preparation Steps
1. Preheat your skillet or griddle over medium heat. This helps the sandwiches cook evenly.
2. Slice each mini Hawaiian roll in half. Make sure to cut them horizontally.
3. Spread 1/2 tablespoon of softened butter on the inside of each roll half. Cover the whole surface for great taste.
4. On each bottom half, add one slice of sharp cheddar cheese and one slice of creamy Swiss cheese. Stack them neatly for melting.
Grilling Instructions
1. In a bowl, mix the remaining butter with garlic powder, sea salt, and parsley (if you want). This makes a tasty garlic butter spread.
2. Spread the garlic butter on the outside of each sandwich. This adds a rich flavor as they grill.
3. Once your skillet is hot, place the sandwiches on it. Grill for about 3-4 minutes on each side. Look for golden brown bread and melted cheese.
4. After grilling, take the sandwiches off the skillet. Let them cool for a minute. Then, cut each sandwich in half for easy eating.
Tips & Tricks
Grilling Techniques for Perfect Results
To grill mini Hawaiian roll grilled cheese right, control the heat. Set your skillet to medium heat. This helps the cheese melt while the bread gets golden. If the heat is too high, the bread burns before the cheese melts.
To stop the sandwiches from sticking, use a non-stick skillet. You can also add a little extra butter to the pan. This makes flipping easy and keeps the bread crisp.
Flavor Enhancements
You can boost the flavor of the garlic butter. Try adding herbs like basil or oregano. A pinch of chili powder gives a nice kick.
For cheese, mix it up! Gouda or provolone add a different taste. You can also layer in extras like ham or spinach for a fun twist. These options make your grilled cheese even more tasty.
Pro Tips
- Use Quality Cheese: Opt for high-quality cheese to really enhance the flavor of your grilled cheese. Freshly sliced cheese melts better and provides a creamier texture.
- Don’t Rush the Grilling: Take your time while grilling to ensure the bread is perfectly toasted and the cheese is fully melted. A lower heat will give you a better result.
- Experiment with Fillings: Feel free to add extras like sliced tomatoes, cooked bacon, or even a hint of pineapple for a tropical twist that complements the Hawaiian rolls.
- Serve Immediately: Grilled cheese sandwiches are best enjoyed fresh off the skillet. Serve them right away to maintain their gooey texture and crisp bread.
Variations
Cheese Substitutions
You can change the cheese for different flavors. Gouda melts nicely and adds a rich taste. Provolone gives a nice, mild flavor. Both cheeses work well in this recipe. If you want a dairy-free option, try vegan cheese. Many brands offer tasty vegan cheeses that melt well.
Ingredient Add-Ons
Want to make your grilled cheese even better? Add proteins like ham or turkey. They bring a nice savory touch. You can also add veggies for a crunchy bite. Try thin slices of bell peppers, spinach, or tomatoes. These additions make your Mini Hawaiian Roll Grilled Cheese even more special and fun!
Storage Info
Storing Leftovers
To keep your Mini Hawaiian Roll Grilled Cheese fresh, follow these tips:
- Refrigeration: Place the sandwiches in an airtight container. This keeps them from drying out. They will last for up to three days in the fridge.
- Freezing: You can freeze these sandwiches for up to a month. Wrap each sandwich tightly in plastic wrap, then place them in a freezer bag. This helps prevent freezer burn.
Reheating Tips
To enjoy your grilled cheese again, here are the best methods:
- Skillet method: Heat a skillet over medium-low heat. Place the sandwich in the skillet and cover it. Heat for about 3-4 minutes per side. This warms the cheese while keeping the bread crispy.
- Oven method: Preheat your oven to 350°F (175°C). Place the sandwiches on a baking sheet. Heat for about 10-12 minutes, or until the cheese melts. This method also helps maintain crispness.
These tips ensure your grilled cheese tastes just as good as when you first made it!
FAQs
Common Questions
Can I use regular bread instead of Hawaiian rolls? Yes, you can use regular bread. However, Hawaiian rolls add a sweet touch. This sweetness pairs well with the salty cheese. If you use regular bread, consider adding a bit of honey or sugar.
How can I make this recipe gluten-free? To make this recipe gluten-free, use gluten-free mini rolls. Many brands offer tasty options now. Check the label to ensure they fit your needs. You can also use gluten-free bread slices.
What is the best way to cut and serve these sandwiches? Cut each sandwich in half after grilling. This makes them easier to hold. You can arrange them on a platter for a fun look. Serve with a side of marinara sauce for dipping.
This blog post covered how to make tasty mini Hawaiian roll sandwiches. We looked at essential ingredients like cheese and garlic butter. I shared preparation and grilling steps to get perfect results. You learned tips for enhancing flavor and how to store leftovers. Remember, you can switch up ingredients for different tastes too. Embrace your creativity in the kitchen, and enjoy every bite of your delicious sandwiches.