Are you ready for a fun treat that requires no baking? These No-Bake Peanut Butter Bars are easy to make and taste amazing. With just a few simple ingredients, you can whip up a sweet snack perfect for any time. Let's dive into the ingredients, step-by-step guide, and tips for making the best bars ever. Trust me, you won't want to miss these tasty delights!
Why I Love This Recipe
- Quick and Easy: This no-bake recipe comes together in just 15 minutes, making it perfect for busy days or last-minute cravings.
- Healthy Ingredients: With wholesome oats, nut butter, and natural sweeteners, these bars satisfy your sweet tooth without the guilt.
- Decadent Chocolate Layer: The rich dark chocolate topping adds an indulgent touch that balances the nutty flavor of the peanut butter.
- Versatile Treat: These bars are great for a quick snack, dessert, or even a post-workout boost, making them a versatile addition to your recipe collection.
Ingredients
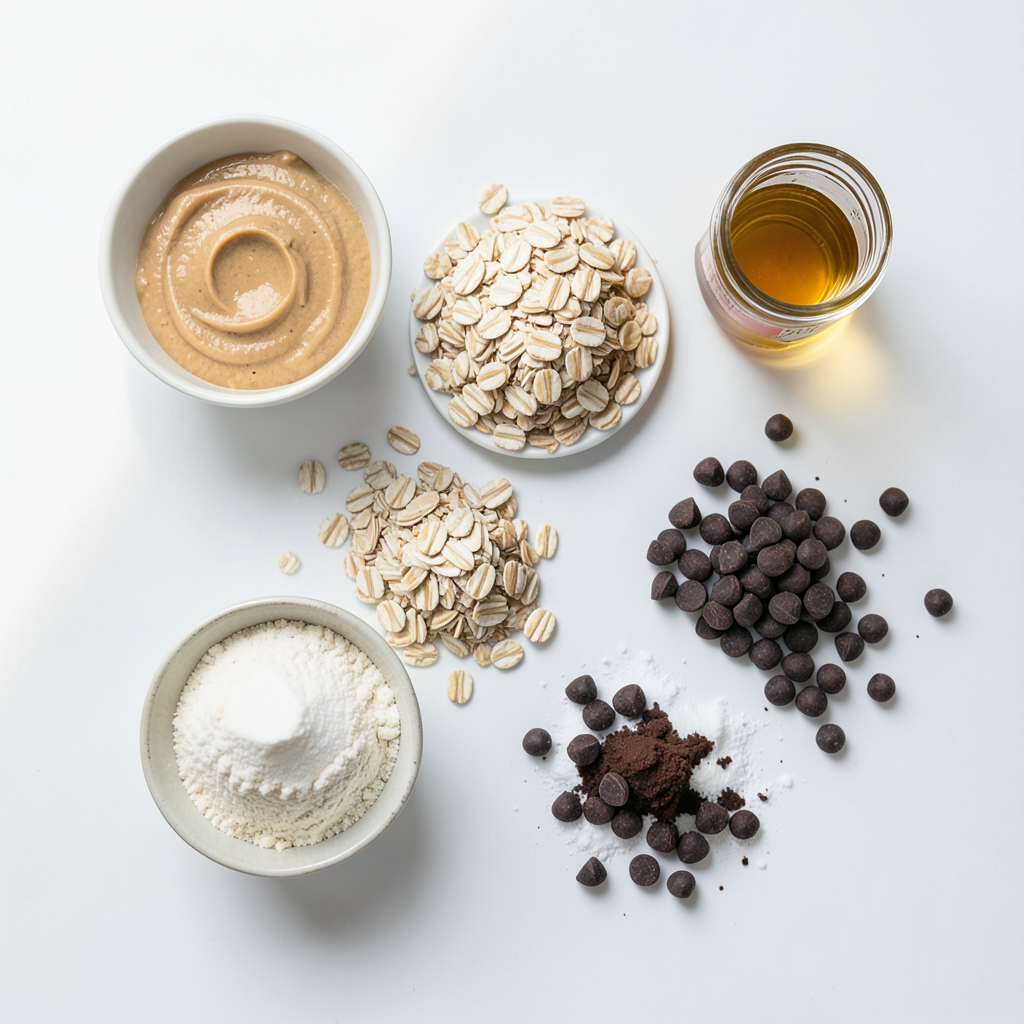
List of Ingredients
To make these yummy no-bake peanut butter bars, gather these items:
- 1 cup creamy peanut butter
- 1 cup rolled oats
- 1/2 cup honey or maple syrup
- 1/2 cup almond flour
- 1/2 teaspoon vanilla extract
- 1/4 teaspoon sea salt
- 1/2 cup dark chocolate chips
- 2 tablespoons coconut oil
Optional Enhancements
You can make these bars even better with some fun ideas:
- Add chopped nuts for crunch.
- Mix in some dried fruit for sweetness.
- Sprinkle sea salt on top for a salty touch.
- Use different types of chocolate, like milk or white chocolate.
Ingredient Substitutions
Not all ingredients may be on hand. Here are some swaps:
- Use crunchy peanut butter instead of creamy for texture.
- Swap honey with agave syrup for a vegan option.
- Try oat flour in place of almond flour.
- Use any nut butter if you want a different taste.
These changes keep the bars tasty while fitting your needs!
Step-by-Step Instructions
Preparation Overview
Start by gathering all your ingredients. You will need creamy peanut butter, rolled oats, honey or maple syrup, almond flour, vanilla extract, sea salt, dark chocolate chips, and coconut oil. Make sure you have a medium-sized bowl and an 8x8-inch baking dish ready. Grease the dish or line it with parchment paper. This helps in easy removal later.
Mixing the Ingredients
In your mixing bowl, add these ingredients:
- 1 cup creamy peanut butter
- 1/2 cup honey or maple syrup
- 1/2 cup almond flour
- 1 cup rolled oats
- 1/2 teaspoon vanilla extract
- 1/4 teaspoon sea salt
Use a sturdy spatula to mix everything together. Blend until you have a sticky dough. It should feel manageable, not too wet or dry. This blend creates the tasty base for your bars. Once mixed, spoon the peanut butter mixture into your prepared baking dish. Press it down firmly with your spatula or hands. Make sure it’s even and compact. This will help hold the bars together later.
Melting the Chocolate
Now, let’s melt the chocolate for the top layer. In a small microwave-safe bowl, combine:
- 1/2 cup dark chocolate chips
- 2 tablespoons coconut oil
Heat the mixture in the microwave in 30-second bursts. Stir after each interval until the chocolate is smooth and glossy. This should take about 1-2 minutes. Once melted, carefully pour the chocolate over the pressed peanut butter layer. Use your spatula to spread the chocolate evenly across the surface.
Let the baking dish chill in the refrigerator for at least 1 hour. This helps the bars set nicely. After an hour, your delicious bars should be firm and ready to cut. Enjoy this simple, tasty treat!
Tips & Tricks
Best Practices for Mixing
When mixing the ingredients, use a sturdy spatula. This helps combine everything well. Start with the peanut butter and honey. Make sure these are smooth before adding the oats and almond flour. Mix until the dough feels sticky but not too wet. You want it to hold together.
Ensuring the Perfect Texture
To get the best texture, press the mixture firmly into the dish. Use your hands or a spatula to spread it evenly. This step is key. A good press helps the bars stay together once set. If they feel too crumbly, add a bit more peanut butter or honey.
Serving Suggestions
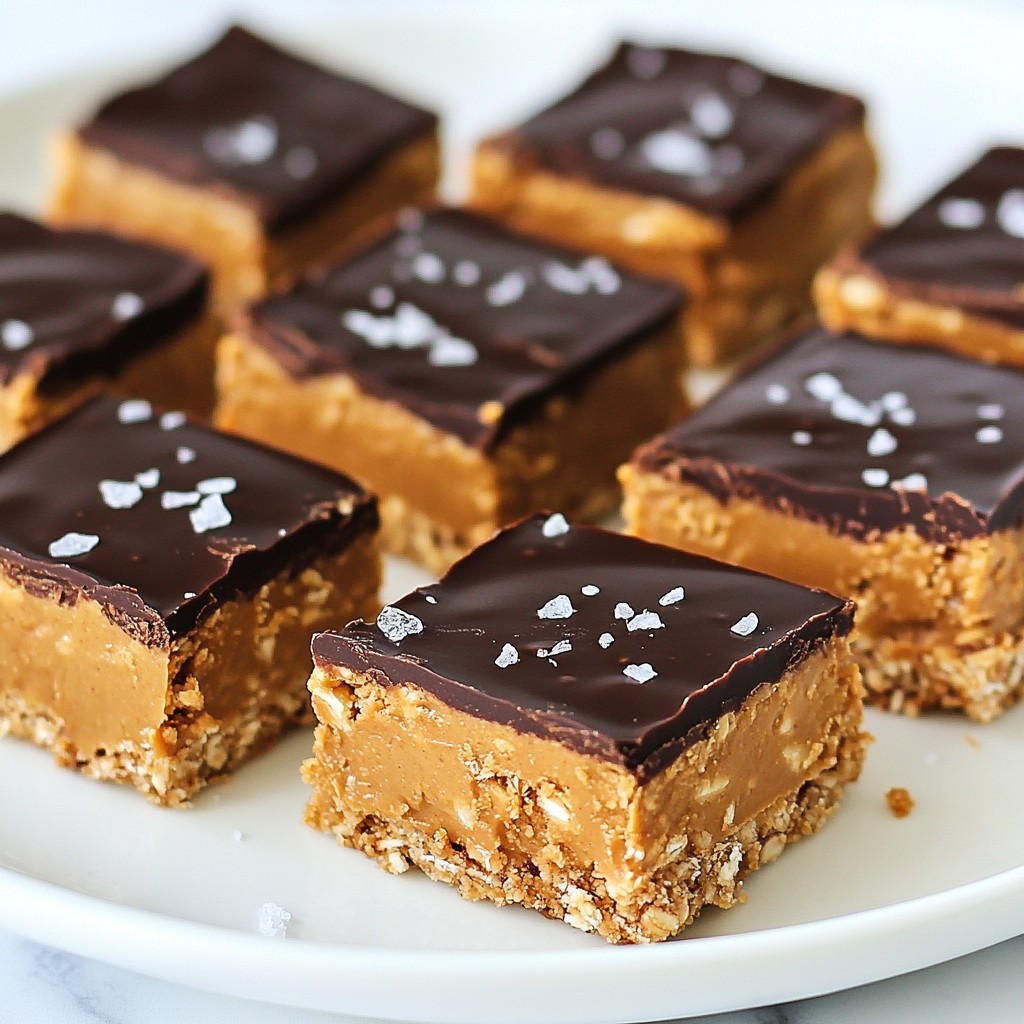
For a lovely display, cut the bars into squares. Place them on a rustic wooden platter. A sprinkle of sea salt on top adds a nice touch. You can drizzle extra melted chocolate over the bars for more flair. Enjoy these treats with friends or family. They will love the rich flavor!
Pro Tips
- Storage Tip: Store these bars in an airtight container in the fridge for up to a week for maximum freshness.
- Texture Tip: For a chewier texture, let the bars sit at room temperature for about 10 minutes before serving.
- Flavor Tip: Experiment with different nut butters, such as almond or cashew, for a unique twist on the classic peanut butter flavor.
- Chocolate Tip: For an extra layer of flavor, consider adding a sprinkle of sea salt on top of the melted chocolate before chilling.
Variations
Adding Different Mix-Ins
You can change up the taste of your no-bake peanut butter bars by adding mix-ins. Some fun options include:
- Chopped nuts (like almonds or walnuts)
- Dried fruit (like raisins or cranberries)
- Seeds (like chia or sunflower seeds)
- Coconut flakes
These add flavor and texture. Just make sure to keep the total amount around 1/2 cup so the bars stay firm.
Making It Dairy-Free
To make your bars dairy-free, skip the chocolate chips, or use dairy-free chocolate. You can find many brands that make great dairy-free chocolate. You can also use coconut oil instead of butter. This keeps the bars creamy and tasty without dairy.
Healthy Swaps for Ingredients
If you want healthier options, swap out a few ingredients. Use natural peanut butter without added sugar. Replace honey with mashed bananas for sweetness. You can also use quick oats instead of rolled oats. This change gives the bars a softer texture. For a boost of protein, add a scoop of protein powder. These swaps make your bars nutritious and still delicious!
Storage Info
How to Store Leftovers
To store leftover peanut butter bars, place them in an airtight container. This keeps them fresh and tasty. Store them in the fridge for the best flavor. You can also layer the bars with parchment paper. This prevents them from sticking together.
Freezing Instructions
You can freeze these bars for a longer shelf life. First, cut them into squares. Wrap each square tightly in plastic wrap. Then, place them in a freezer bag. Make sure to remove all air. These treats can last up to three months in the freezer.
Shelf Life of Peanut Butter Bars
Peanut butter bars last about one week in the fridge. If stored properly, they stay fresh and delicious. If you freeze them, they can last even longer. Just remember to thaw them in the fridge before eating. Enjoy your sweet snack!
FAQs
Can I use natural peanut butter?
Yes, you can use natural peanut butter. It gives a great taste. Just make sure it is creamy. Natural peanut butter may be a bit more oily. Stir it well before using. This ensures the bars hold together.
How long do no-bake peanut butter bars last?
These bars last about one week in the fridge. Be sure to store them in an airtight container. This helps keep them fresh and tasty. If you freeze them, they can last up to three months. Just cut them into squares before freezing for easy snacks.
Can I customize the chocolate layer?
Absolutely! You can use milk chocolate or white chocolate. Add nuts or sprinkles on top for fun. You can even skip the chocolate if you prefer a healthier snack. The bars still taste great without it.
What can I substitute for honey or maple syrup?
If you want to swap honey or maple syrup, use agave nectar or brown rice syrup. Both options work well and add sweetness. You can also try date syrup for a unique flavor. Just keep the same amount for a good balance.
In this post, we explored key ingredients and step-by-step instructions for no-bake peanut butter bars. We shared tips for mixing and achieving the perfect texture. You learned about variations, storage methods, and answered common questions.
Feel confident to customize your bars or store them for later. Enjoy creating these treats, knowing they are flexible and delicious. Happy baking!