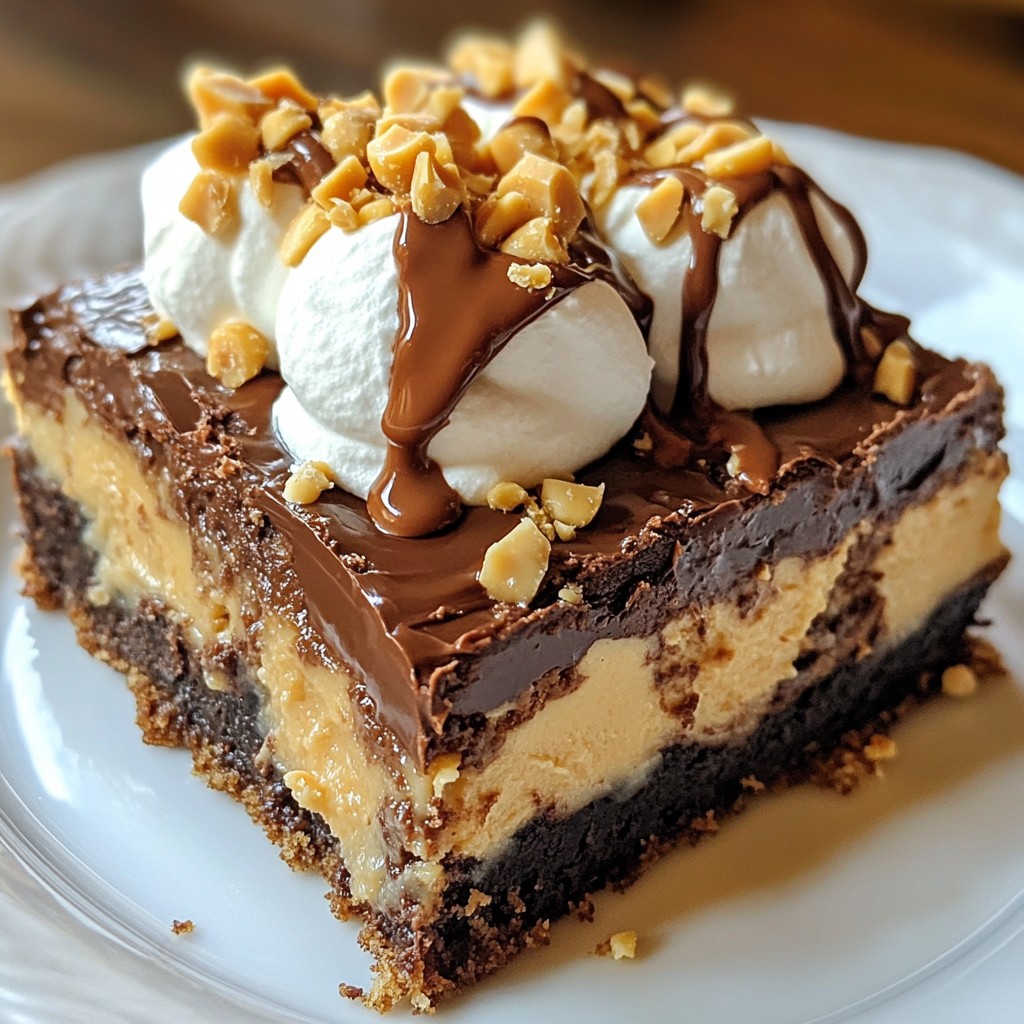
If you love dessert and peanut butter, you’re in for a treat! Today, we’re making a Peanut Butter Cup Dump Cake that’s both delicious and super easy. With just a few simple ingredients and steps, you can create a dessert that will wow your family and friends. Get ready for a sweet and rich experience that combines chocolate and peanut butter in a mouthwatering way. Let’s dive into this tasty recipe!
Why I Love This Recipe
- Easy to Make: This dump cake simplifies the baking process, requiring minimal effort while delivering maximum flavor.
- Decadent Flavor: The combination of rich chocolate and creamy peanut butter creates a deliciously indulgent dessert.
- Customizable: You can easily switch out the nuts or add different toppings to make it your own.
- Perfect for Sharing: This recipe yields plenty of servings, making it ideal for gatherings and celebrations.
Ingredients
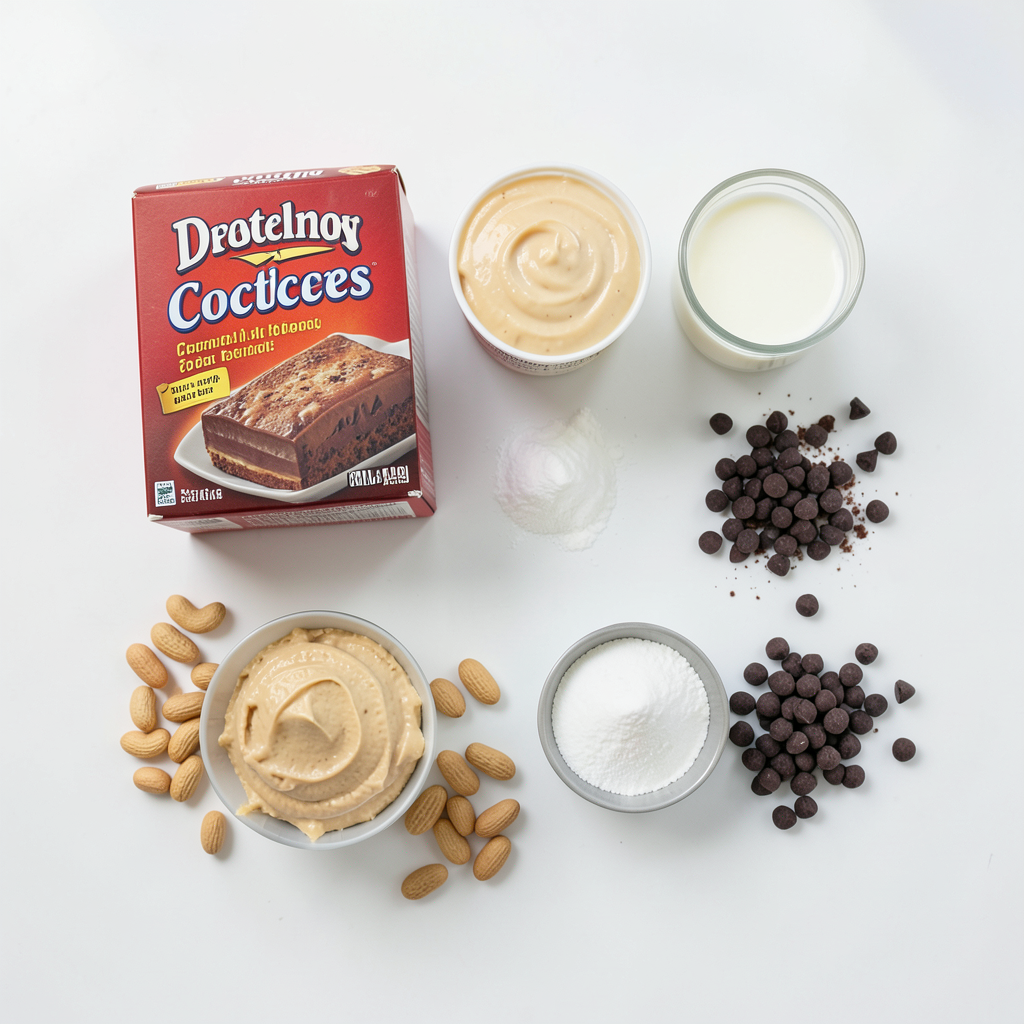
To make the Peanut Butter Cup Dump Cake, you will need a few simple items. Here is the full list of ingredients:
- 1 box (15.25 oz) chocolate cake mix
- 1 cup creamy peanut butter
- 1 cup whole milk
- 1 cup granulated sugar
- 1 cup semi-sweet chocolate chips
- 1/2 cup unsalted butter, melted
- 1 cup crushed peanuts or walnuts
- Optional: whipped cream for serving
Each ingredient plays a key role in this dessert. The chocolate cake mix forms a rich base. Creamy peanut butter adds flavor and texture. Whole milk keeps the cake moist, while granulated sugar sweetens it just right. Semi-sweet chocolate chips create a chocolatey surprise. Unsalted butter helps bind everything together. Crushed peanuts or walnuts add a nice crunch. You can top it with whipped cream for a creamy finish.
Feel free to switch out the nuts based on your taste. This simple list makes a delicious treat that everyone will love!
Step-by-Step Instructions
Prepping the Oven and Baking Dish
First, set the oven to 350°F (175°C). This temperature helps the cake bake evenly. Next, take a 9x13 inch baking dish and grease it well with cooking spray or softened butter. This step keeps the cake from sticking. A well-prepared dish makes serving easy and clean.
Mixing the Dry Ingredients
In a large bowl, mix the chocolate cake mix with the granulated sugar. Use a whisk to blend them well. This mix forms the base layer of the cake, so make sure it is even. A good foundation leads to a better dump cake.
Combining the Wet Ingredients
In a separate bowl, combine the creamy peanut butter, whole milk, and melted unsalted butter. Use a hand mixer or whisk to blend until smooth. This mixture adds creaminess and flavor. It brings a rich taste to the cake that you will love.
Layering the Ingredients in the Baking Dish
Now, pour the dry cake mix and sugar mixture into the baking dish. Spread it out gently to cover the bottom. Next, pour the peanut butter mixture over the cake mix. Do not stir it. This keeps the layers distinct, giving you that delightful dump cake effect.
Baking and Checking for Doneness
Put the baking dish in the oven and bake for 30-35 minutes. Watch for the edges to turn golden brown. They should also pull slightly away from the sides. To check if it's done, insert a toothpick in the center. It should come out clean or with a few moist crumbs. Once baked, let it cool for 10 minutes before slicing. This helps the cake set up nicely for serving.
Tips & Tricks
How to Achieve the Perfect Texture
To get the best texture for your Peanut Butter Cup Dump Cake, avoid overmixing. When you spread the peanut butter mixture over the cake mix, do not stir. This keeps the layers separate and makes it fluffy. Bake it until the edges turn golden brown. A toothpick should come out clean or with a few moist crumbs. This shows your cake is done just right.
Storage Tips for Leftovers
Store any leftovers in an airtight container. Let the cake cool completely before covering it up. Keep it in the fridge for up to four days. If you want to store it longer, freeze it. Cut it into squares, wrap each piece in plastic wrap, and place them in a freezer bag. It can last for up to three months in the freezer.
Presentation Ideas for Serving
Serving is key to enjoying this treat. For a fun touch, drizzle melted peanut butter over warm squares. Add a dollop of whipped cream on top to make it special. Sprinkle extra crushed peanuts for a nice crunch. Arrange the squares on a nice plate to impress your guests. It makes the dessert look as good as it tastes!
Pro Tips
- Choose the Right Peanut Butter: Opt for creamy peanut butter for a smoother texture, but if you enjoy a little crunch, go for a chunky variety to enhance the cake's texture.
- Layering Technique: Ensure you pour the peanut butter mixture over the cake mix without stirring to achieve the signature dump cake effect, which creates a delightful contrast of textures.
- Storage Tips: Store any leftovers in an airtight container at room temperature for up to 3 days, or refrigerate for longer freshness. Reheat in the microwave for a warm treat!
- Serving Suggestions: For a gourmet touch, drizzle with melted chocolate or peanut butter before serving, and don’t forget the whipped cream for added indulgence!
Variations
Alternative Nut Butters
You can swap out creamy peanut butter for other nut butters. Almond butter gives a nutty twist. Cashew butter is smooth and sweet. Sunflower seed butter is great for nut-free options. Each choice adds a new taste and texture.
Different Cake Mix Flavors
While chocolate is classic, you can try other cake mix flavors. Vanilla cake mix pairs well with peanut butter. Red velvet adds a fun color and a hint of chocolate. Spice cake mix brings warmth and a unique flavor. Experiment to find your favorite!
Add-Ins for Extra Flavor and Crunch
Add-ins make this cake even better. Try mini marshmallows for sweetness. You can also use toffee bits for a buttery crunch. Dried fruit like cranberries adds a chewy texture. Feel free to mix and match to create your perfect dump cake!
Storage Info
Best Storage Practices
To keep your Peanut Butter Cup Dump Cake fresh, store it in an airtight container. This will stop the cake from drying out. You can also cover the dish with plastic wrap. Make sure it is sealed well to keep out air.
How Long Does Peanut Butter Cup Dump Cake Last?
If stored properly, your dump cake can last for about 3 to 4 days in the fridge. It tastes best when fresh, but it still stays yummy for a few days. Just remember to check for any signs of spoilage before enjoying.
Freezing Instructions
You can freeze this cake to enjoy later! First, let it cool completely. Then, slice it into squares. Wrap each square in plastic wrap, and place them in a freezer-safe bag. You can keep them in the freezer for up to 3 months. When you want to eat a piece, thaw it in the fridge overnight or heat it in the microwave for a quick treat.
FAQs
Can I make this recipe gluten-free?
Yes, you can make this recipe gluten-free. Just use a gluten-free chocolate cake mix. Many brands offer great options that work well. Check the label to ensure it is certified gluten-free.
How to reheat Peanut Butter Cup Dump Cake?
To reheat, place the cake in the microwave. Heat it on medium for about 20-30 seconds. You can also heat it in the oven at 350°F for about 10 minutes. This warms the cake and keeps it soft.
Can I use natural peanut butter instead of creamy?
You can use natural peanut butter, but it may change the texture. Natural peanut butter can be thicker and less sweet. If you like a crunch, it adds a nice twist. Just stir it well before using to mix the oils.
What’s the difference between a dump cake and a regular cake?
A dump cake is simpler to make. You layer the ingredients without mixing them. This creates unique textures and flavors. Regular cakes require mixing ingredients thoroughly to create a smooth batter. Dump cakes are fun and easy for any baker!
This blog post covered a simple and tasty Peanut Butter Cup Dump Cake. We explored the ingredients needed, like chocolate cake mix and creamy peanut butter. I provided clear instructions for baking, plus tips for perfect texture and storage. You can even swap ingredients for new flavors.
Make this treat your own and enjoy every bite! It’s a fun recipe that brings smiles. Happy baking!