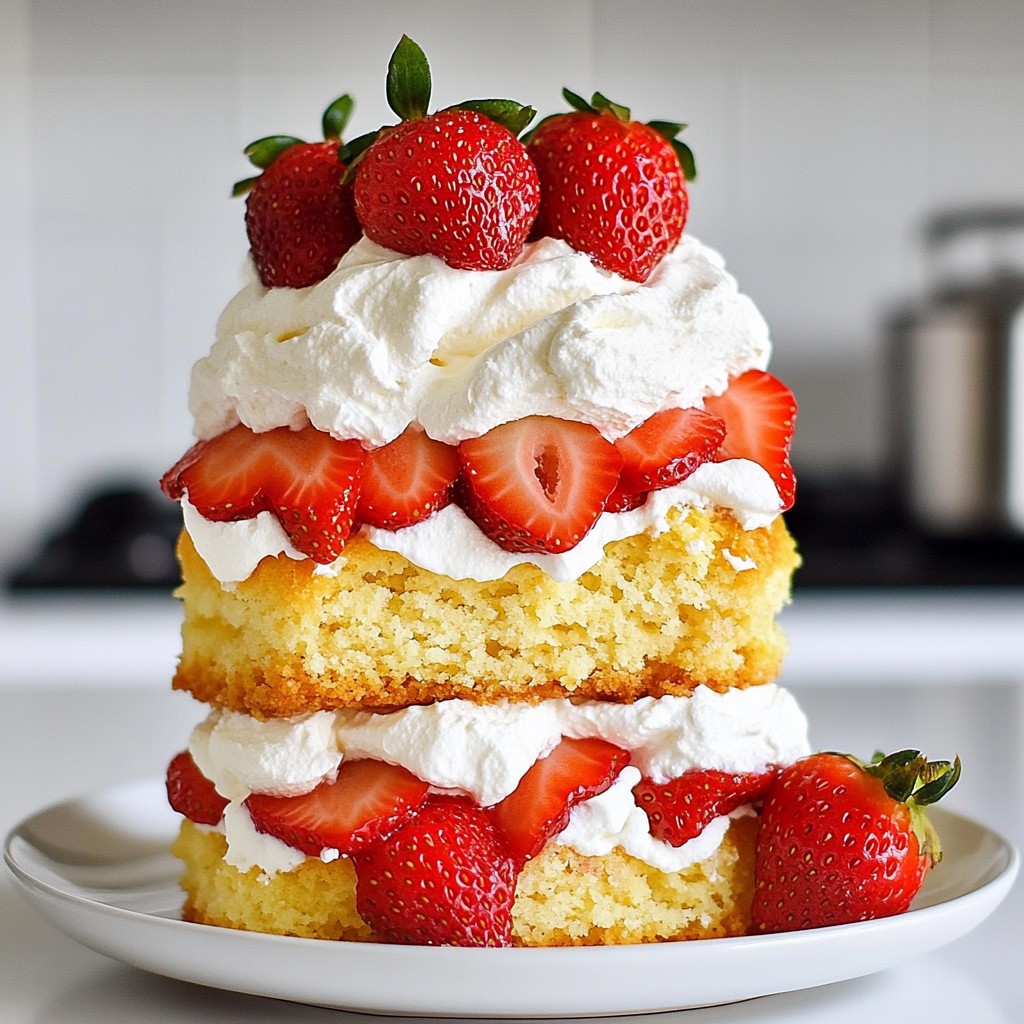
If you're craving a sweet and simple treat, the Strawberry Shortcake Cake is for you! This delicious dessert blends soft cake with fresh strawberries and fluffy whipped cream. In this guide, I’ll share easy steps, helpful tips, and fun variations to make your own masterpiece. Whether you're a baking newbie or a seasoned pro, you'll find everything you need to create a delightful Strawberry Shortcake Cake that everyone will love!
Why I Love This Recipe
- Deliciously Fresh: This cake is packed with fresh strawberries, making every bite a burst of flavor that captures the essence of summer.
- Easy to Assemble: With simple layers of cake, whipped cream, and fruit, it’s a straightforward recipe that anyone can master.
- Stunning Presentation: The layers of vibrant strawberries and fluffy cream create a visually appealing dessert that’s perfect for any occasion.
- Customizable: Feel free to switch up the fruit or add your favorite flavors to make this shortcake your own!
Ingredients
List of Ingredients
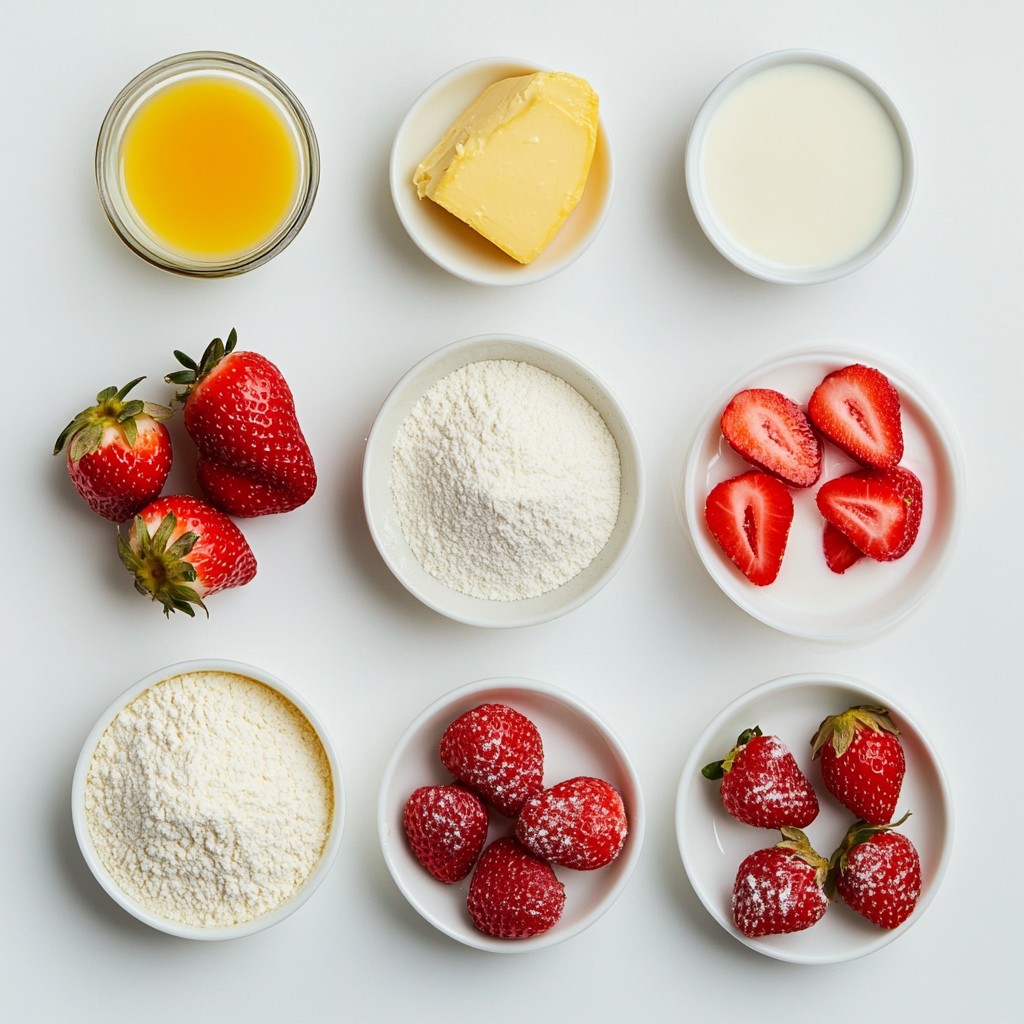
To make the Strawberry Shortcake Cake, you need the following ingredients:
- 2 cups all-purpose flour
- 1 cup granulated sugar
- 1 tablespoon baking powder
- 1/2 teaspoon salt
- 1/2 cup unsalted butter, softened to room temperature
- 1 cup whole milk
- 2 large eggs, at room temperature
- 1 teaspoon pure vanilla extract
- 2 cups fresh strawberries, hulled and sliced
- 1 tablespoon freshly squeezed lemon juice
- 1 1/2 cups heavy whipping cream
- 1/4 cup powdered sugar
- 1 teaspoon pure vanilla extract (for whipped cream)
Fresh Vs. Frozen Strawberries
When it comes to strawberries, fresh is best for this cake. Fresh strawberries taste sweeter and have a better texture. They also hold their shape well when you slice them. Frozen strawberries can work in a pinch, but they may be mushy after thawing. If you use frozen, make sure to drain any excess liquid to avoid a soggy cake.
Substitutions for Allergens
You can make this recipe work for different diets. Here are some easy swaps:
- Gluten-Free: Use gluten-free flour blend instead of all-purpose flour.
- Dairy-Free: Substitute dairy milk with almond or oat milk. Use a dairy-free butter for the cake and whipped cream.
- Egg-Free: Replace eggs with flax eggs or a commercial egg replacer. This will keep your cake moist and fluffy.
These substitutions let everyone enjoy a slice of this delightful cake!
Step-by-Step Instructions
Prepping the Oven and Cake Pans
First, preheat your oven to 350°F (175°C). This step is key for even baking. While the oven warms up, prepare your two 9-inch round cake pans. Grease each pan with butter. Then, lightly dust them with flour. This method helps the cake come out easily without sticking.
Mixing Dry Ingredients
In a large mixing bowl, combine the following dry ingredients:
- 2 cups all-purpose flour
- 1 cup granulated sugar
- 1 tablespoon baking powder
- 1/2 teaspoon salt
Whisk these together until well mixed. This step ensures that the baking powder and salt spread evenly throughout the batter.
Whisking Wet Ingredients
In another bowl, whisk together these wet ingredients:
- 1 cup whole milk
- 2 large eggs
- 1 teaspoon pure vanilla extract
Make sure the eggs are at room temperature. This helps them mix in smoothly. Whisk until the mixture is completely combined and smooth.
Combining Mixtures
Now, gently pour the milk mixture into the bowl with the dry ingredients. Stir using a wooden spoon or spatula until just combined. You should see a few lumps, and that’s perfectly fine. Overmixing can make the cake tough, so be gentle.
Baking Time and Tips
Evenly divide the batter between the two prepared cake pans. Use a spatula to smooth the tops. Place the pans in the preheated oven. Bake for 25-30 minutes. To check if the cakes are done, insert a toothpick into the center of each cake. If it comes out clean, the cakes are ready.
Cooling the Cakes Properly
Once baked, remove the cakes from the oven. Let them cool in the pans for about 10 minutes. Then, carefully turn them out onto wire racks to cool completely. Proper cooling helps the cakes maintain their shape and texture.
Tips & Tricks
How to Achieve the Perfect Whipped Cream
To make great whipped cream, use cold heavy cream. Start with a chilled bowl and beat the cream on medium-high speed. Add powdered sugar and vanilla for flavor. Whip until soft peaks form. Avoid overbeating; this can turn cream into butter.
Ensuring Even Cake Layers
For even cake layers, divide the batter equally between the pans. Use a kitchen scale for accuracy. Smooth the tops with a spatula. This helps the cakes rise evenly in the oven. Check for doneness by inserting a toothpick; it should come out clean.
Enhancing Strawberry Flavor
Macerate your strawberries to boost their taste. Toss sliced strawberries with lemon juice and let them sit. This draws out juices and enhances flavor. You can also mix in a bit of sugar if you like. Fresh strawberries bring a bright, fruity taste to your cake.
Pro Tips
- Use Fresh Strawberries: Always opt for ripe, fresh strawberries for the best flavor. If strawberries are out of season, consider using frozen berries but make sure to thaw and drain them well to avoid excess moisture.
- Don't Overmix the Batter: When combining wet and dry ingredients, mix just until combined. Overmixing can lead to a dense cake rather than a light, fluffy texture.
- Chill the Whipping Cream: For the best results when whipping cream, chill your mixing bowl and beaters in the freezer for about 15 minutes before whipping. This helps the cream whip faster and achieve better volume.
- Make Ahead Tips: You can prepare the cakes a day in advance. Wrap them tightly in plastic wrap and store at room temperature. Assemble the shortcake just before serving to keep the whipped cream fresh.
Variations
Layer Cake Variation
You can make a beautiful layer cake with this recipe. Just bake the cake in two round pans. Stack the layers with whipped cream and strawberries in between. This gives each slice a stunning look. You can add more layers if you want. Just make sure to adjust the amount of whipped cream and strawberries to match.
Sheet Cake Variation
A sheet cake version is fun and easy. Bake the batter in a large rectangular pan. Once cooled, spread whipped cream on top and add sliced strawberries. Cut it into squares for easy serving. This way, you have a great treat for parties or picnics. Everyone can grab a piece easily.
Gluten-Free Options
You can enjoy this cake gluten-free. Use a gluten-free all-purpose flour blend instead of regular flour. Make sure it contains xanthan gum for better texture. The rest of the recipe stays the same. You’ll still get a light and fluffy cake that everyone will love.
Storage Info
How to Store Leftover Cake
To keep your leftover cake fresh, first, let it cool completely. Then, place it in an airtight container. This will keep the moisture in and the cake soft. If you don't have a container, you can wrap the cake tightly with plastic wrap. Store it at room temperature for up to three days.
Freezing the Cake
If you want to save the cake longer, freezing is a great option. First, wrap each layer in plastic wrap. Then, place it in a freezer bag. Be sure to label the bag with the date. You can freeze the cake for up to three months. When you're ready to enjoy it, let it thaw in the fridge overnight.
Best Practices for Reheating
To reheat the cake, preheat your oven to 300°F (150°C). Place the cake on a baking sheet. Cover it loosely with foil to prevent it from drying out. Heat for about 10-15 minutes, or until warm. You can also use the microwave. Heat individual slices for about 15-20 seconds. Enjoy your cake warm with fresh whipped cream!
FAQs
What is the best way to slice a layered cake?
To slice a layered cake, use a sharp knife. Warm the knife under hot water for easy cutting. Wipe the knife clean after each slice. This keeps the layers neat. You can also use a cake server to help lift the pieces.
Can I make this cake ahead of time?
Yes, you can make this cake ahead of time. Bake the layers and cool them completely. Wrap each layer in plastic wrap tightly. Store them in the fridge for up to two days. You can also freeze the layers for up to three months. Just thaw them before assembly.
How do I prevent my cake from getting soggy?
To keep your cake from getting soggy, avoid adding too many fresh fruits too soon. Macerate the strawberries right before serving. You can also layer whipped cream between the cake and fruit. This acts as a barrier against moisture.
What other fruits can I use in a shortcake?
You can use many fruits in a shortcake. Some great options are peaches, blueberries, and raspberries. You can mix different fruits for a unique flavor. Just make sure to macerate them like the strawberries for the best taste.
How long does Strawberry Shortcake Cake last?
Strawberry Shortcake Cake lasts about three days in the fridge. It is best eaten fresh, as the strawberries can make it soggy over time. If you freeze it, it can last up to three months. Just wrap it well before freezing.
This blog post walks you through making a tasty strawberry shortcake. We covered essential ingredients, from fresh strawberries to allergen substitutes. You learned step-by-step baking instructions and storage tips for leftovers. Our tricks help you whip perfect cream and bake even layers.
In closing, enjoy trying different cake variations and flavors. Baking can be fun and rewarding, so dive in!