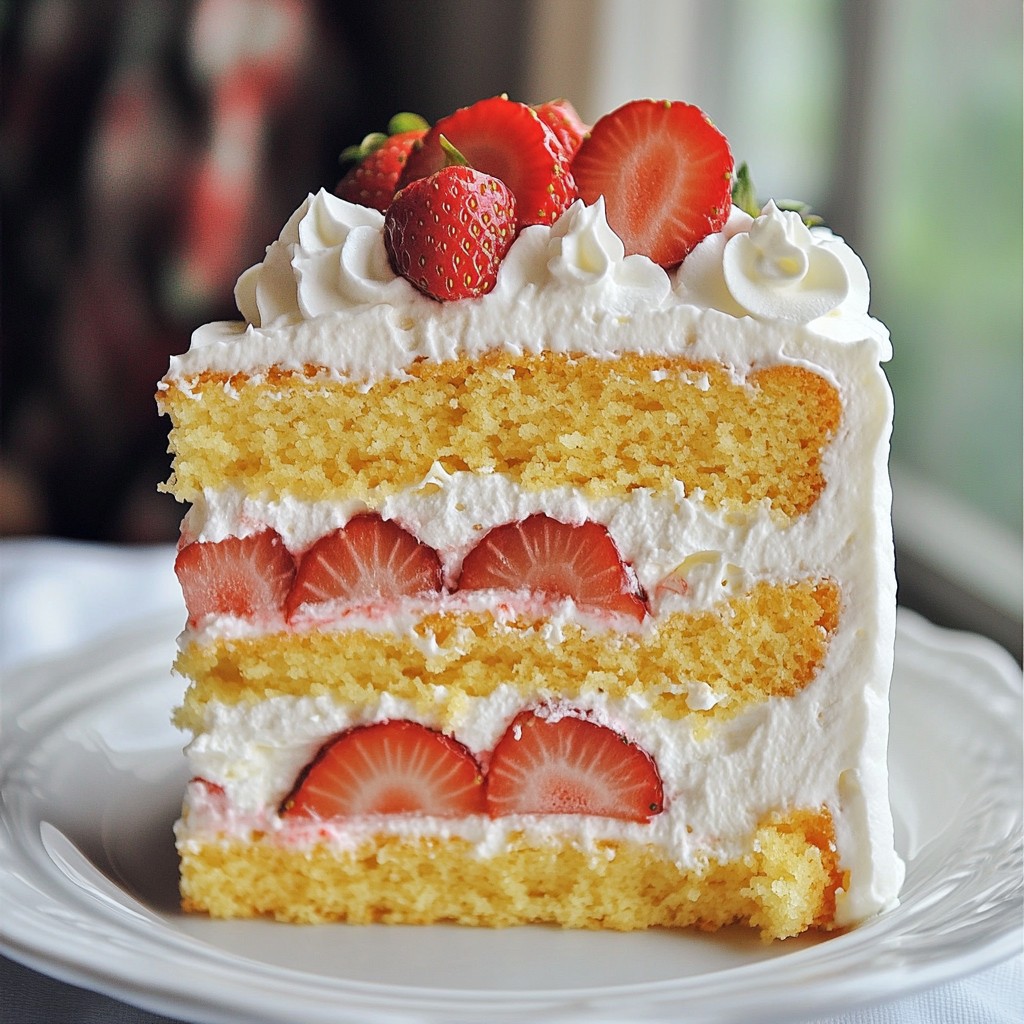
If you crave a dessert that bursts with fresh flavors, look no further! This Strawberry Shortcake Layer Cake is a must-try. With layers of soft cake, sweet strawberries, and fluffy cream, it’s the perfect treat for any occasion. I’ll guide you through each step, from mixing the batter to decorating the final masterpiece. Let’s dive in and create a delightful sweet treat that will impress everyone!
Why I Love This Recipe
- Deliciously Fresh: The combination of fluffy cake and sweet, juicy strawberries creates a delightful flavor explosion in every bite.
- Perfect for Celebrations: This stunning layer cake is not only visually appealing but also makes for an impressive dessert at any gathering or celebration.
- Customizable: Feel free to adjust the sweetness or add other fruits to suit your taste preferences, making this recipe versatile for all occasions.
- Simple Ingredients: With basic pantry staples and fresh strawberries, this recipe is easy to whip up, even for novice bakers.
Ingredients
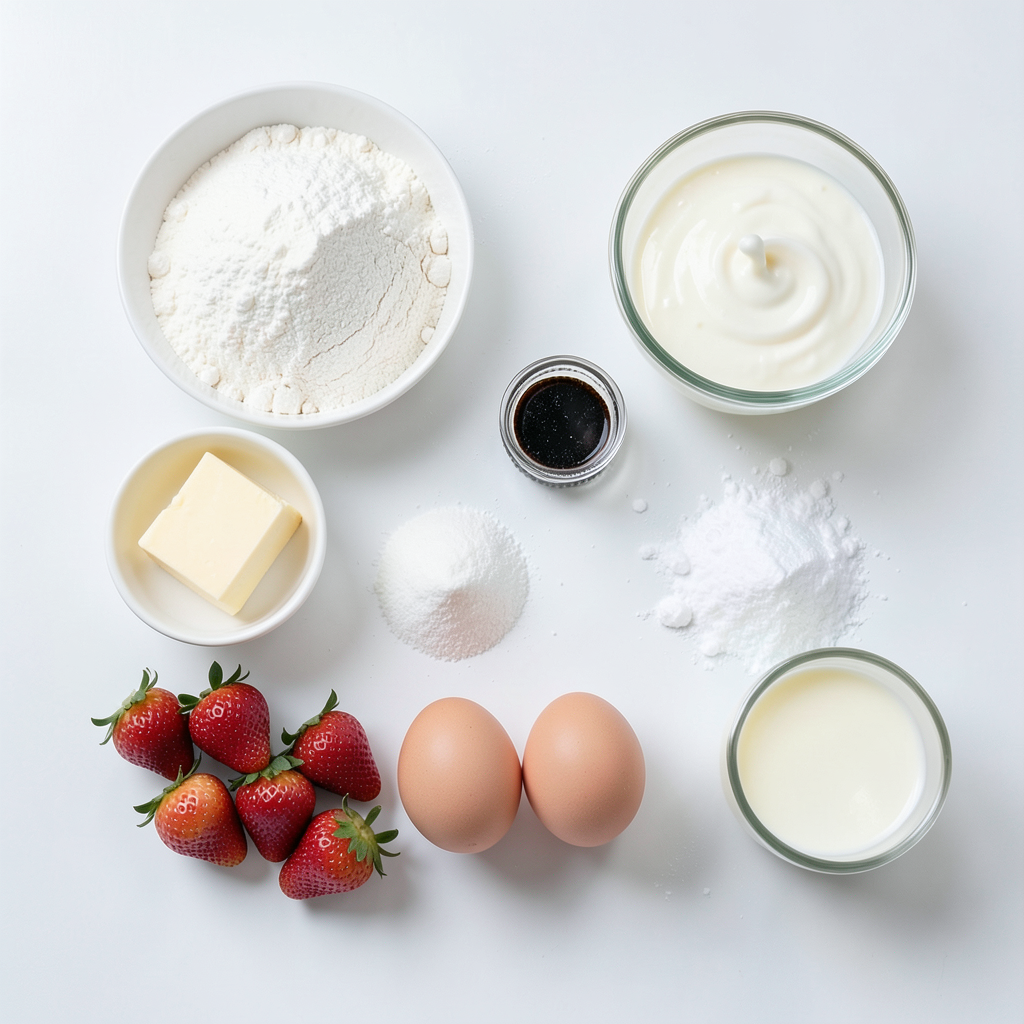
When making a Strawberry Shortcake Layer Cake, having the right ingredients is key. Here’s what you need:
- 2 cups all-purpose flour
- 1 cup granulated sugar
- 1 tablespoon baking powder
- 1/2 teaspoon salt
- 1/2 cup unsalted butter, softened
- 1 cup whole milk
- 2 large eggs
- 1 teaspoon vanilla extract
- 4 cups fresh strawberries, hulled and sliced
- 1/4 cup powdered sugar (for macerating strawberries)
- 2 cups heavy whipping cream
- 1/4 cup powdered sugar (for whipped cream)
- 1 teaspoon vanilla extract (for whipped cream)
These ingredients create a soft, moist cake with a rich flavor. The fresh strawberries add sweetness and a burst of color. The whipped cream provides a light and airy texture that balances the cake.
Make sure your butter is softened to room temperature. This helps it mix well and makes a lighter cake. Using fresh strawberries is a must for the best flavor. The macerating process enhances their taste, making them juicy and sweet.
Gather these items before you start. It makes the cooking process smoother and more fun.
Step-by-Step Instructions
Preheat the Oven
Preheating your oven is key. It helps the cake bake evenly. Set your oven to 350°F (175°C). While it heats, prepare three 9-inch round cake pans. Grease them with butter and dust with flour. This step ensures the cakes come out easily later.
Prepare the Strawberry Filling
Next, let’s prepare the strawberry filling. Take 4 cups of fresh strawberries and hull them. Slice them and place them in a bowl. Add 1/4 cup of powdered sugar. Mix gently to coat the strawberries. Allow them to sit for about 30 minutes. This process is called macerating. It helps the strawberries release their sweet juices.
Make the Cake Batter
Now, we’ll make the cake batter. In a large bowl, whisk together 2 cups of all-purpose flour, 1 cup of granulated sugar, 1 tablespoon of baking powder, and 1/2 teaspoon of salt. In another bowl, mix 1/2 cup of softened unsalted butter, 1 cup of whole milk, 2 large eggs, and 1 teaspoon of vanilla extract. Combine the wet and dry ingredients. Beat the mixture on medium speed for about 2 minutes. This will create a smooth batter.
Bake the Cakes
It's time to bake the cakes. Carefully divide the batter evenly among the prepared pans. Bake for 25-30 minutes. To check if they are done, use a toothpick. Insert it into the center. If it comes out clean, the cakes are ready. Allow them to cool in the pans for 10 minutes. Then, invert them onto wire racks to cool completely.
Whip the Cream
Let’s whip the cream now. In a clean bowl, pour in 2 cups of heavy whipping cream. Add 1/4 cup of powdered sugar and 1 teaspoon of vanilla extract. Beat on medium-high speed for about 3-5 minutes. Look for stiff peaks in the cream. Taste it and adjust sweetness if needed.
Assemble and Frost the Cake
After the cakes cool, it’s time to assemble. Place one cake layer on a serving platter. Spread a generous layer of whipped cream on top. Add a layer of macerated strawberries next. Place the second cake layer on top and repeat the process. Finally, top it with the last cake layer. Use the remaining whipped cream to frost the top and sides of the cake. For decoration, arrange any leftover strawberries on top.
Tips & Tricks
Baking Tips
- To avoid common mistakes, measure flour correctly. Use a spoon to scoop flour into a cup, then level it off.
- Always preheat your oven to 350°F. This helps your cake rise evenly.
- Grease and dust your cake pans well. This makes the cakes easier to remove later.
- Bake until a toothpick comes out clean. This usually takes 25-30 minutes.
Whipping Cream Techniques
- Use cold heavy cream for the best peaks. Chill your bowl and beaters too.
- Beat on medium-high speed. Stop when you see stiff peaks. This takes about 3-5 minutes.
- If you want flavored whipped cream, try adding a splash of almond or coconut extract.
- You can also mix in a bit of cocoa powder for chocolate whipped cream.
Serving Suggestions
- Serve the cake cool, but not too cold. If it’s been in the fridge, let it sit for 10-15 minutes before slicing.
- This cake pairs well with iced tea or sparkling water. You can also serve it with a scoop of vanilla ice cream for extra fun.
Pro Tips
- Use Room Temperature Ingredients: Ensuring your butter, eggs, and milk are at room temperature helps create a smoother batter and leads to a more even bake.
- Don't Overmix the Batter: Mix until just combined to keep your cake light and fluffy. Overmixing can lead to a dense texture.
- Chill Your Whipped Cream: For the best results, chill your mixing bowl and beaters before whipping the cream to achieve a better volume and texture.
- Layer Evenly: When stacking the cake layers, ensure they are level and even to create a beautiful presentation and consistent slices.
Variations
Flavor Alternatives
You can switch up the fruit in this cake. Raspberries work great! They add a nice tartness. You could also use blueberries or peaches. Each fruit brings its own flavor. Want a zesty twist? Add citrus! Lemon or orange zest in the whipped cream brightens the cake. It gives a fresh taste.
Gluten-Free Options
If you need a gluten-free cake, use a gluten-free flour blend. These blends work well in many recipes. Make sure to check the brand's instructions for best results. You might also want to add a bit of xanthan gum. This helps with texture and gives the cake a nice rise.
Vegan Adaptations
For a vegan version, swap eggs for flaxseed meal. Mix 1 tablespoon of flaxseed with 2.5 tablespoons of water. Let it sit to thicken. For milk, use almond or oat milk. Instead of butter, try coconut oil or vegan butter. For whipped cream, look for coconut cream as a perfect dairy-free choice. You can still enjoy a delicious strawberry shortcake!
Storage Info
How to Store Leftovers
To keep your cake fresh, store it in the fridge. Use an airtight container to protect it. This way, the cake stays moist and tasty. You can also cover it tightly with plastic wrap. Make sure no air can get in.
Freezing Instructions
If you want to save some cake for later, freezing is a great option. First, slice the cake into pieces. Wrap each piece in plastic wrap. Then, place the wrapped slices in a freezer bag. This helps keep the cake from getting freezer burn. When you are ready to eat, thaw the cake in the fridge overnight.
Best Practices for Freshness
For the best taste, eat the cake within three days if stored in the fridge. If frozen, it’s best to eat it within three months. The longer it sits, the more it may lose its flavor and texture. Enjoy your cake while it’s still at its best!
FAQs
How can I make a lighter version of the cake?
To make a lighter version of this cake, reduce the sugar and butter. Use half the sugar, or try a sugar substitute. You can also replace some butter with applesauce. This change keeps flavor but cuts calories.
Can I make this cake in advance?
Yes, you can prepare this cake ahead of time. Bake the layers and cool them. Wrap the layers in plastic wrap and store them in the fridge for up to three days. You can also prepare the whipped cream a day early. Just keep it in the fridge until you are ready to assemble.
What’s the best way to decorate the cake?
For decoration, keep it simple and fresh. Use whipped cream to frost the top and sides. Add fresh strawberries on top for a pop of color. You can also sprinkle some mint leaves for a nice touch.
How do I know when the cake is done baking?
To check if the cake is done, insert a toothpick in the center. If it comes out clean, the cake is ready. Look for a light golden color on the surface. The cake should also spring back when lightly pressed.
Can I use frozen strawberries instead of fresh?
You can use frozen strawberries, but the flavor and texture may change. They might be softer and watery when thawed. Fresh strawberries have a firmer texture and a brighter taste. If using frozen, make sure to drain excess juice before adding them to the cake.
This blog post covered making a delicious strawberry cake. We discussed the key ingredients, from flour to fresh strawberries. I explained the step-by-step process, from baking to whipping cream. Remember the tips for even layers and perfect peaks. You can try swaps for gluten-free or vegan options too. Always store leftovers properly to keep them fresh. With these insights, you can make a cake that impresses everyone. Enjoy baking and tasting your creation!