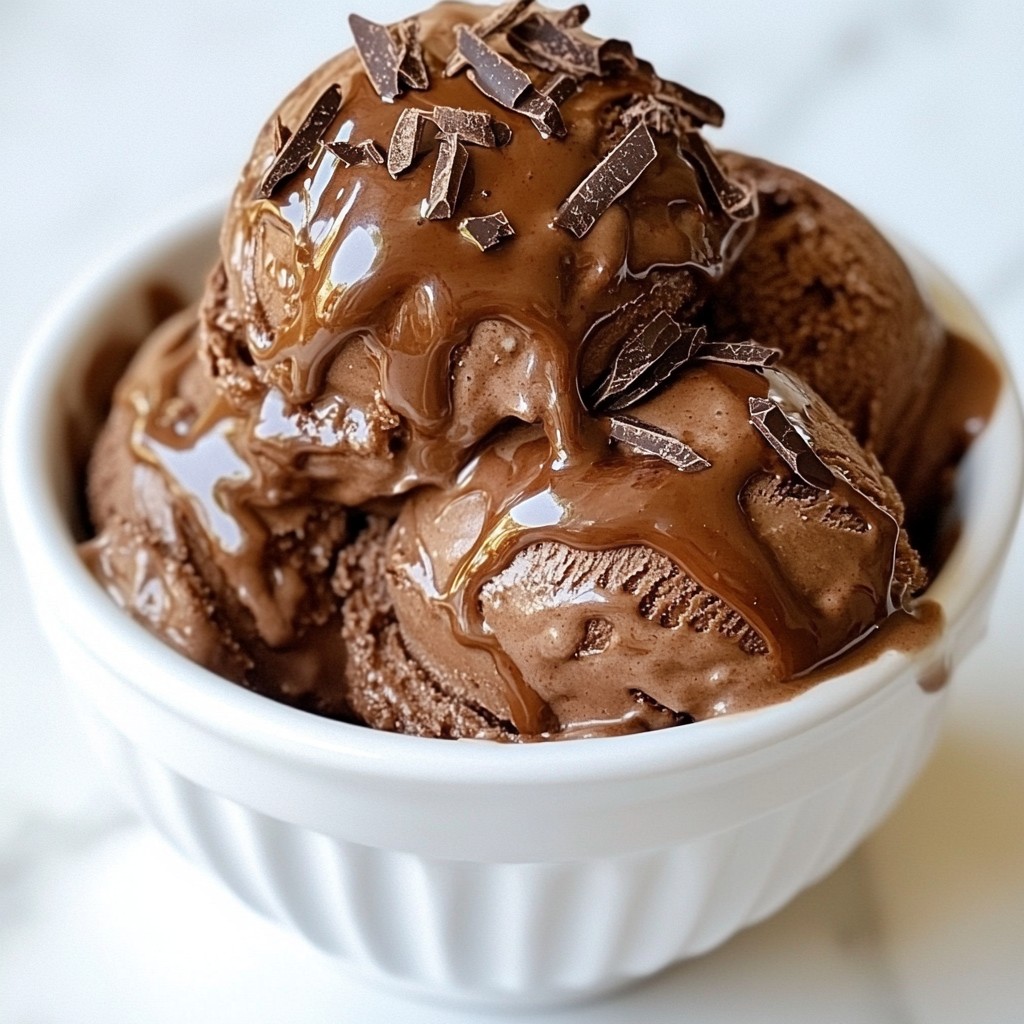
Craving a dessert that’s rich and smooth? You’re in the right place! This Ultra Creamy Chocolate Ice Cream is your perfect sweet treat. With just seven ingredients, I’ll guide you through making this delightful dessert that’s sure to impress. From easy mixing to freezing tips, I’ve got all the details you need. Get ready to indulge in chocolate goodness with every scoop!
Why I Love This Recipe
- Decadent Flavor: This ice cream is rich and creamy, delivering a chocolate experience that feels indulgent with every scoop.
- Customizable: You can easily adjust the sweetness or add mix-ins like nuts or extra chocolate chips for a personalized treat.
- Simple Ingredients: Made with just a few pantry staples, this recipe is accessible and straightforward, perfect for any home cook.
- Perfect for Any Occasion: Whether it's a hot summer day or a cozy winter evening, this ultra creamy chocolate ice cream is a delightful dessert option year-round.
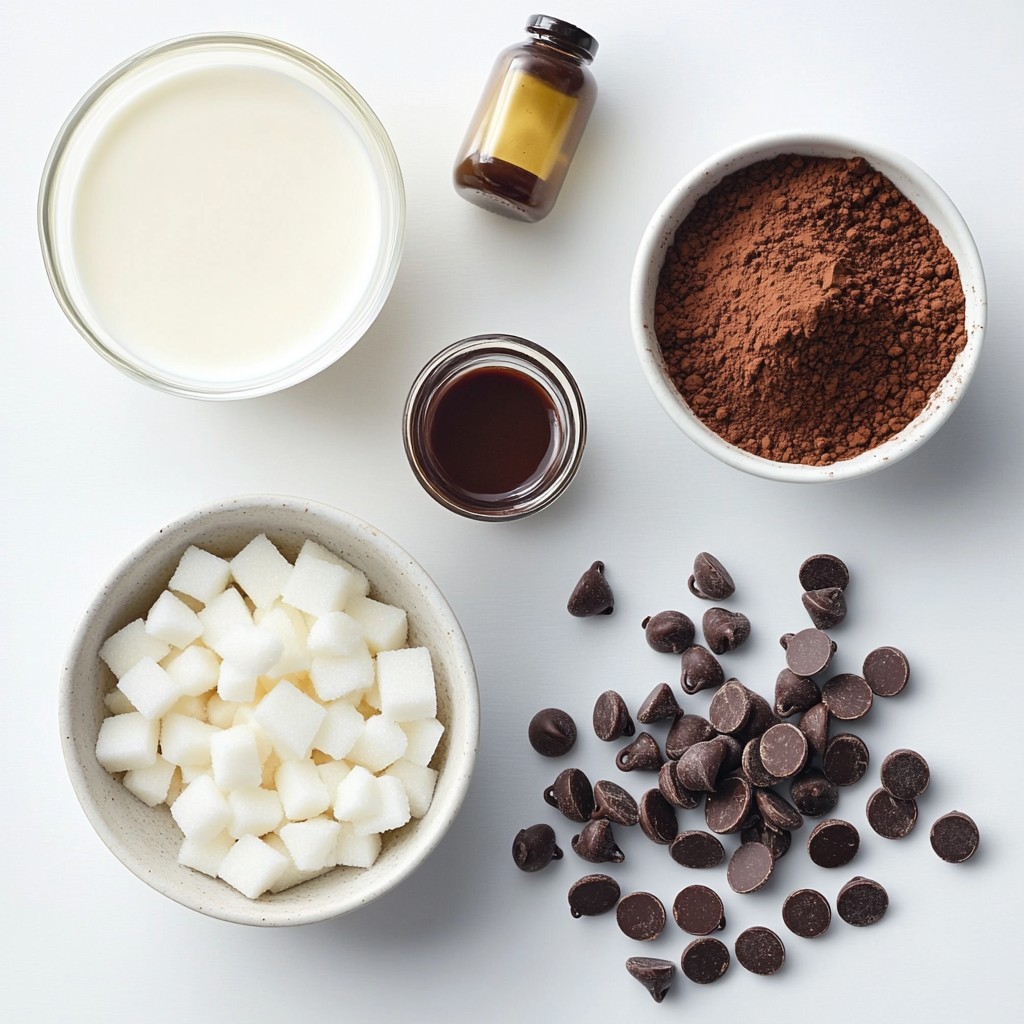
Ingredients
To make ultra creamy chocolate ice cream, you need simple ingredients. Here’s what you will need:
- 1 cup whole milk
- 2 cups heavy cream
- 3/4 cup granulated sugar
- 2/3 cup unsweetened cocoa powder
- 1 teaspoon pure vanilla extract
- 1/2 teaspoon salt
- 1 cup semi-sweet chocolate chips (optional for a richer flavor)
- 1/2 cup chocolate syrup (for swirls, optional)
Each ingredient plays a key role in creating that rich, creamy texture. The whole milk adds a lightness, while the heavy cream gives it a smooth mouthfeel. Granulated sugar sweetens the mixture, and cocoa powder brings deep chocolate flavor. The vanilla extract adds a touch of warmth, and salt enhances all these flavors.
If you choose to use semi-sweet chocolate chips, they melt into the mix and create even more chocolatey goodness. The chocolate syrup can add a fun swirl and extra sweetness. All these elements come together for a delightful dessert that you will love.
Step-by-Step Instructions
Preparing the Chocolate Base
- Whisking the Ingredients: Start by pouring 1 cup of whole milk into a medium saucepan. Add 3/4 cup of granulated sugar, 2/3 cup of unsweetened cocoa powder, and 1/2 teaspoon of salt. Whisk this mixture over medium heat. Stir until warm and all the sugar and cocoa are dissolved, but do not boil.
- Removing from Heat: Once the mixture is warm, take the saucepan off the heat. This step is essential to keep the chocolate smooth.
- Adding Heavy Cream and Vanilla: Next, stir in 2 cups of heavy cream and 1 teaspoon of pure vanilla extract. Mix until everything is well blended and creamy. If you want a richer flavor, add 1 cup of semi-sweet chocolate chips now. Stir until they melt completely. This creates a luscious chocolate base.
Cooling and Churning
- Cooling the Mixture: Allow your chocolate mixture to cool at room temperature. Cover the saucepan and place it in the fridge for at least 2 hours. This chilling step is important for a smooth ice cream texture.
- Using the Ice Cream Maker: Once chilled, pour the mixture into your ice cream maker. Follow the maker's instructions and churn until it thickens, about 20 to 25 minutes.
Final Steps
- Adding Chocolate Swirls: For a fun twist, drizzle in 1/2 cup of chocolate syrup during the last few minutes of churning. Stir gently to create a beautiful marbled effect.
- Transferring to the Container: Use a spatula to transfer your freshly made ice cream to an airtight container. Smooth the top and freeze it for at least 4 hours. This helps the ice cream set firm. When ready to serve, let it sit out for a few minutes to soften. Enjoy your ultra creamy chocolate ice cream!
Tips & Tricks
Achieving the Creamiest Texture
Importance of Chilling Chilling your chocolate mixture is key. It helps the ice cream become smooth and creamy. After mixing your ingredients, let them cool at room temperature. Then, cover and place them in the fridge for at least two hours. This step makes a big difference in texture.
Best Practices for Mixing Mix your ingredients well to avoid lumps. Use a whisk to blend the milk, sugar, cocoa, and salt over medium heat. Make sure everything dissolves completely. When you add the heavy cream and vanilla, stir gently yet thoroughly. If you add chocolate chips, stir until they melt fully for a rich base.
Serving Suggestions
Ideal Presentation Techniques Serve the ice cream in elegant bowls. This makes it look special. You can drizzle extra chocolate syrup on top for a sweet touch. A smooth scoop with a lovely swirl looks great.
Optional Garnishes Add chocolate shavings or crushed nuts to your ice cream. These toppings add flavor and texture. They also make the dessert visually appealing. You can even sprinkle a pinch of sea salt for an extra kick!
Pro Tips
- Chill Your Base: Make sure to chill the chocolate mixture thoroughly before churning. This helps achieve a creamier texture in the final ice cream.
- Use Quality Chocolate: Opt for high-quality cocoa powder and chocolate chips to enhance the flavor of your ice cream.
- Don’t Skip the Salt: A pinch of salt balances the sweetness and intensifies the chocolate flavor, making your ice cream even more delicious.
- Experiment with Add-ins: Feel free to mix in your favorite nuts, fruits, or candies during the last few minutes of churning for added texture and flavor.
Variations
Flavor Additions
You can make your ice cream even better with some fun flavors.
- Using Different Chocolates: Swap semi-sweet chocolate chips for dark or milk chocolate. Dark chocolate gives a rich taste, while milk chocolate adds sweetness. Each choice creates a different vibe for your ice cream.
- Adding Extracts or Spices: Try adding extracts like almond or mint for a twist. A pinch of cinnamon or a dash of espresso powder can enhance the chocolate flavor. These little changes can take your ice cream to the next level.
Swirl Options
Swirls can add exciting textures and flavors to your ice cream.
- Nut Butters: Swirl in peanut or almond butter for a nutty kick. These add creaminess and a rich flavor that pairs well with chocolate.
- Fruit Purees: Use fruit purees like raspberry or strawberry for a fruity contrast. The tartness of the fruit balances the sweetness of the chocolate. This makes each bite a surprise and adds color to your dessert.
Storage Info
Freezing Techniques
To keep your ultra creamy chocolate ice cream fresh, use an airtight container. Here are some tips:
- Choose the right container: A hard-sided container works best. It protects against ice crystals.
- Leave space: Don’t fill the container all the way to the top. Leave some room for expansion.
- Seal tightly: Make sure the lid fits snugly. This helps keep air out.
For maximum freshness, store your ice cream at the back of the freezer. This area stays colder and more stable.
Reusing Leftovers
If you have leftover ice cream, you can use it in many fun ways:
- Mix into milkshakes: Blend leftover ice cream with milk for a thick shake.
- Top desserts: Use it on brownies or pie for a sweet touch.
- Create sundaes: Layer it with nuts, whipped cream, and fruit.
When it’s time to serve, thaw the ice cream slightly. Here are some tips for thawing:
- Let it sit: Take it out of the freezer 5-10 minutes before serving.
- Cut into chunks: If it’s too hard, cut it into chunks to speed up softening.
- Stir gently: If needed, stir it lightly to achieve a smooth consistency.
FAQs
How long does homemade chocolate ice cream last in the freezer?
Homemade chocolate ice cream can last up to two weeks in the freezer. For best storage, use an airtight container. This keeps the ice cream fresh and prevents ice crystals. Place a piece of parchment paper on top before sealing. This helps maintain texture and flavor.
Can I make this ice cream without an ice cream maker?
Yes, you can make this ice cream without an ice cream maker. One method is to pour the mixture into a shallow dish. Place it in the freezer, and stir it every 30 minutes. This breaks up ice crystals and helps create creaminess. Repeat this for about 3 to 4 hours until it’s set.
What can I use instead of heavy cream?
If you want a dairy-free option, use coconut cream. It gives a rich flavor and creamy texture. You can also try silken tofu blended with a bit of almond milk. This will keep your ice cream smooth and tasty, while also being lower in fat.
This blog post covered how to make delicious chocolate ice cream from scratch. You learned about the key ingredients needed and the easy, step-by-step process. I shared tips to get a creamy texture and some fun variations to try. Remember, storage is key for freshness. With these simple ideas, you can whip up a treat that beats store-bought. Enjoy making this chocolate goodness, and don't hesitate to share your own twists!